Data Intelligence Introduction
Gathering insights from large datasets to drive key business decisions could be a very challenging task.
Design Data Intelligence applications in Gathr to simplify data exploration and enhance decision-making through a user-friendly interface.
Ask questions in plain English about your data and receive precise answers, making data exploration intuitive and accessible.
Type of Insights you get in Data Intelligence
Descriptive: Textual answers for your business queries, making it easier to comprehend the data insights.
Graphical: Visual depiction of the descriptive insights. Select the most suitable graphical visualizations to illustrate your data.
SQL Queries: See the SQL generated by LLM model for every question you ask, used to query your datasets.
You can simply ask questions like “How many walk-in customers have converted into sales in the last six months?”. Data Intelligence will interpret the question, fetch data from the relevant tables and answer accordingly.
Navigate to Data Intelligence
Login to your Gathr account.
From the main menu, select Applications > Data Intelligence option within the project where you want to configure or use the application.
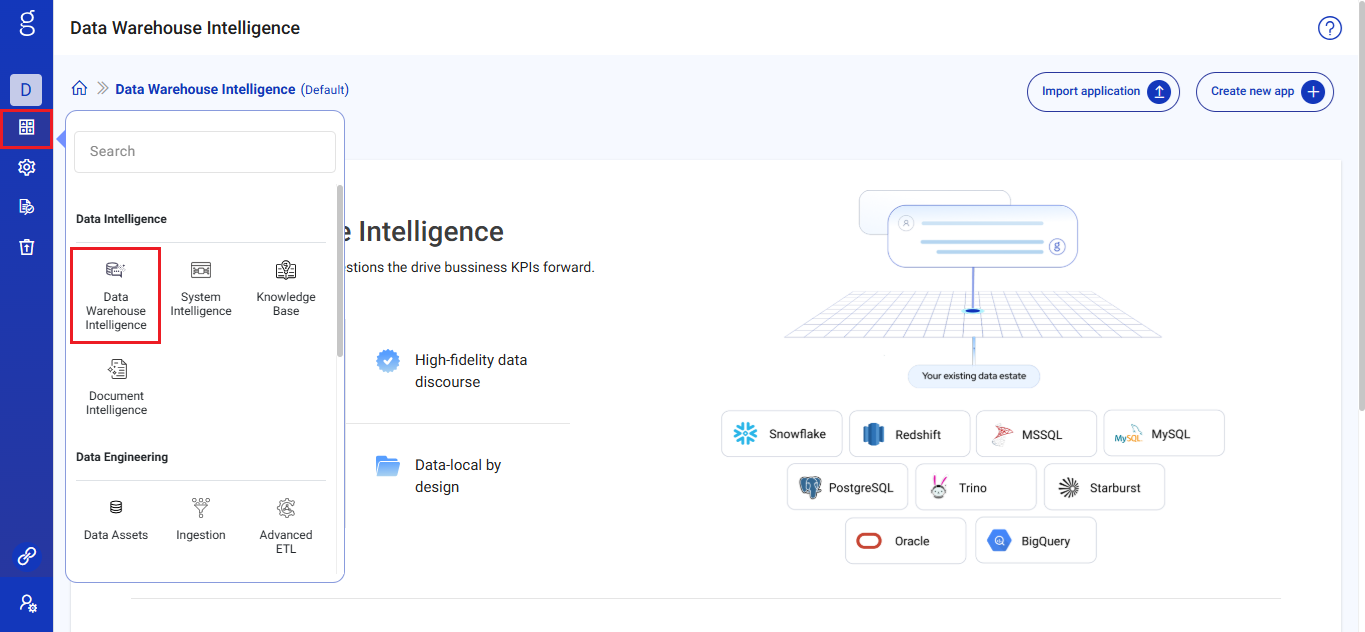
Quick Start: Configure Data Intelligence App
Create Data Intelligence applications tailored to your data analysis needs in few simple steps.
1. Create a New Data Intelligence Application
Click Create Data Intelligence Application and provide the following details:
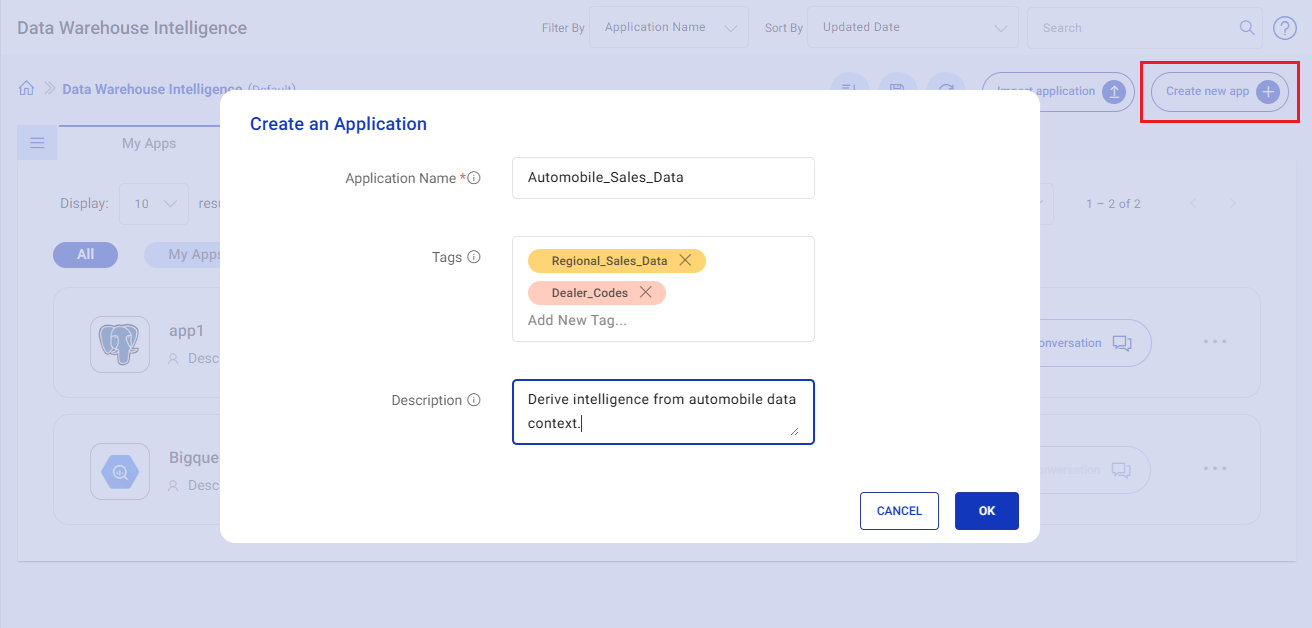
App Name: A unique name for your application.
Tags: Keywords to help categorize your app.
Description: A brief overview of your app.
Click OK to continue configuring the app.
2. Set Up Data Sources
Establish connections to your preferred data source (e.g., Snowflake, PostgreSQL).
Configure AI providers:
LLM: To generate queries based on natural language inputs.
Vector Database: To store and retrieve the vector representation of table(s) metadata.
Embeddings Provider: To generate vector representations of tables metadata.
Options to access Gathr managed AI providers and auto-configure application after setting up data sources. For more details, refer to Data Sources
3. Generate and Manage Data Descriptions
Data Intelligence application fetches tables and columns from the data source and their descriptions if available.
You can also leverage AI Assistance to generate descriptions for tables and columns.
Add simple instructions for efficiently querying tables, which would be helpful in SQL generation during conversations.
For more details, refer to Generate Descriptions for Database Objects
4. Select and Configure Knowledge Sources
Specify Instructions for analytical insights in conversations.
You can specify business rules, Recommendations etc. to customize the behavior of data analysis.
For more details, refer to Instructions
5. Add Hints
- Provide natural language inputs and corresponding queries to guide your LLM model in generating accurate responses.
For more details, refer to Add Hints to Assist Query Building
6. Preferences
- Customize the application settings to enhance user experience, such as enabling query visibility and setting output formats.
For more details, refer to Preferences
Once completed, save the application and start conversation to gain key insights on your data.
Who Can Access Data Intelligence Apps?
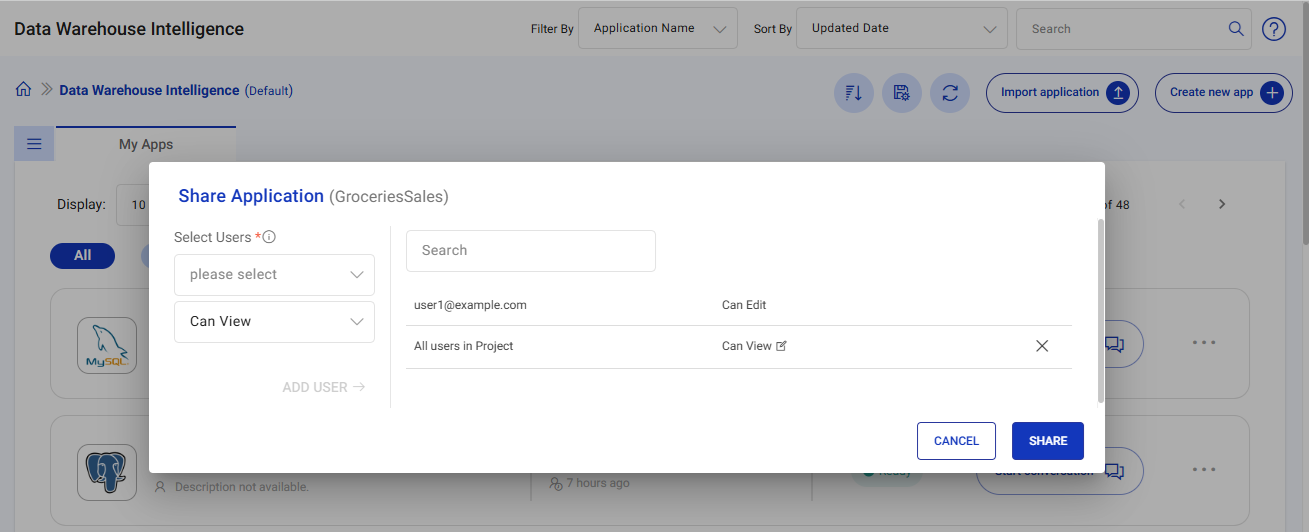
Application Creators: Users who create apps can perform all operations, including editing, deleting, and sharing.
Users with Edit Access: Can edit, delete, and share apps with other project members.
To allow other users to edit the application and not just perform Q&A, the app admin should choose connections with at least a Project scope for the project where the Data Intelligence app will be shared.Users with View-Only Access: Can converse with the application but cannot modify it.
Listing Page Details
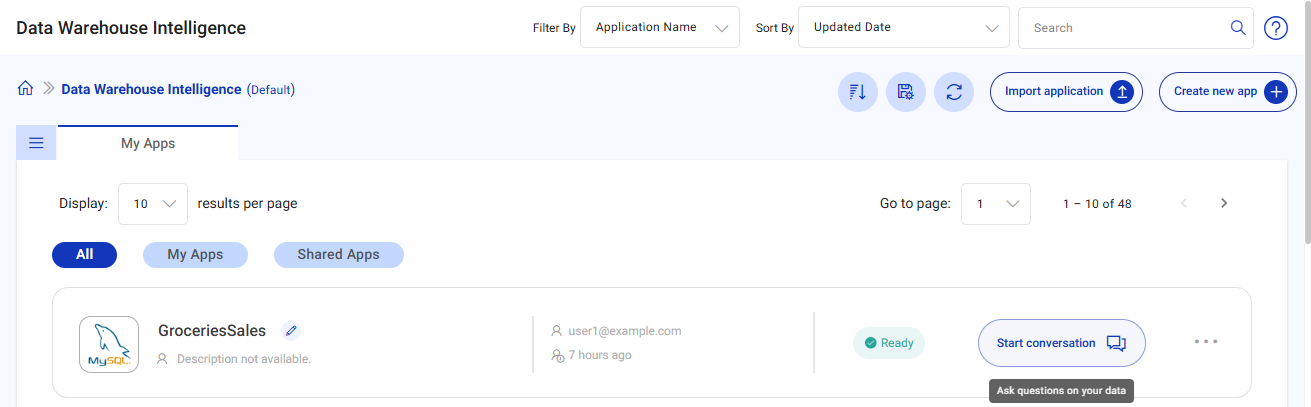
The Data Intelligence listing page provides an overview of all available Data Intelligence applications.
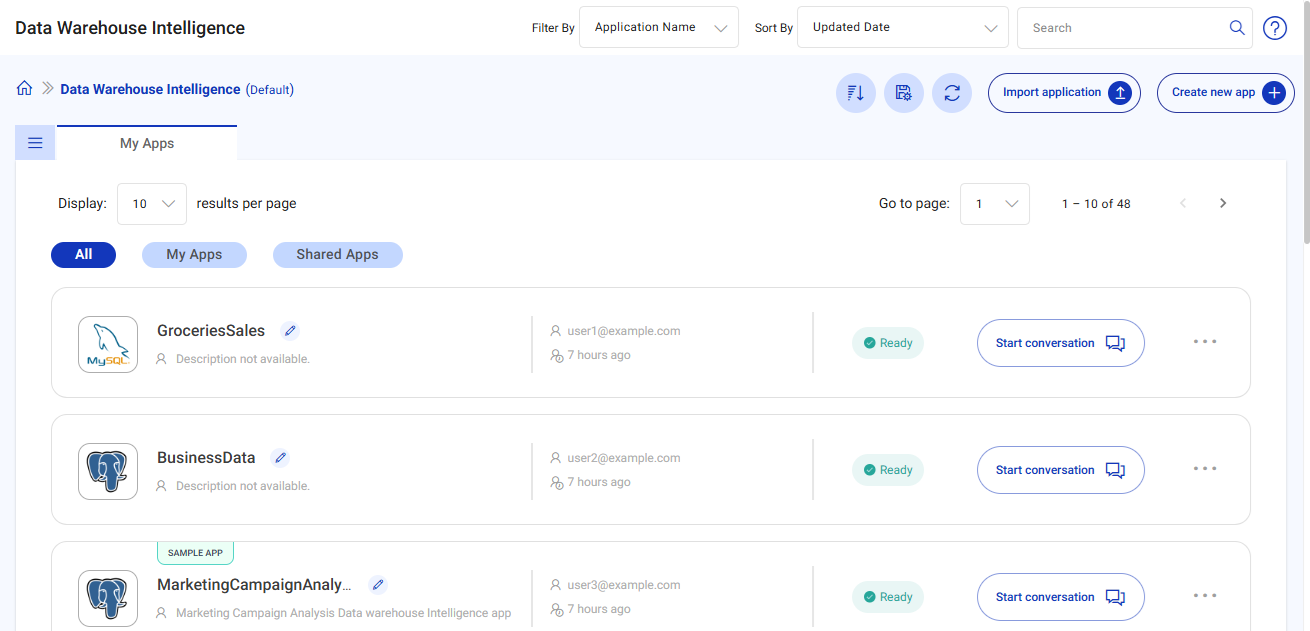
Here are the key details:
Search Applications: Quickly locate an app by name.
Sort By: Organize apps by Name or Last Updated Date.
Save User Preferences: Retain your display preferences for future visits.
Refresh Applications: Update the listing to reflect recent changes.
Create Data Intelligence Application: Start building a new Data Intelligence app.
Results per Page: Choose the number of apps displayed per page.
Go to Page: Navigate to specific pages within the listing.
Tag Filters
All: Shows all Data Intelligence applications.
My Apps: Displays apps created by you.
Shared Apps: Lists apps shared with you.
Application Entry Details
Each listed application displays:
Data Source: Example: PostgreSQL, Snowflake.
Status: Configured, Syncing, or Draft.
Created By & Last Modified Details.
Tags & Descriptions (if added).
Actions:
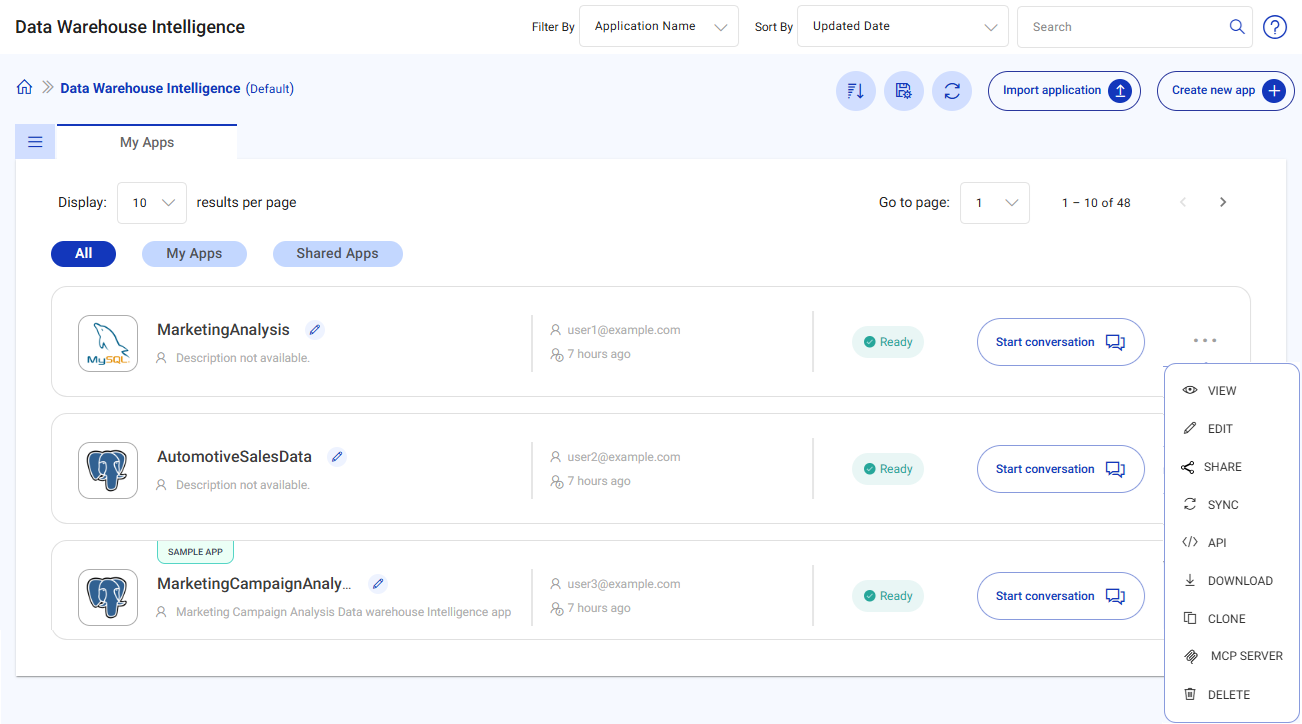
- Ask Questions: Ask questions on your data.
View Application: Open App Details, Monitor start/end date and time, Chat History, and App Access and MCP Server details in a new tab.
Edit App: Make changes to the application.
Share: Share the app with project users and assign view or edit permissions.
Sync: Sync metadata and example updates to the vector database.
API: View sample request and response for supported APIs. For more details, see Data Intelligence APIs.
Download: Download the application configuration as a JSON file.
Clone: Create a copy of the application in a selected project.
Import application: Create an application by importing a previously downloaded JSON file.
MCP Server: Gathr provides the platform to interact with DI application as MCP tools for External AI Assistants through MCP Client.
Delete App: Permanently delete the Data Intelligence application along with its conversation history.
Download, Clone, and Import Applications
Use these options when you want to:
Move an application to another environment (for example, Dev to QA).
Create a copy of an application in a different project.
For connection setup, see Configure Data Intelligence Application →
Download Application
When you download an application, Gathr exports the application configuration as a JSON file.
On the Data Intelligence listing page, locate the application.
Open the actions menu for the application.
Select Download.
Gathr downloads a JSON file that includes application details such as the selected connections used by that application. The downloaded file name includes the application name and a timestamp.
Clone Application
Use Clone to copy an existing application to another project.
On the Data Intelligence listing page, locate the application.
Open the actions menu for the application.
Select Clone.
In the Clone application window:
(Optional) Update the Application Name.
Select the target Project.
Select the Connection Name that is available in the selected project.
Select the AI provider connections (for example, LLM and Vector DB) that are available in the selected project.
Select OK to create the cloned application.
Import Application
Use Import application when you have a JSON file downloaded from another environment and you want to recreate the application without configuring it from scratch.
On the Data Intelligence listing page, select Import application.
Select the JSON file that you downloaded earlier.
You can import only a JSON file in the expected export format.On the import configuration page, review and update the fields:
Application Name: By default, Gathr uses the application name from the downloaded file, without the timestamp.
Connection Name:
If a connection with the same name and connection type exists in the current environment, it is auto-selected.
If the connection does not exist, no connection is selected. Create or select an appropriate connection.
AI Provider connections (LLM and Vector DB): Same behavior as the data source connection.
(Optional) If you do not select connections, you can still continue. Gathr imports the application as a Draft. You can edit the application later and select the correct connections.
If an application with the same name already exists, select whether you want to Overwrite the existing application.
Select OK.
After you select OK, the application starts syncing. If the required details are valid, the sync completes successfully.
If you have any feedback on Gathr documentation, please email us!