Manage Google Cloud Dataproc Clusters
GCP Dataproc services are used to manage Dataproc cluster(s) from the Gathr application.
The Cluster Management page in Gathr supports features where superuser and workspace users can manage Google Dataproc clusters.
You can Create a Cluster→ or Create Cluster Template→.
Create Cluster
From the main menu navigate to the Settings > Advanced > Cluster Management page.
The GCP Cluster will be available under the Cluster Management, once the GCP account is added in the Compute Setup →.
To create a cluster click the Create New Cluster option.

Configuration to Create Cluster
Provide the configuration details to create a cluster as mentioned below.
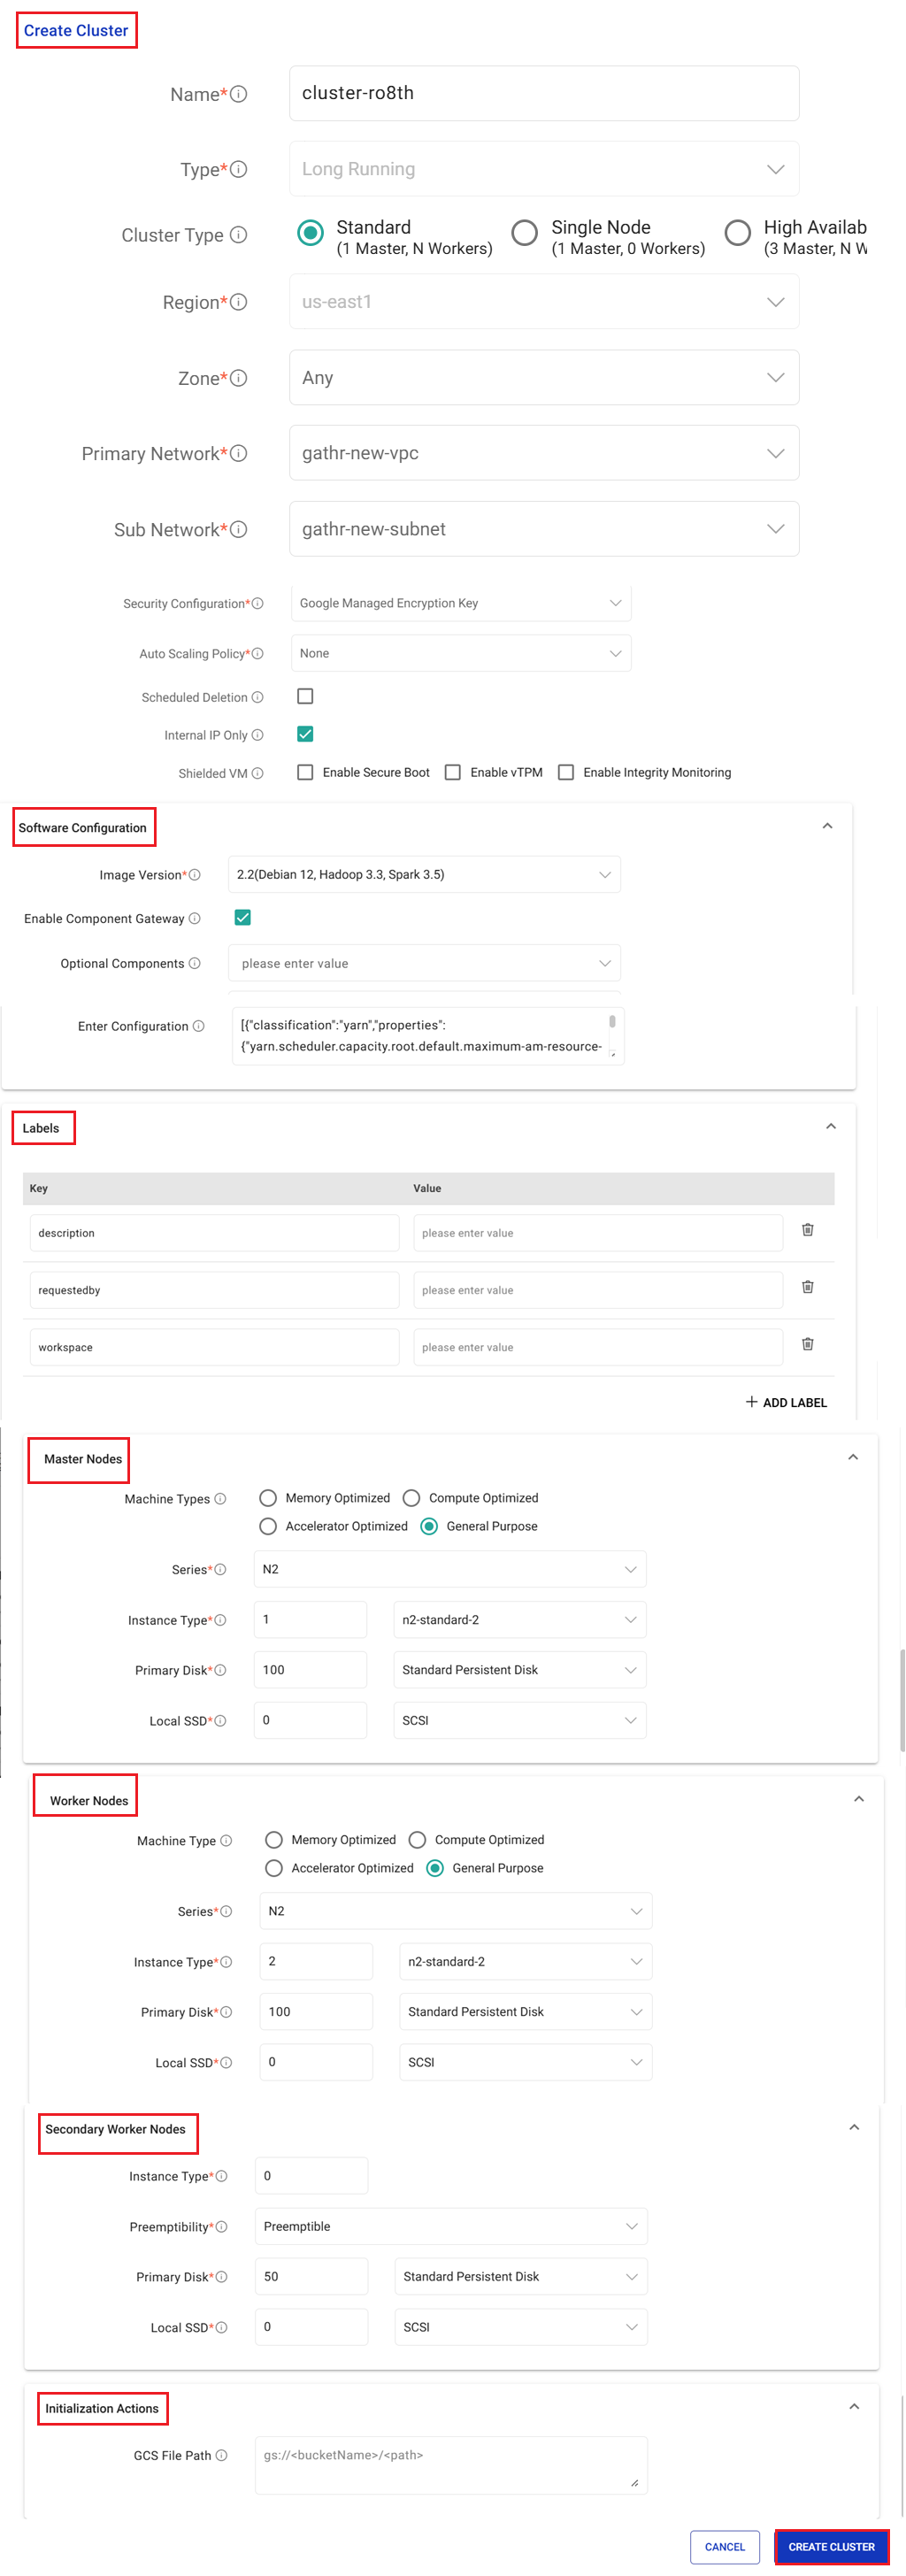
Name
Option to provide a unique name of the cluster.
Type
Option to choose from various cluster types. i.e., Standard (1 Master, N Workers), Single Node Cluster (1 Master, 0 Workers), High Availability (3 Master, N Workers).
Region
Option to select the Cloud Dataproc regional service, determining the zones and resources that are available. Example: us-east3
Zone
Option to select the available computing resources where the data is stored and used from. Example: us-east4-a.
Auto-zoning is used for creating clusters when the ‘Any’ zone option is selected from the drop-down list.
Auto Zone prioritizes creating a cluster in a zone with resource reservations.
If requested cluster resources can be fully satisfied by reserved, and if required, the on-demand resources in a zone, Auto Zone will consume the reserved and on-demand resources, and create the cluster in that zone.
Auto Zone prioritizes zones for selection according to total CPU core (vCPU) reservations in a zone.
Example: A cluster creation request specifies 20 n2-standard-2 and 1 n2-standard-64 (40 + 64 vCPUs requested).
Auto Zone will prioritize the following zones for selection according to the total vCPU reservations available in the zone:
zone-c available reservations: 3 n2-standard-2 and 1 n2-standard-64 (70 vCPUs).
zone-b available reservations: 1 n2-standard-64 (64 vCPUs).
zone-a available reservations: 25 n2-standard-2 (50 vCPUs).
Assuming each of the above zones has additional on-demand vCPU and other resources sufficient to satisfy the cluster request, Auto Zone will select zone-c for cluster creation.
If requested cluster resources cannot be fully satisfied by reserved plus on-demand resources in a zone, Auto Zone will create the cluster in a zone that is most likely to satisfy the request using on-demand resources.
Primary Network
Option to select the default network or any VPC network created in this project for the cluster.
Sub NetWork
Includes the subnetworks available in the Compute Engine region that you have selected for this cluster.
Security Configuration
Provide Security Configuration for the cluster.
Auto Scaling Policy
Option to automate cluster resource management based on the auto scaling policy.
Scheduled Deletion
Option to schedule deletion. You can delete on a fixed time schedule or delete after cluster idle time period without submitted jobs.
Internal IP Only
Configure all instances to have only internal IP addresses.
Shielded VM
Turn on all the settings for the most secure configuration. Available options are: Enable Secure Boot, Enable vTPM, Enable Integrity Monitoring.
Other configuration options available are explained below:
Software Configuration
Image Version
Cloud Dataproc uses versioned images to bundle the operating system, big data components and Google Cloud Platform connectors into one package that is deployed on your cluster.
Enable Component Gateway
Option to provide access to web interfaces of default & selected optional components on the cluster.
Optional Components
Select additional component(s).
Enter Configuration
Option to provide cluster properties. The existing properties can also be modified.
Labels
Add Label
Option to add labels.
Master Nodes
Machine Types
Select GCP machine type from the master node. Available options are: Compute Optimized, Memory Optimized, Accelerator Optimized, General Purpose.
Series
Select series for your Master Node.
Instance Type
The maximum number of nodes are determined by your quota and the number of SSDs attached to each node.
Primary Disk
The primary disk contains the boot volume, system libraries, HDFS NameNode metadata.
Local SSD
Each Solid State Disk provides 375 GB of fast local storage. If one or more SSDs are attached, the HDFS data blocks abd local execution directories are spread across these disks. HDFS does not run on preemptible nodes.
Worker Nodes
Machine Types
Select GCP machine type from the master node. Available options are: Compute Optimized, Memory Optimized, Accelerator Optimized, General Purpose.
Series
Select series for your Worker Node.
Instance Type
The maximum number of nodes are determined by your quota and the number of SSDs attached to each node.
Primary Disk
The primary disk contains the boot volume, system libraries, HDFS NameNode metadata.
Local SSD
Each Solid State Disk provides 375 GB of fast local storage. If one or more SSDs are attached, the HDFS data blocks and local execution directories are spread across these disks. HDFS does not run on preemptible nodes.
Secondary Worker Nodes
Instance Type
The maximum number of nodes are determined by your quota and the number of SSDs attached to each node.
Preemptibility
Spot and preemptible VMs cost less, but can be terminated at any time due to system demands.
Primary Disk
The primary disk contains the boot volume, system libraries, HDFS NameNode metadata.
Local SSD
Each Solid State Disk provides 375 GB of fast local storage. If one or more SSDs are attached, the HDFS data blocks and local execution directories are spread across these disks. HDFS does not run on preemptible nodes.
Initialization Actions
GCS File Path
Provide the GCS file path.
The below fields are stored with their default values in Gathr metastore and will be auto-populated while creating the cluster in Gathr.
- Region
- Primary Network
- Sub Network
- Internal IP Only
- Enter Configuration
- Initialization Actions
- Labels
These values can be updated as per your requirements either from Gathr UI manually or by update query as mentioned below.
You can modify the below query as per your requirement to update default fields:
UPDATE gcp_cluster_default_config set default_config_json = '{"internalIpOnly":"","subnetworkUri":"","region":"","executableFile":"","properties":[{"classification":"yarn","properties":{"yarn.scheduler.capacity.root.default.maximum-am-resource-percent":"0.50","yarn.log-aggregation.enabled":"true"}},{"classification":"dataproc","properties":{"dataproc.scheduler.max-concurrent-jobs":"5","dataproc.logging.stackdriver.enable":"true","dataproc.logging.stackdriver.job.driver.enable":"true","dataproc.logging.stackdriver.job.yarn.container.enable":"true","dataproc.conscrypt.provider.enable":"false"}},{"classification":"spark","properties":{"spark.yarn.preserve.staging.files":"false","spark.eventLog.enabled":"false"}}],"networkUri":"","labels":{}}'
Upon clicking SAVE button the cluster will be saved on database but it will not be launched.
You can click SAVE AND CREATE button to save the cluster on database and create the cluster on dataproc.
Create Cluster Template
Option to save the cluster configuration details as a template is available in Gathr. This feature allow users to save configurations by creating a template and use the template to create cluster(s).
Click Create Cluster Template option and provide the details by clicking Configuration to Create Cluster→.
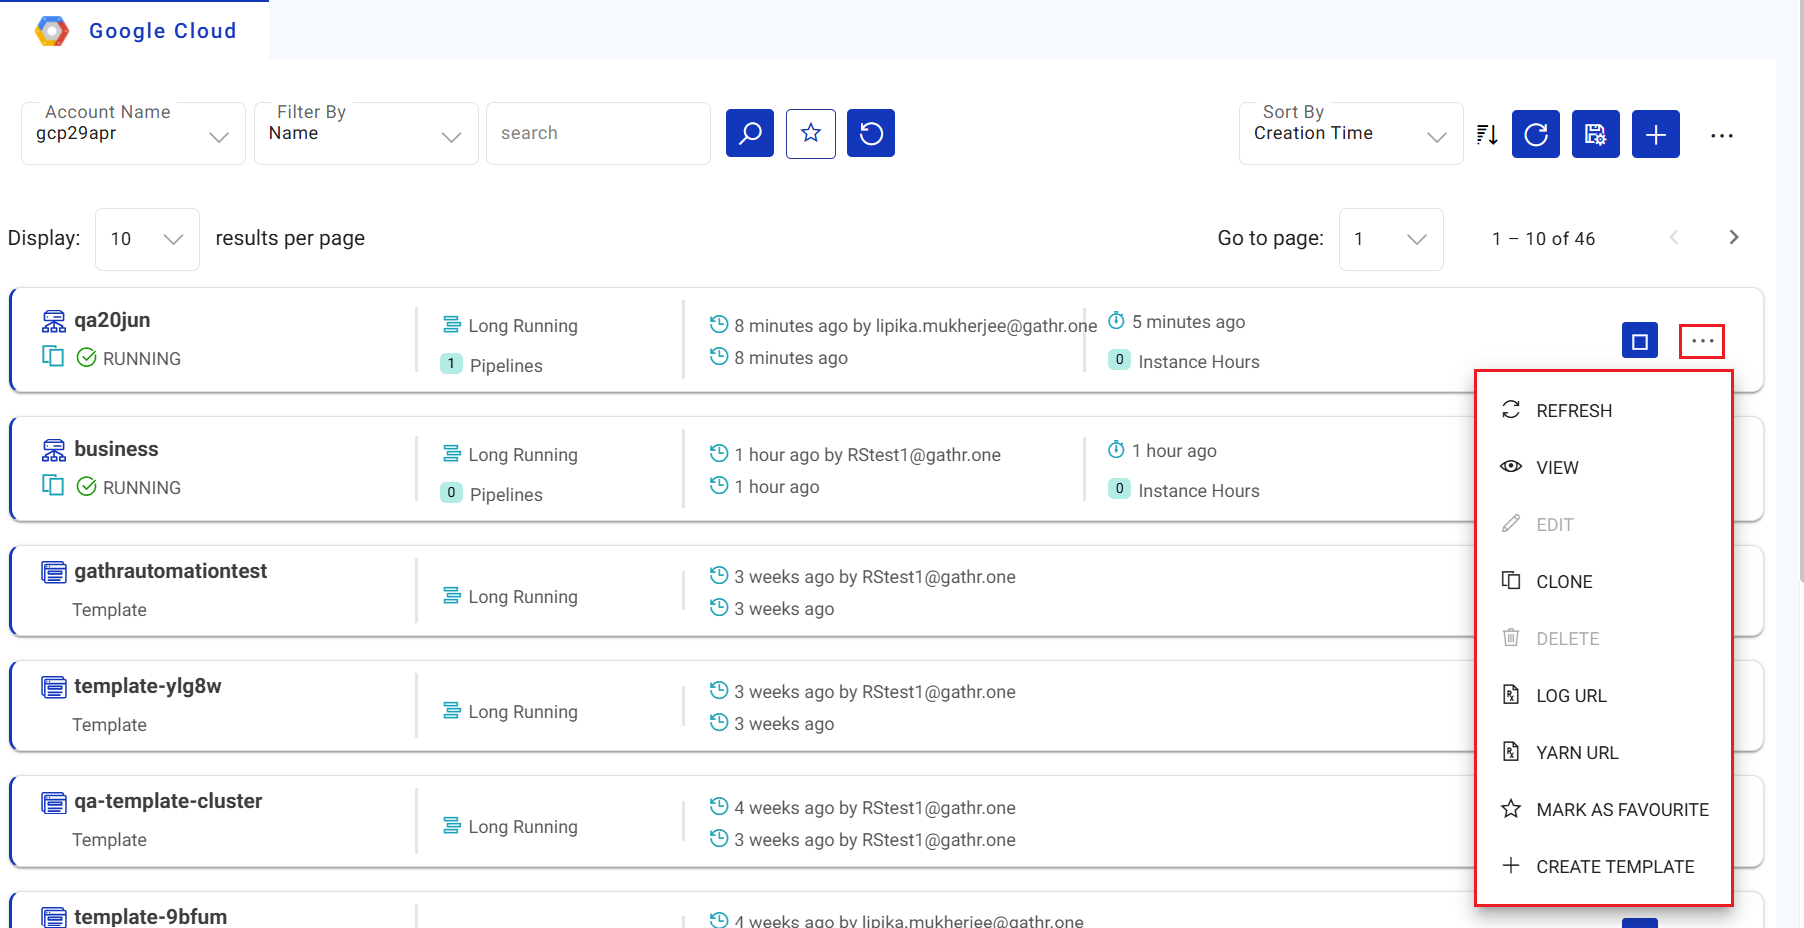
Cluster(s) Listing page
On the Cluster Management listing page, all the created templates and cluster are listed.
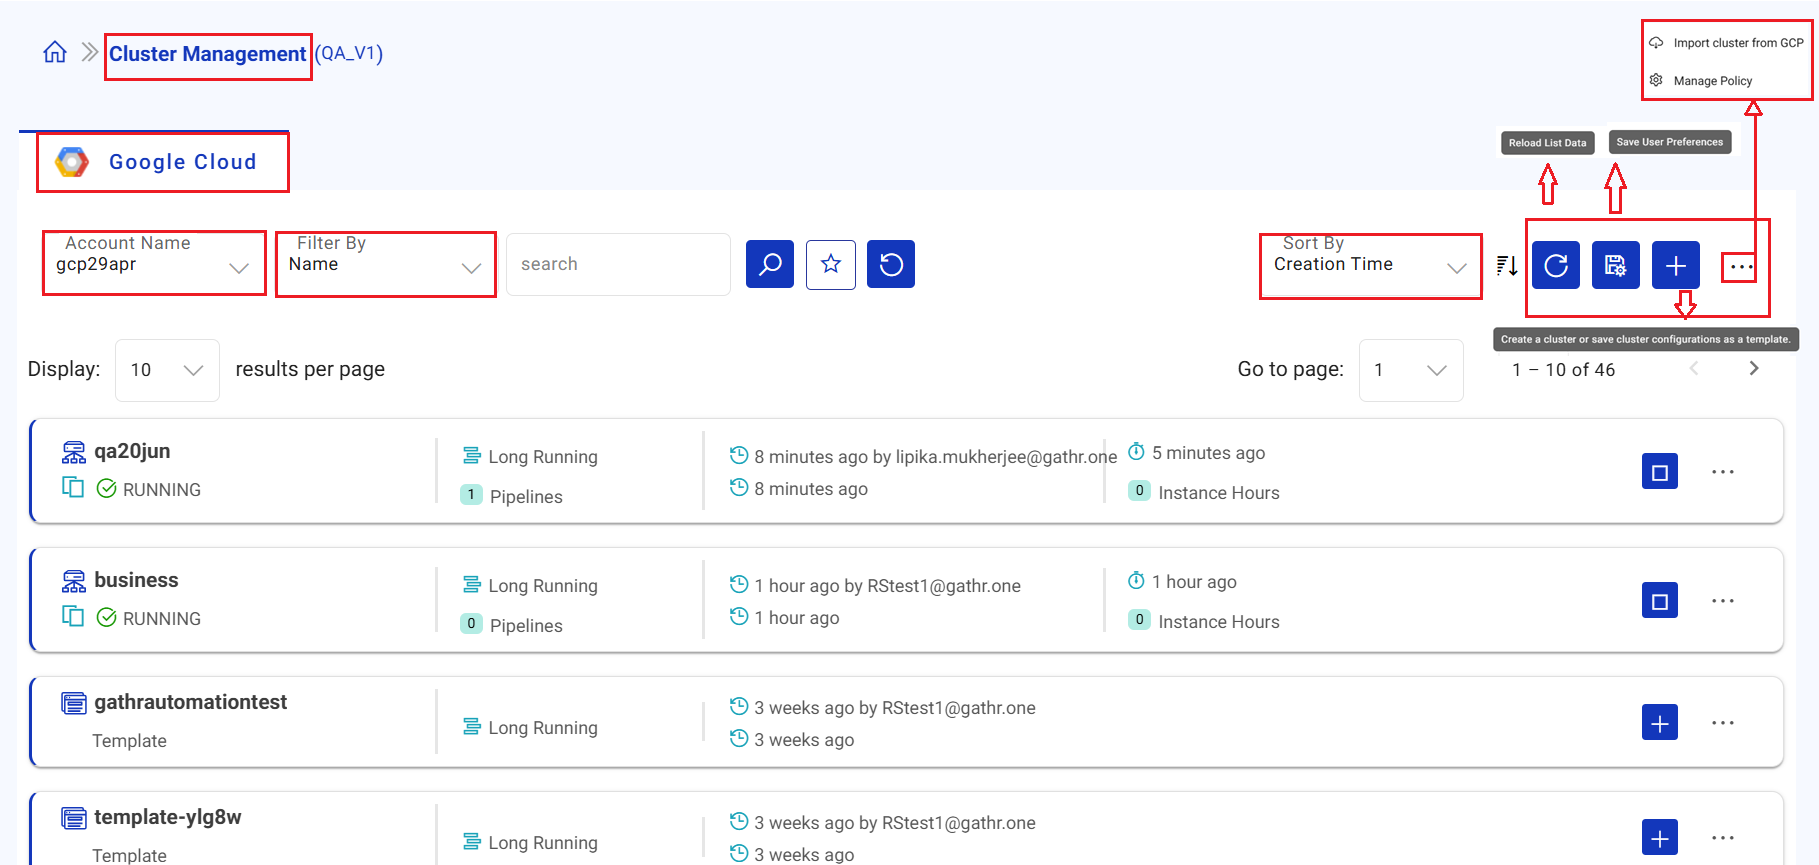
The listing page displays the below details.
Logo of the GCP Dataproc services that are used to manage Dataproc cluster(s) from the Gathr application.
Account Name
The account name provided while adding account in Compute Setup →. The same account was linked to the project which reflects here. For details click, Steps to link a custom compute environment to a project →.
Filter By
Option to filter out the created cluster/template by Name, ID, Cluster Type, Template Type, Status.
Search Bar
Option to search the created cluster/template.
Favourite
Option to mark specific cluster as favourite.
Reset
Option to reset all the filter options to reload the list.
Sort By
Option to Sort the listed clusters/templates by Name, Status, Creation Time and Updation Time.
Reload List Data
You can reload/refresh the GCP cluster listing by clicking at the Reload List Data option available on the Cluster List View page.
Save User Prefrences
Select a few filters and Sort By. Click on Save User Preferences button. The selected prefrences will be saved and visible on the user’s interface for future use.
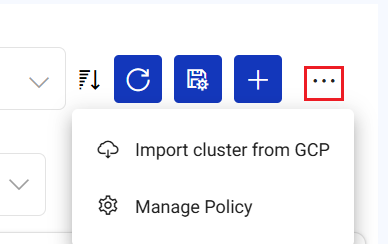
Import Cluster from GCP
Clusters created on GCP can be imported as a cluster template or a cluster in Gathr.
If you create cluster from GCP console, then you have an option to Import the cluster at Gathr UI using the Import Cluster from GCP option.
If you have created a cluster in GCP console and you want to use that cluster in Gathr for running the pipelines, then click the Import Cluster from GCP option.
Upon clicking this option, you will be able to view the cluster created in GCP, on Gathr UI and you will be able to register the same cluster in Gathr.
Upon clicking this option, provide the GCP Cluster ID and Click Import as Template/Import as Cluster.
Manage Policy
Auto scaling option lets you to automatically add or delete virtual machine instances based on increase or decrease in load, thus letting you handle increase in traffic and reduce costs when the need for resources is lower.
Option to Create and manage Auto Scaling Policy is available on the Cluster Management page. Click the ellipses option and then click the Manage Policy option. Auto Scaling Policy List window appear.
Click on the + Button to create a new Auto scaling policy.
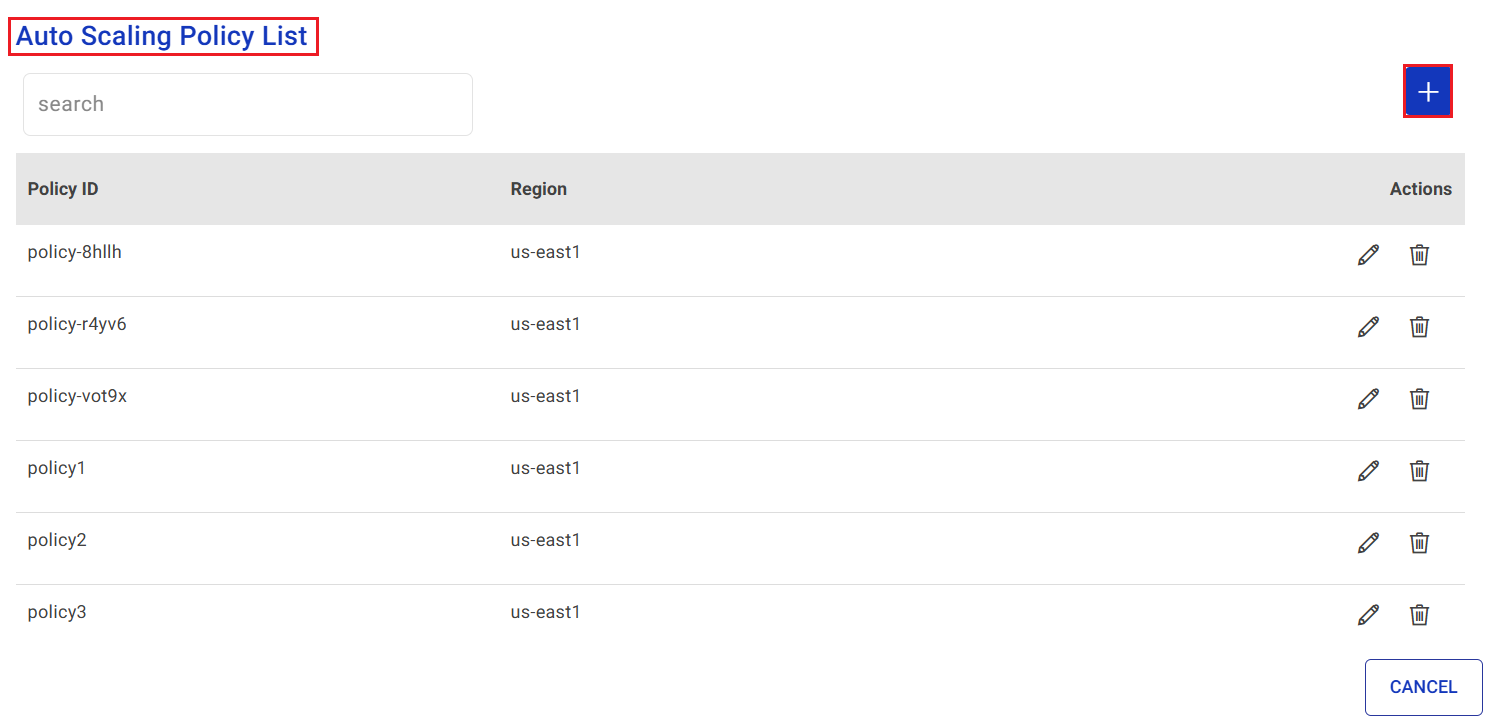
Auto Scaling Policy List
List of all the auto scaling policy created. Details include: Policy ID, Region: us-east1, option to update the details of policy by using Edit option and Delete policy are available.
Create Policy
Create auto scaling policy by clicking at the + button.
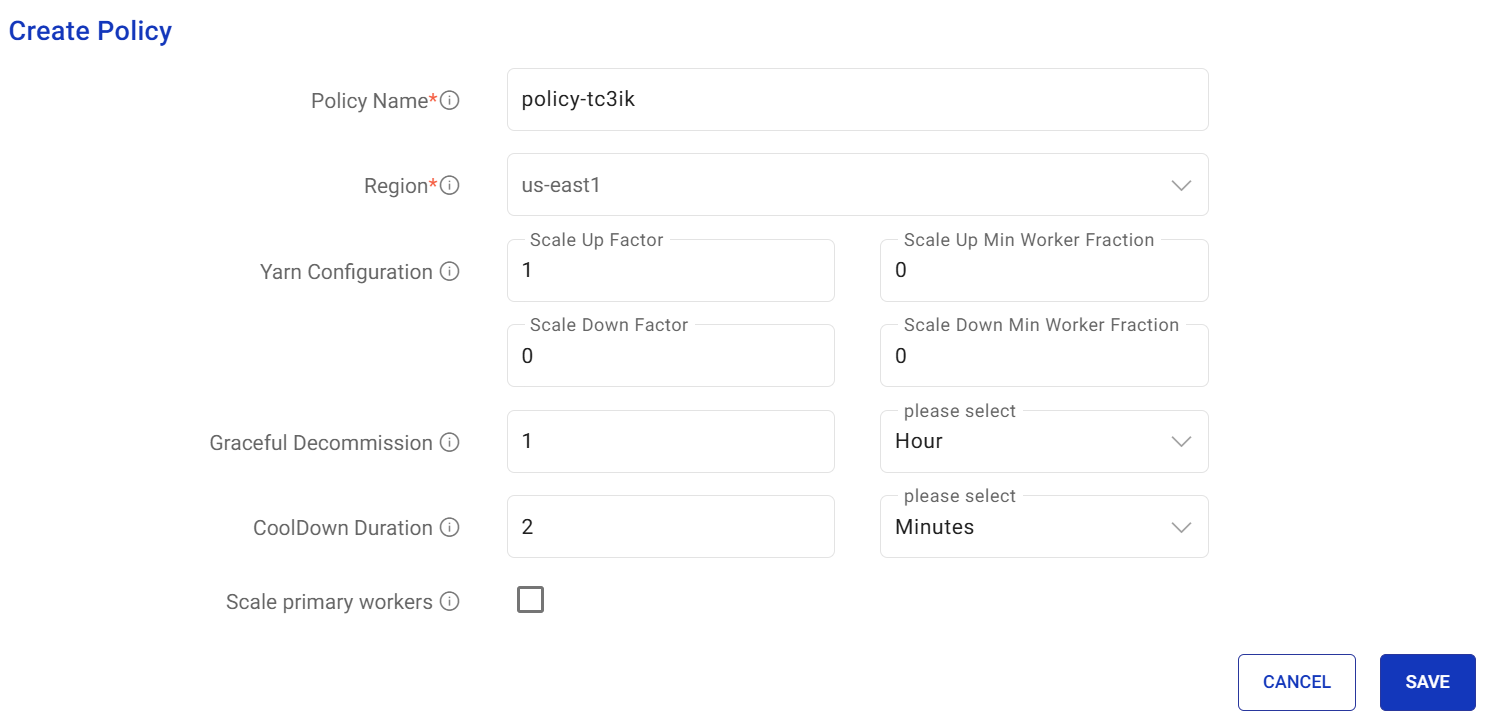
Policy Name
Provide a unique name for the policy.
Region
The region in which the policy is to be created. Example: us-east4
Yarn Configuration
Provide Yarn Configuration details including Scale up factor and Scale up minimum worker fraction, Scale up minimum worker fraction and Scale down minimum worker fraction.
Graceful Decommission
Provide Graceful Decommission timeout per Hour/Min/Second/day.
CoolDown Duration
Provide Cooldown duration in hour(s)/minute(s)/second(s)/ day(s).
Scale primary workers
Check the option to scale primary workers.
Worker Configuration
Provide Worker Configuration details including number of instance(s), Secondary minimum instance(s), Secondary maximum instance(s).
After cluster creation you can Configure GCP cluster in data pipeline on Gathr.
Listed Cluster/Template
The listed cluster/template has the below details.
Name
Name of the cluster.
Status
Current status of the cluster. i.e., RUNNING, STOPPED, SAVED, DELETED.
Pipelines on Cluster
The existing pipelines on the cluster.
Cluster Type
The type of cluster used i.e., Long Running or Job cluster.
Launch Time
Cluster launch time. Example: 2023-10-12 06:12:21 UTC
Duration
Running duration of the cluster. Example: 2 Hours 42 Minutes.
Start or Stop Cluster
You can start/stop a cluster that is created by clicking at the Start/Stop option available under on the listed cluster.
Options available on the Ellipses are explained below.
The below image shows the options available for the listed Cluster.
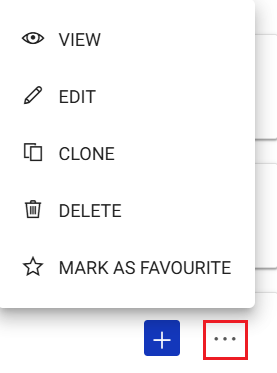
The below image shows the options available for the listed Template.
Refresh
Option to get the latest status of the cluster.
View
Option to get the detailed information of the clusters.
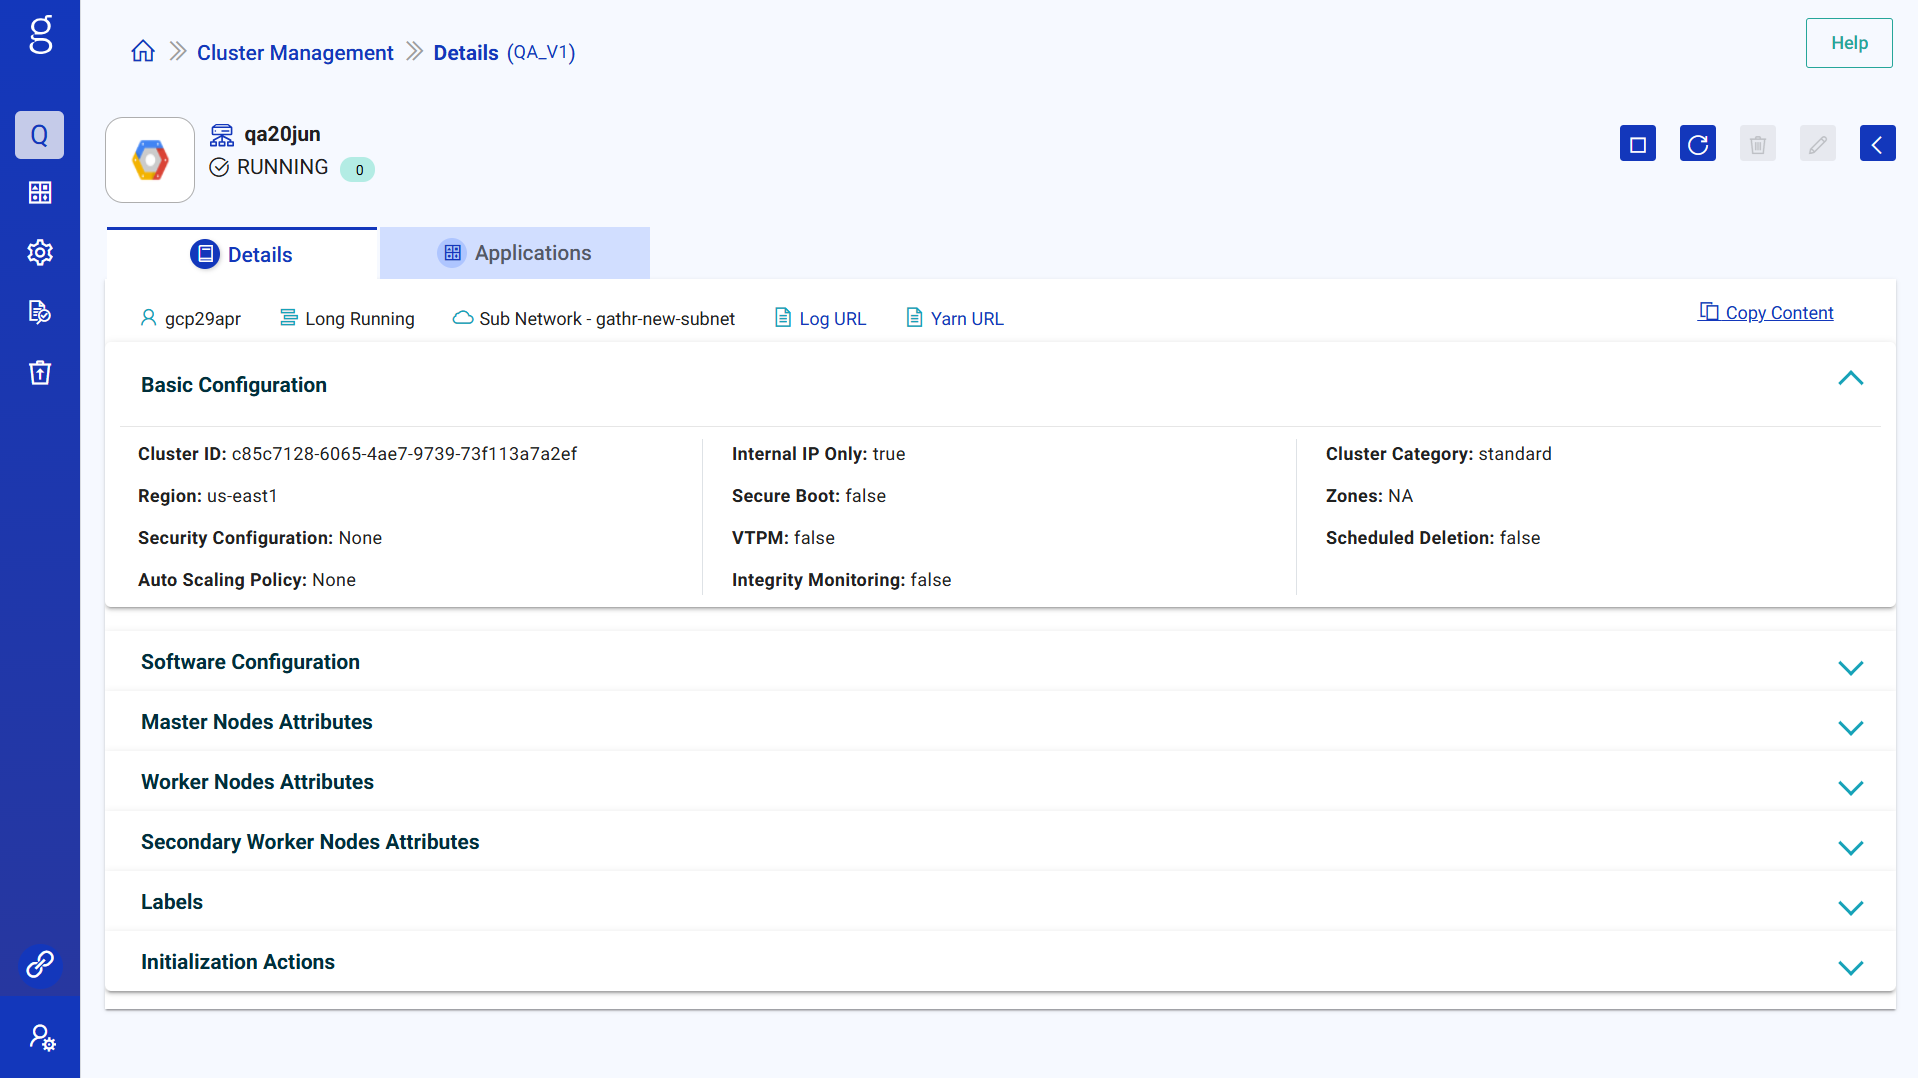
Details
Details of cluster including Account, Cluster Type, Primary Network, Log URL, Yarn URL are available.
Basic Configuration
Under this tab the basic configuration details of cluster are provided which includes the following:
- Cluster ID Example
- Region
- Security Configuration
- Auto Scaling Policy
- Internal IP Only
- Secure Boot
- VTPM
- Integrity Monitoring details
- Cluster Category example: standard
- Zones
- Scheduled Deletion
Software Configuration
Under this tab the software configuration details of cluster are provided which includes the following:
- Image Version
- Enable Component Gateway details
- Optional Components used and other configuration details such as spark and yarn environment.
Master Nodes Attributes
Under this tab the Master Nodes Attributes of cluster are provided which includes the following:
- Machine Type
- Number of Instances
- Local SSDs
- Primary Disk
- Primary Disk Type
Worker Nodes Attributes
Under this tab the Worker Nodes Attributes of cluster are provided which includes the following:
- Machine Type
- Number of Instances
- Local SSDs
- Primary Disk
- Primary Disk Type
Secondary Worker Nodes Attributes
Under this tab the Secondary Worker Nodes Attributes of cluster are provided which includes the following:
- Preemptibility
- Number of Instances
- Local SSDs
- Primary Disk
- Primary Disk Type
Labels
Under this tab the Labels of cluster are provided which includes the following:
description: default-label gathr-requested-by gathr-workspace owner requestedby workspace
Initialization Actions
Under this tab the Initialization Actions of cluster are provided which include the following:
- GCS File Path
Example: gs://bo**cario-test/bootstrap-actions/copy-ssl-certs.sh , gs://boticario-test/bootstrap-actions/add-hosts.sh , gs://test/qa/setup_python.sh
Application
The details of specific cluster utilized in application(s) are available under the tab.
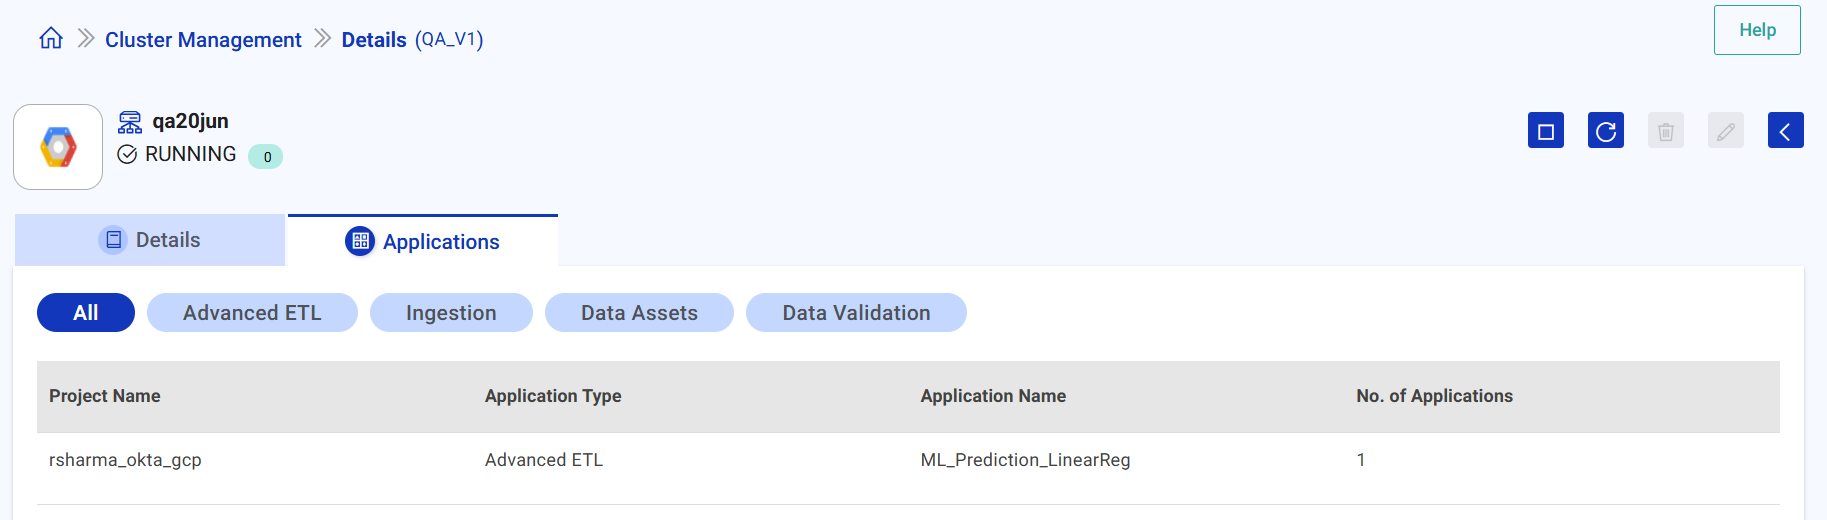
The details include Project Name, Application Type (Advanced ETL, Ingestion, Data Assests, Data Validations), Application Name, No. of Applications.
Edit
You can edit a cluster/template, by clicking at the Edit option.
Upon clicking Edit option, the Edit Cluster/Save Cluster Configuration as a Template window opens with the following options:
Cluster Name
Option to provide a unique name of the cluster. Provide unique name in lower case only. You can create clusters with name starting with a lowercase letter followed by up to 51 lowercase letters, numbers or hyphens. Ensure that the name should not end with a hyphen.
Cluster Type
Option to choose from various cluster types. i.e., Standard (1 Master, N Workers), Single Node Cluster (1 Master, 0 Workers), High Availability (3 Master, N Workers).
Region
Option to select the Cloud Dataproc regional service, determining the zones and resources that are available.
Zone
Option to select the available computing resources and where the data is stored and used from.
Primary Network
Option to select the network or any VPC network created in this project for the cluster.
Click Update to save the changes.
A cluster/template can be edited/updated only when it is in following state:
- RUNNING
- SAVED
- DELETED
The below fields can be updated while updating the cluster when it is in RUNNING state:
- graceful-decommission-timeout
- num-secondary-workers
- num-workers
- labels
- autoscaling-policy
Clone
You can clone a cluster, by clicking on the Clone option.
Delete
You can Delete a cluster, by clicking at the Delete option under Action tab.
On a running cluster, if no pipelines are configured and you want to delete the cluster, then you will have two options to delete:
Delete from GCP, where the cluster will be deleted from GCP and continue to remain in the Gathr database. So, later the same cluster can be started.
Delete cluster from both GCP and Gathr and the cluster will be removed from both.
Log URL
Option to redirect user to the log url page of GCS bucket.
Yarn URL
Option to redirect user to the yarn url for yarn access.
Mark as Favourite
Option to mark the specific cluster as favourite. Once a cluster is marked as favourite, you can unmark as favourite.
Create Template
Option to create a template.
This feature allow users to save configurations by creating a template and use the template to create cluster(s).
Click Create a Template→ to know more.
If you have any feedback on Gathr documentation, please email us!