Gathr Deployment on GCP - Manual
Gathr can be deployed on the Google Cloud Platform (GCP) to leverage the capabilities of Dataproc clusters for efficient and scalable data processing.
Create, manage and use Google Cloud Dataproc clusters from Gathr.
GCP Setup for Gathr
Steps to configure your GCP account as prerequisites for setting up Gathr on Google Cloud Platform.
Create Service Account for Gathr in GCP
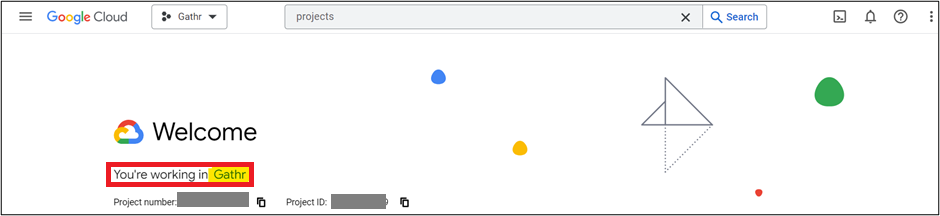
Login to GCP Console and select the Project in which you want to deploy Gathr application.
Create a custom role for the service account.
In the Google Admin console, navigate to Menu > IAM & Admin > Roles > Create Role.
Provide below details as per requirements and assign the mentioned permissions to specific role that are necessary for the functioning of Gathr Application.
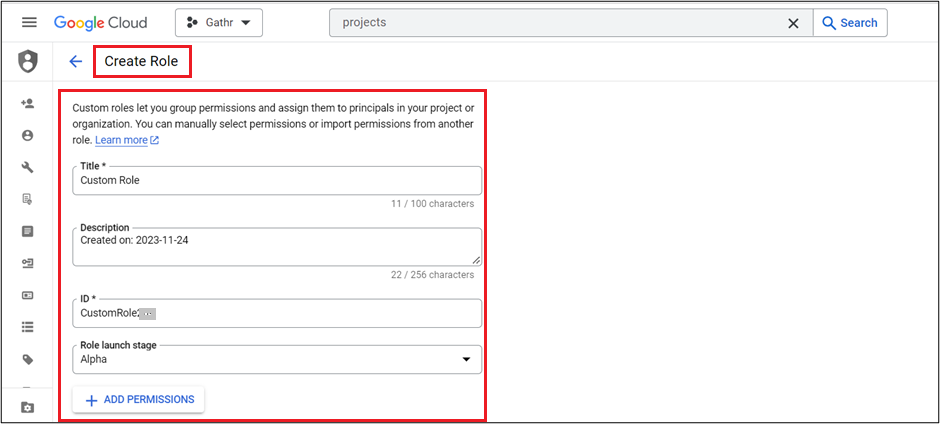
To know more about creating a custom role with Google, click here.
List of Required Permissions
To run Gathr pipelines on GCP dataproc cluster, the service account dedicated for Gathr must have the role assigned to it and the assigned role should have the associated permissions as provided below.
compute.acceleratorTypes.get
compute.acceleratorTypes.list
compute.instances.get
compute.instances.list
compute.machineTypes.get
compute.machineTypes.list
compute.networks.get
compute.networks.list
compute.nodeGroups.get
compute.nodeGroups.list
compute.nodeTypes.get
compute.nodeTypes.list
compute.regions.list
compute.subnetworks.get
compute.subnetworks.list
compute.subnetworks.use
compute.zones.get
compute.zones.list
dataproc.autoscalingPolicies.create
dataproc.autoscalingPolicies.delete
dataproc.autoscalingPolicies.get
dataproc.autoscalingPolicies.list
dataproc.autoscalingPolicies.update
dataproc.autoscalingPolicies.use
dataproc.clusters.create
dataproc.clusters.delete
dataproc.clusters.get
dataproc.clusters.getIamPolicy
dataproc.clusters.list
dataproc.clusters.setIamPolicy
dataproc.clusters.start
dataproc.clusters.stop
dataproc.clusters.update
dataproc.clusters.use
dataproc.jobs.cancel
dataproc.jobs.create
dataproc.jobs.delete
dataproc.jobs.get
dataproc.jobs.list
dataproc.jobs.update
dataproc.nodeGroups.get
dataproc.operations.cancel
dataproc.operations.delete
dataproc.operations.get
dataproc.operations.getIamPolicy
dataproc.operations.list
dataproc.operations.setIamPolicy
dataproc.workflowTemplates.instantiateInline
iap.tunnelInstances.accessViaIAP
metastore.services.list
resourcemanager.projects.get
storage.buckets.create
storage.buckets.get
storage.buckets.list
storage.objects.create
storage.objects.delete
storage.objects.get
storage.objects.list
storage.objects.update
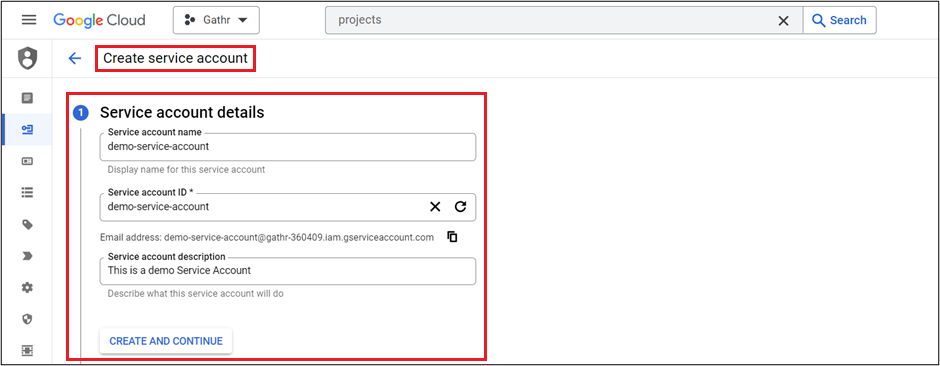
Create Service account and assign above created role to this service account.
In the Google Admin console, navigate to Menu > IAM & Admin > Service Account > Create Service Account.
- Provide Service account details and click on Create and Continue.
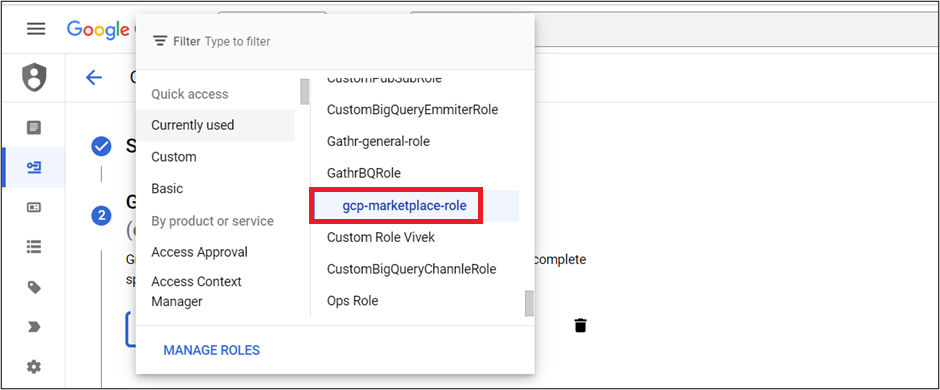
- Assign the role which is created for this Service Account.
You have an option to grant users access to this service account. This is an optional step.
Click Done.
Once this account is created, assign a key to this service account so that Gathr can communicate with GCP Services using this Account Key.
- In the Google Admin console, navigate to Menu > IAM & Admin > Service Account and search for your Service Account > Actions > Manage Keys
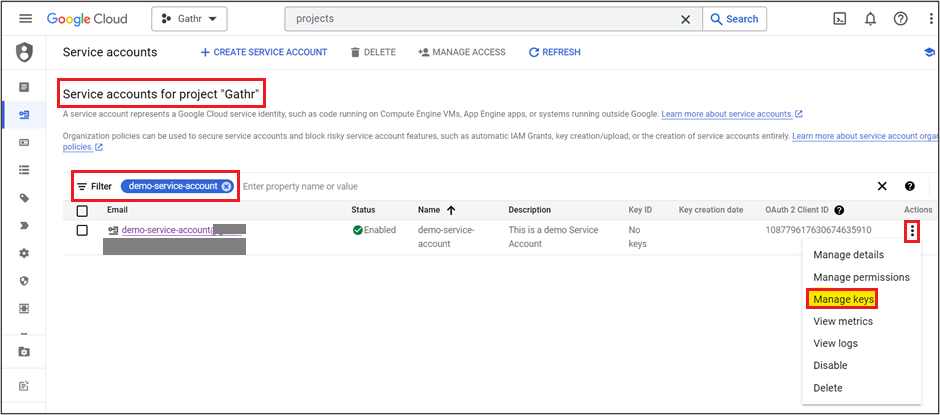
- Click Add Key > Create New Key > Select Key Type as Json > Create
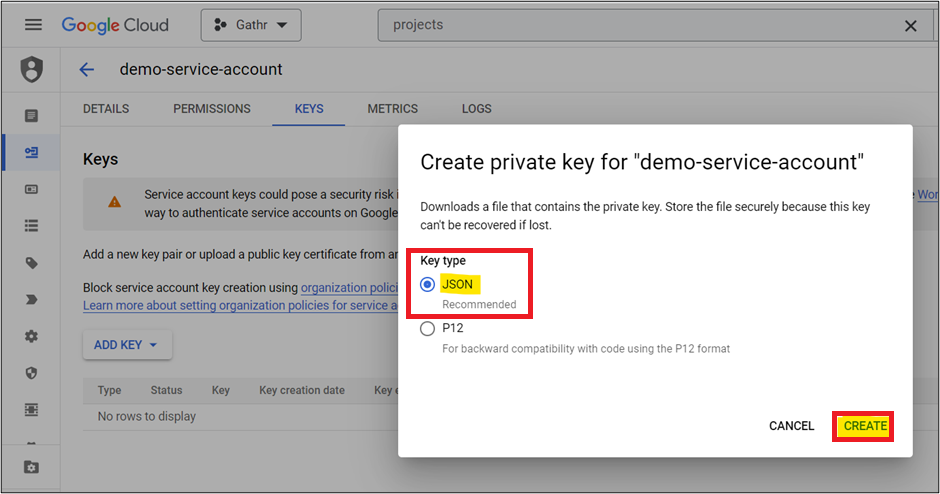
A Json key will be created and will automatically get download on your browser.
You will require this key during Gathr configurations.
To know more about creating service account with Google, click here.
Creating VPC, Subnets and VM
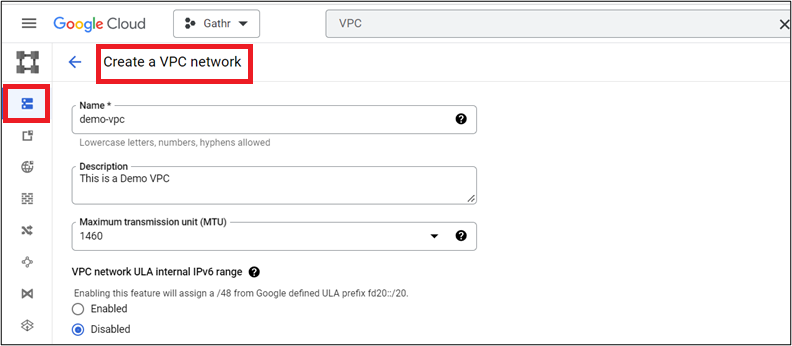
In the Google Admin console, navigate to Menu > VPC Network > VPC Networks > Create VPC Network.
- Provide VPC and Network details as per requirement.
- Provide subnet details as per requirement.
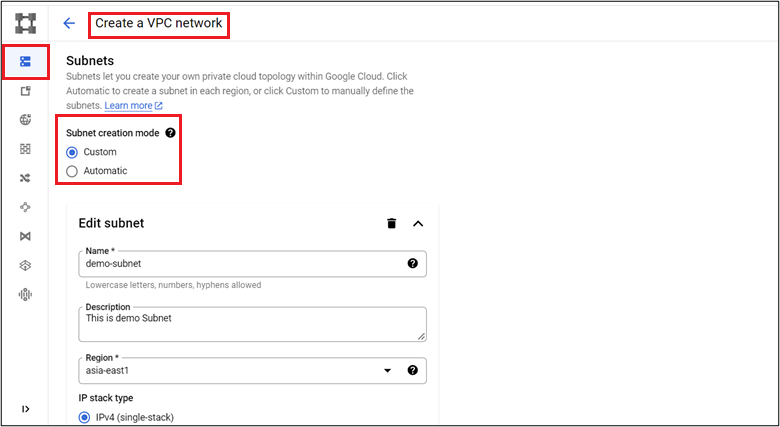
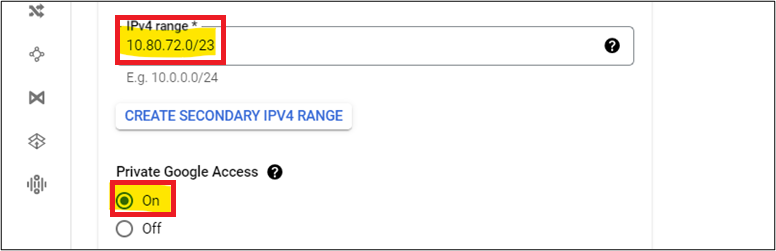
- Provide the IP Range for subnets and enable Private Google Access option.
Edit the custom firewall rule to add the ports that you want open for your VPC.
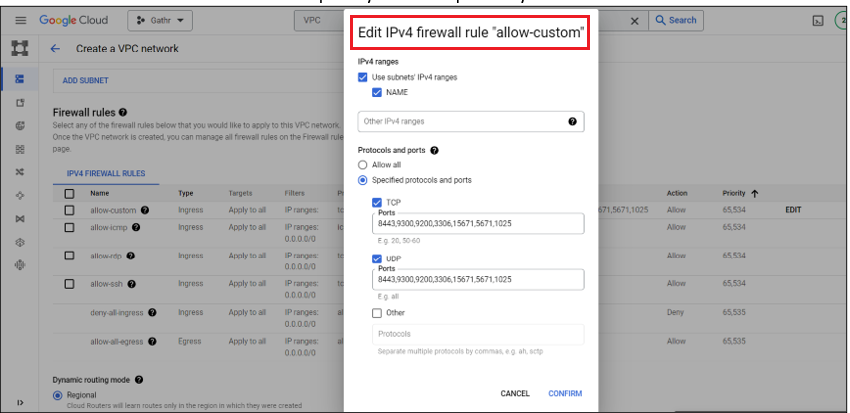
In Firewall Rules enable the below ports. You can further add ports as per requirement.
Service Ports Zookeeper 2181 Gathr (Non-SSL/SSL) 8090/8443 Elasticsearch 9200,9300 PostgreSQL 5432 After providing all the above details click on Create.
Launch VM’s on this VPC.
To know more about creating VPC Subnet and VM with Google, click here.
Hardware and Software Requirements for Gathr
Series: E2
RAM: 8 GB
Cores: 4
Disk Space: 50 GB minimum (Recommend using 100 GB)
Operating System: Centos-7.x / RHEL-7.x
Internet access: Required (Components including S3, SMTP require internet access)
Launch VM’s on the Created VPC
If you want to connect to VMs using third party tools or OpenSSH, then you need to generate a key for your VM.
If you don’t have an SSH key, you must create one from any machine:
Open a terminal and use the ssh-keygen command with the -C flag to create a new SSH key pair.
ssh-keygen -t rsa -f ~/.ssh/KEY_FILENAME -C USERNAME -b 2048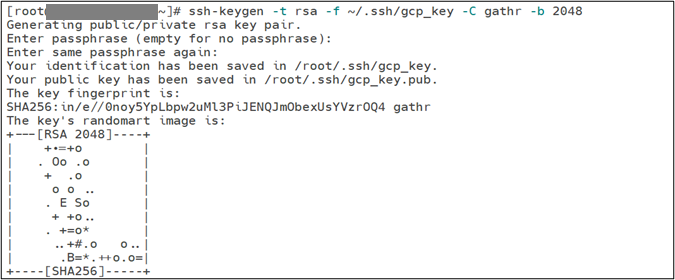
This command will create one public (KEY_FILENAME.pub) and one private key (KEY_FILENAME) in the specified location.
Using the private key the .pem file can be created that will be used to connect with the VM.
Create a .pem file using the below command:
cp ~/.ssh/KEY_FILENAME ~/.ssh/<key_name>.pemThe public key can be used while creating VM and the private key can be used while connecting to the VM.
In the Google Admin console, navigate to Menu > Compute Engine > VM Instances > Create Instance.
Provide a name to your VM, add tags (if required).
Select the Region and Zone (Provide the same region where you have configured the VPC).
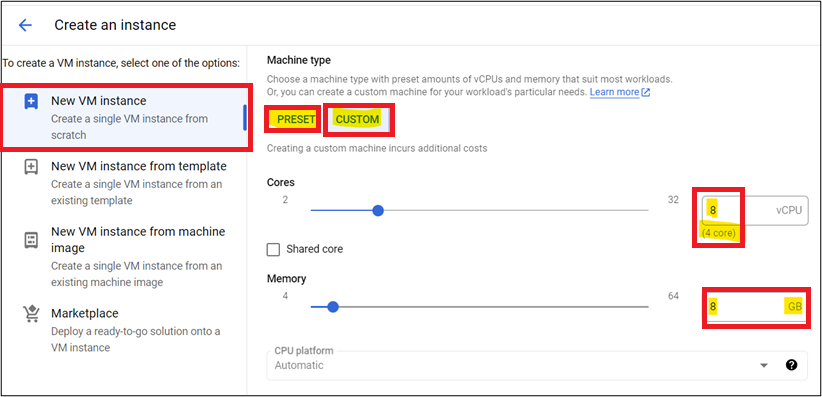
Select Machine Series type.

In Machine Type Section Click Custom or Preset Machine type as per requirement. The minimum configuration recommendation for Gathr Application is 4 Cores & 8 GB RAM.
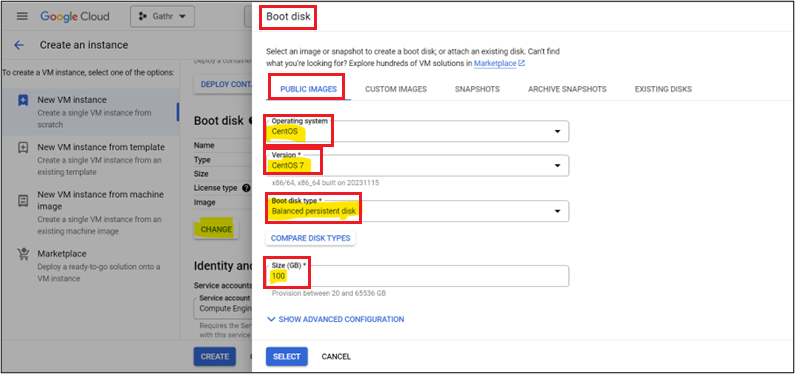
In Boot Disk Section click on change and provide OS and Disk related parameters accordingly.
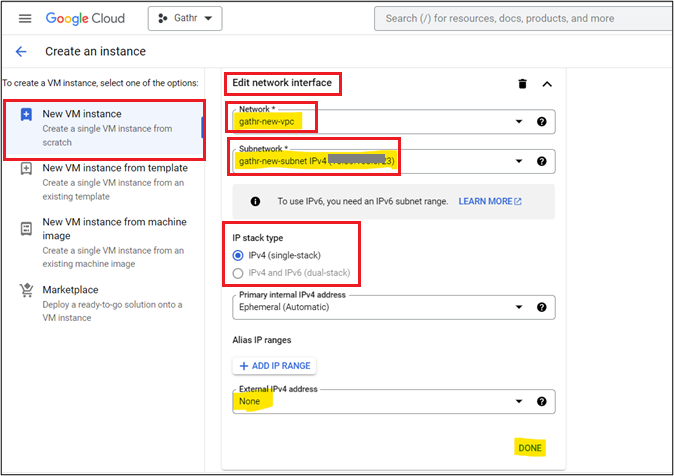
Click Advanced Options Drop Down > Networking > Edit the Network Interface. Select The VPC Network and Subnet that you created. Select External IP as none > Click Done.
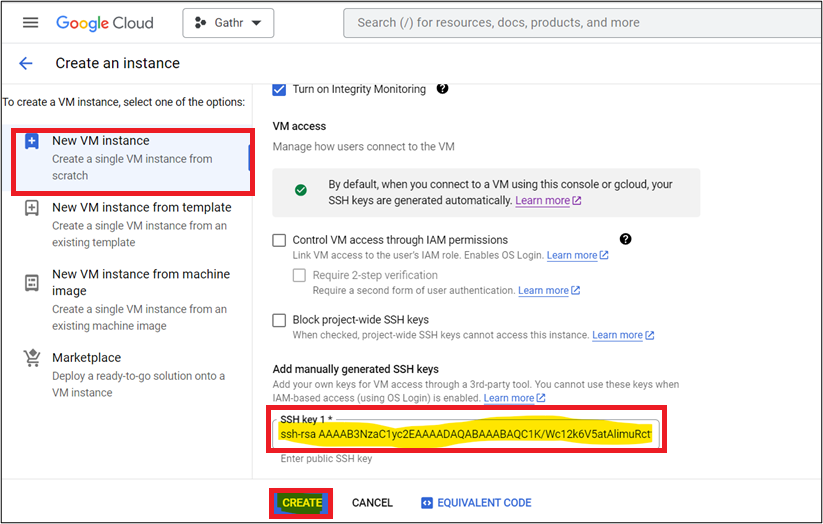
Next, click Advanced Options Drop Down > Security > Manage Access > Add Item and paste the contents of public key (KEY_FILENAME.pub) that has been generated in step ‘1’ > After providing the Key Click Create.
The VM will be launched and you can access the VM with the private key which has been created earlier.
To connect VM using the SSH use the below command:
ssh -i /path/to/<key_name>.pem <user>@<private_ip_of_vm>To know more about launching a VM on a specific subnet, click here.
Create a GCS bucket in the same region where your VM’s are launched. You will need this bucket for storing Gathr-pipeline jar, Job dependencies, Job Driver output and Cluster config files.
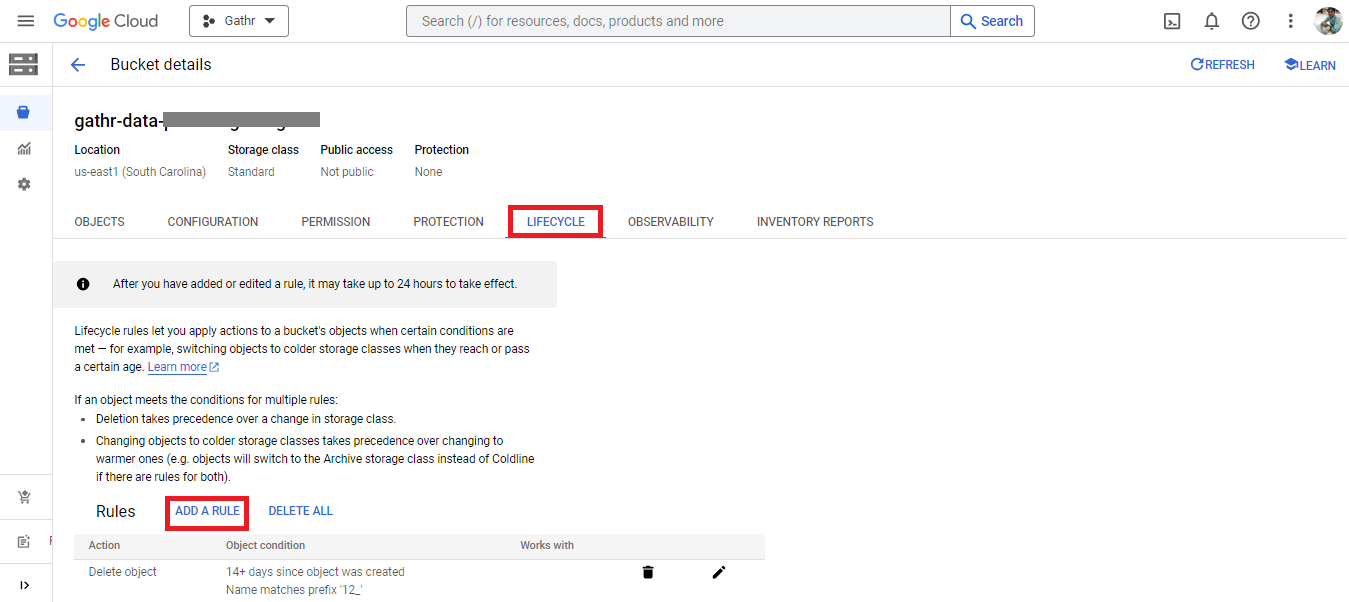
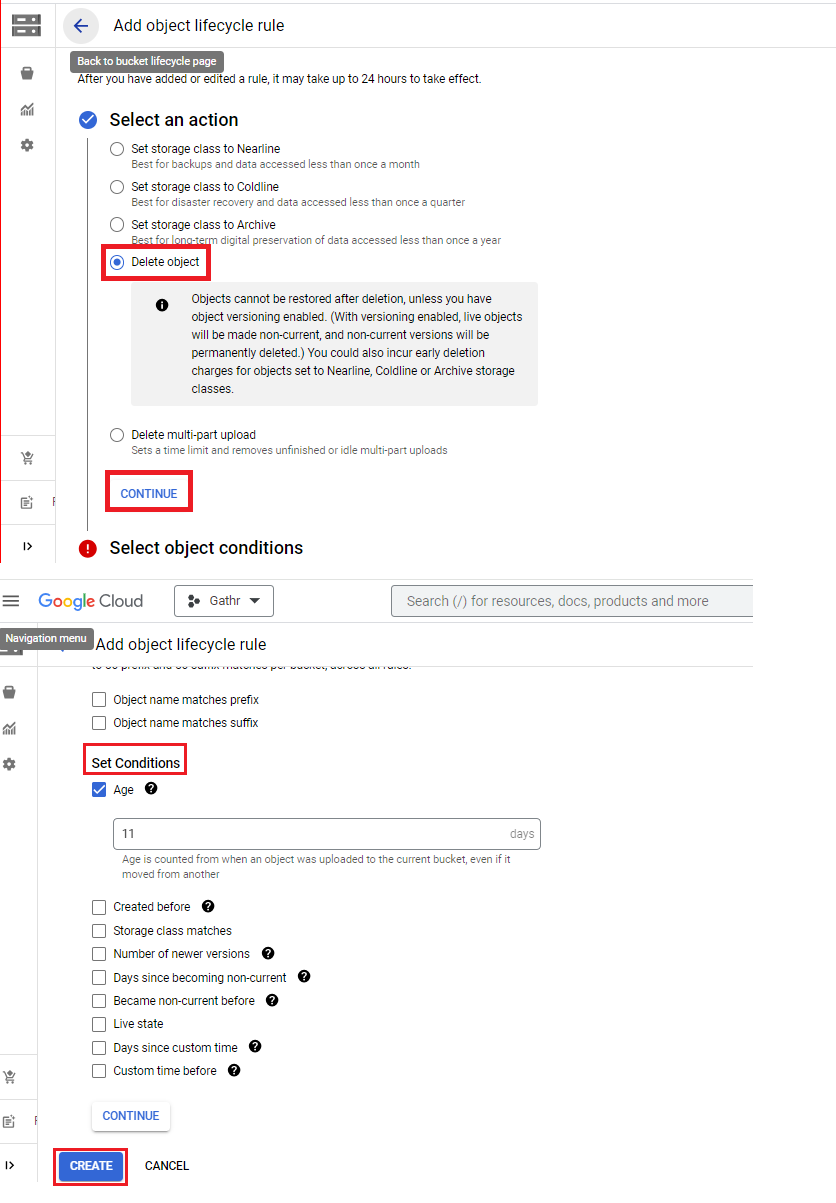
Standard Storage type is recommended. Gathr needs to access the data inside this bucket very frequently.It is recommended to apply the life cycle policy on the bucket to ensure that the generated files are cleaned periodically or as per the condition specified in a policy.
A life cycle policy is a collection of life cycle rules. Lifecycle rules allows you to apply actions to a bucket’s objects when certain conditions are met. For example, delete objects when they reach or pass a certain age or pass a certain criteria.
At GCP console navigate to Cloud Storage > and then to the specific Bucket > click on Life Cycle tab. Here, you can create life cycle policy containing one or multiple rules. For example: perform actions on the files starting with a prefix or ending with a suffix, or files those have reached a certain age.
Create NAT Gateway for Internet Access in Private Subnets
In the Google Admin console search for NAT in the search box.
Click on Cloud NAT.
Click on Create Cloud NAT Gateway.
Provide a name to your gateway.
Select NAT type as Public.
Select region & select Cloud Router.
If you don’t have any cloud router you can create a router by clicking on create new router and rest of the options you can chose as per your need.
After providing all NAT Details click the Create button.
Now, your VM in that VPC will have internet Access.

To know more about creating NAT Gateway, click here.
Gathr Prerequisites
Before starting to deploy Gathr, you need few Packages/Services to be installed in Gathr Application including Java-8, Zookeeper, Postgres, Elasticsearch & RabbitMQ (Optional).
Java Installation
Install Java using below command:
yum install java-1.8.0-openjdk java-1.8.0-openjdk-devel -yIf the CentOS has multiple JDK installed, you can use the alternatives command to set the default java.
sudo alternatives --config javaA list of all installed Java versions will be printed on the screen.
Enter the number of version that you want to use as default and press Enter key.
Append JAVA_HOME in .bashrc file of the user through which you are deploying Gathr.
export JAVA_HOME=/usr/lib/jvm/java-1.8.0-openjdk-1.8.0.362.b08-1.el7_9.x86_64
export PATH=$JAVA_HOME/bin:$PATH
Test JAVA_HOME
source .bashrcecho $JAVA_HOMEecho $PATH
Apache Zookeeper-3.8.0 Installation
Create an installation directory where you want to install Zookeeper. (ex: /opt/apache)
Download the Zookeeper tar bundle:
cd <installation_dir>wget https://archive.apache.org/dist/zookeeper/zookeeper-3.8.0/apache-zookeeper-3.8.0-bin.tar.gzUntar the Bundle:
tar -xvzf apache-zookeeper-3.8.0-bin.tar.gzCreate a data/directory in the zookeeper folder and create a copy of zoo_sample.cfg file and rename it to zoo.cfg:
cd apache-zookeeper-3.8.0-bin && mkdir data
cp conf/zoo_sample.cfg conf/zoo.cfg
Now edit the zoo.cfg file and update dataDir path:
vi conf/zoo.cfg
dataDir=<installation_dir>/apache-zookeeper-3.8.0-bin/data
Start the Zookeeper and check the status:
bin/zkServer.sh start
bin/zkServer.sh status
Postgres-14 Installation
Download and install updates:
sudo yum update -yAdding PostgreSQL 14 Yum repository:
sudo tee /etc/yum.repos.d/pgdg.repo<<EOF
[pgdg14]
name=PostgreSQL 14 for RHEL/CentOS 7 - x86_64
baseurl=https://download.postgresql.org/pub/repos/yum/14/redhat/rhel-7-x86_64
enabled=1
gpgcheck=0
EOF
Installing Postgresql-14 server and libraries:
sudo yum install postgresql14 postgresql14-serverInitialize the Database:
sudo /usr/pgsql-14/bin/postgresql-14-setup initdbYou will get the below output on successful initialization:
Initializing database … OK
Start and enable the PostgreSQL service:
sudo systemctl start postgresql-14sudo systemctl enable postgresql-14sudo systemctl status postgresql-14You can change the admin database user password using the below command:
sudo su postgres -c psqlALTER USER postgres WITH PASSWORD 'your-password';Edit the configuration files:
sudo vi /var/lib/pgsql/14/data/postgresql.confUncomment the listen_addresses line and modify localhost with ‘*’:
listen_addresses = '*'Change the password_encryption to md5:
password_encryption = md5sudo vi /var/lib/pgsql/14/data/pg_hba.confChange the Address and Method Section as below:
# TYPE    DATABASE     USER     ADDRESS       METHOD
#
# "local" is for Unix domain socket connections only
local     all        all                        peer
# IPv4 local connections:
host      all        all       0.0.0.0/0         md5
# IPv6 local connections:
host      all        all        ::1/128          md5
# Allow replication connections from localhost, by a user with the
# replication privilege.
local   replication      all                     peer
host    replication      all   127.0.0.1/32      md5
host    replication      all     ::1/128         md5
Restart PostgreSQL server for changes to take effect:
sudo systemctl restart postgresql-14
Elasticsearch-6.8.1 Installation
Navigate to Installation directory and download the Elasticsearch tar bundle:
cd <installation_dir> && wget https://artifacts.elastic.co/downloads/elasticsearch/elasticsearch-6.8.1.tar.gzUntar the package:
tar -xvzf elasticsearch-6.8.1.tar.gzEdit the elasticsearch.yml file:
vi config/elasticsearch.ymlEdit the below sections accordingly:
cluster.name: <es_cluster_name>
node.name: <es_node_name>
path.data: <installation_dir>/elasticsearch-6.8.1/data
path.logs: <installation_dir>/elasticsearch-6.8.1/logs
network.host: <machine_IP>
http.port: 9200
discovery.zen.ping.unicast.hosts: ["<machine_IP>"]
The below Configuration is important for Audit and Monitoring error (without this Property the Audit and Monitoring Functionality will not work).
action.auto_create_index: .security,.monitoring*,.watches,.triggered_watches,.watcher-history*,.ml*,sax-meter*,sax_audit_*,*-sax-model-index,true,sax_error_*,ns*,gathr_*Increase the vm.max_map_count to 262144:
sudo nano /etc/sysctl.confvm.max_map_count=262144sudo sysctl -pYou have an option to increase heap size for elasticsearch as below:
vi config/jvm.optionsFor ex: to set heap size to 4GB set below properties:
-Xms4g-Xmx4gStart Elasticsearch:
bin/elasticsearch -dCheck if elastic search is up and running using below command:
curl -X GET 'http://<machine_ip>:9200'You will get an output like below:
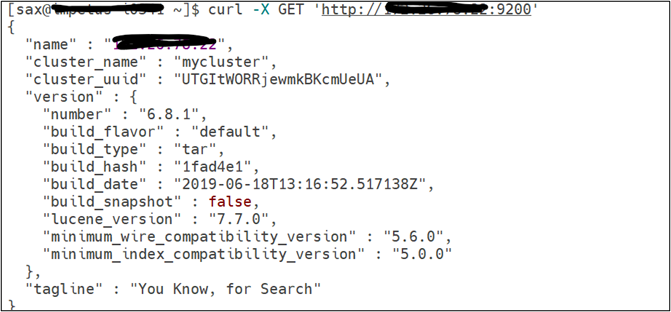
RabbitMQ-3.11.16 Installation (Optional)
Download the Erlang and RabbitMQ package.
cd <installation_dir> && wget https://packages.erlang-solutions.com/rpm/centos/7/x86_64/esl-erlang_25.0.3-1~centos~7_amd64.rpmwget https://github.com/rabbitmq/rabbitmq-server/releases/download/v3.11.16/rabbitmq-server-generic-unix-3.11.16.tar.xzInstall the erlang Package using below command:
sudo yum localinstall esl-erlang_25.0.3-1~centos~7_amd64.rpm -yExtract the RMQ tar bundle:
tar -xf rabbitmq-server-generic-unix-3.11.16.tar.xzSet RabbitMQ Home in .bashrc file:
vi ~/.bashrcexport RABBITMQ_HOME=<installation_dir>/rabbitmq_server-3.11.16 export PATH=$RABBITMQ_HOME/sbin:$PATHsource ~/.bashrcStart RMQ server:
To start in foreground
rabbitmq-serverTo start in background
rabbitmq-server -detachedEnable RMQ management Plugin and create an admin user:
rabbitmq-plugins enable rabbitmq_managementrabbitmqctl delete_user guestrabbitmqctl add_user testrabbitmqctl set_user_tags test administratorrabbitmqctl set_permissions -p / test ".*" ".*" ".*"Access the RMQ WebUI:
http://<machine_IP>:15672

Creds – test/test
Gathr Installation (Embedded Mode)
Create a directory where you want to install Gathr & copy the Gathr tar bundle to that directory and extract it.
Start Gathr in embedded mode.
cd Gathr/bin./startServicesServer.sh -deployment.mode=embeddedIf your zookeeper is running on same machine (i.e., your 2181 port is occupied) then before starting Gathr in embedded mode you need to change zookeeper port in Gathr Configurations:
vi <gathr_installation_dir>/Gathr/conf/config.properties- Change 2181 port to any free port (ex - 2182)
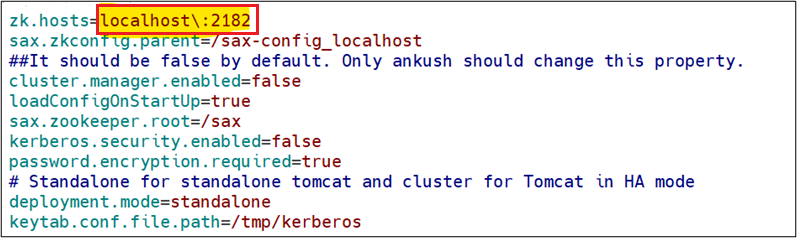
- Start Gathr in embedded mode with below command:
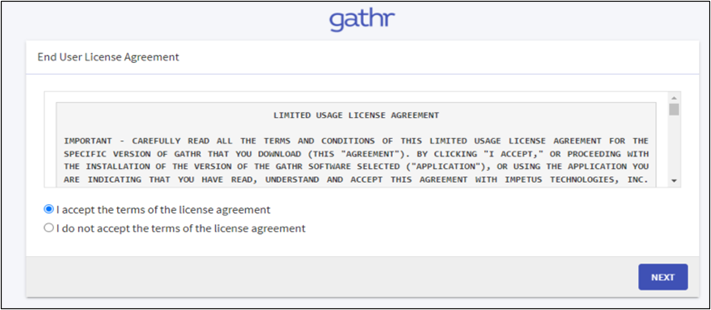
cd Gathr/bin./startServicesServer.sh -deployment.mode=embedded -config.reload=trueOpen Gathr UI using below URL and accept the user agreement.
http://<machine_IP>:8090/Gathr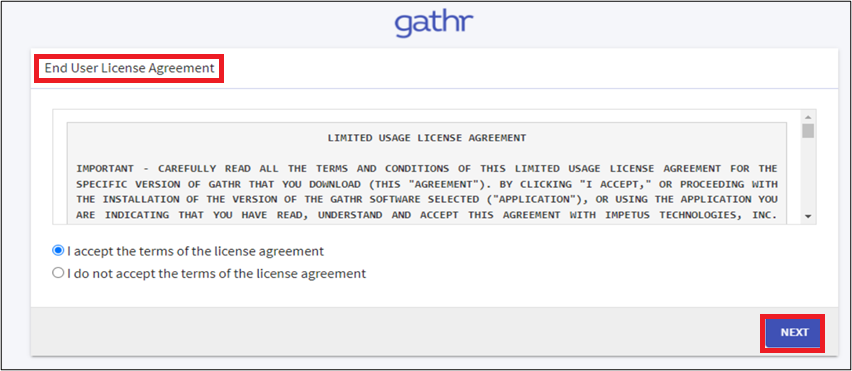
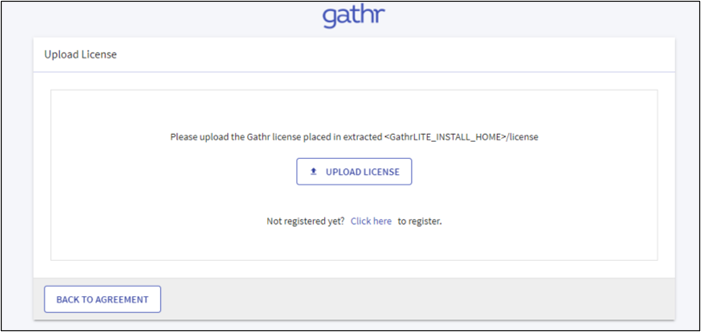
Open the upload License page. Upload the license and click Confirm.
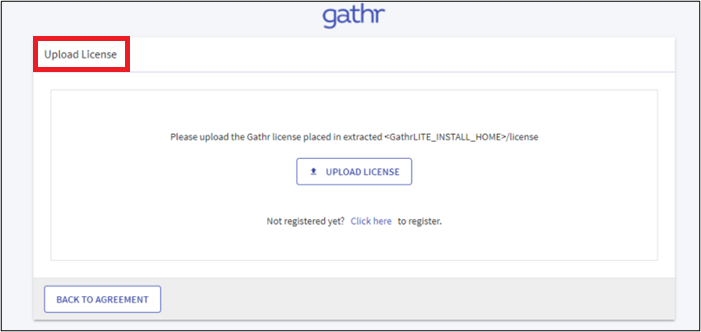
- A welcome page appears. Click Continue.
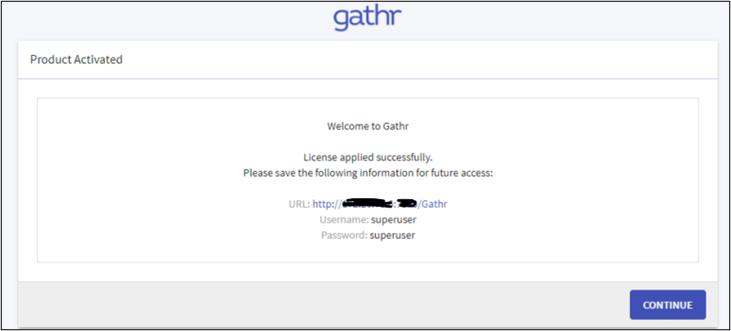
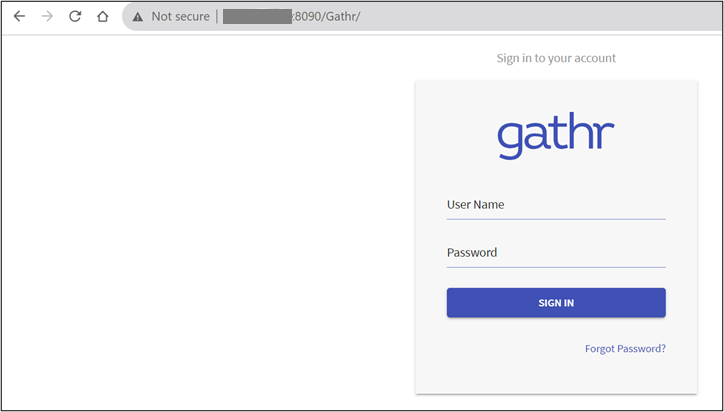
Login Page will appear. Login with superuser/superuser as default credentials.
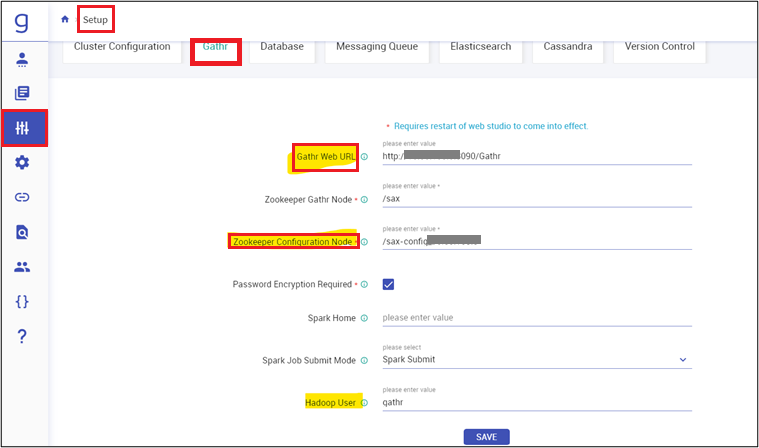
Navigate to Setup page of Gathr and update the below configuration:
Gathr web URL (http://<Gathr_IP>)
Zookeeper Configuration Node (/sax-config_<machine_IP>)
Hadoop User (If you are using Hadoop)
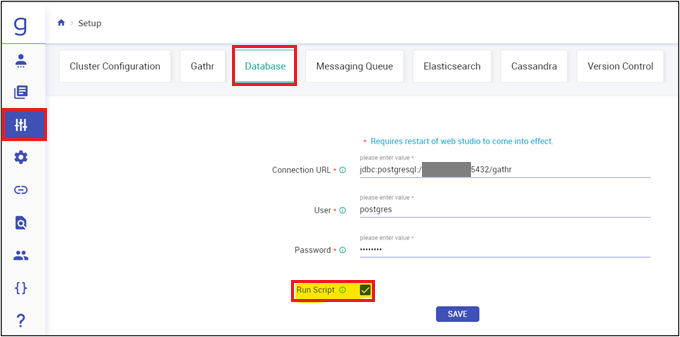
Navigate to Setup, and then to Database and add database configurations:
Connection URL (jdbc:postgresql://<postgres_IP>:5432/<db_name>)
Provide the username and password for postgresDB
Next, enable the run script and click SAVE.
This will execute db_dump scripts in the backend.
Once the script is completed uncheck the Run Script box and click Save.
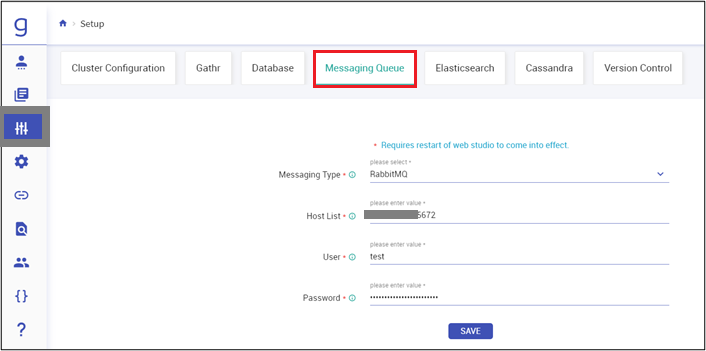
Navigate to Setup, and then to Messaging Queue and update the RabbitMQ configurations. Click SAVE.
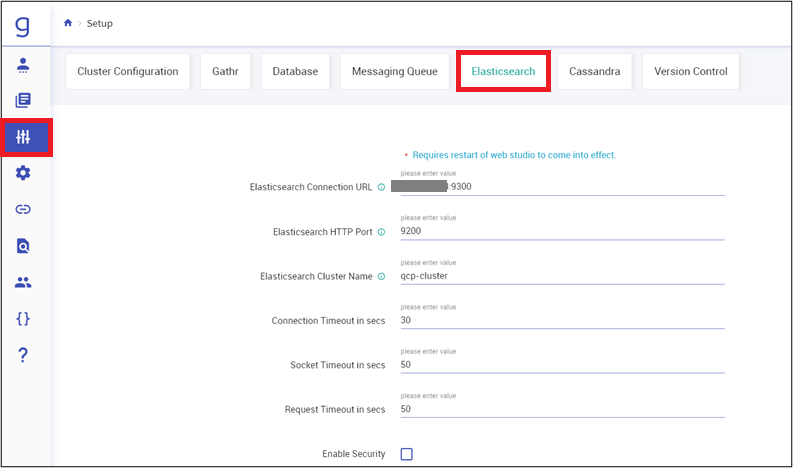
Navigate to Setup, and then to Elasticsearch. Update Elasticsearch configurations.
Deploy gcp-dataproc-service.war. This requires you to stop Gathr.
Follow the below steps:
cd Gathr/bin./stopServicesServer.shNavigate to Gathr/lib folder and copy gcp-dataproc-service.war in Gathr/server/tomcat/webapps/ folder.
Navigate to Gathr/server/tomcat/webapps/ and unzip gcp-dataproc-service.war
unzip gcp-dataproc-service.war -d gcp-dataproc-serviceYou can delete the gcp-dataproc-service.war
rm -rf gcp-dataproc-service.warEdit the application.properties file in gcp-dataproc-service/WEB-INF/classes/
cd Gathr/server/tomcat/webappsvi gcp-dataproc-service/WEB-INF/classes/application.propertiesUpdate the JDBC and Zookeeper details:
#DEV
spring.datasource.url=jdbc:postgresql://<postgres_IP>:5432/<db_name>
spring.datasource.username=postgres
spring.datasource.password=<postgres_password>
spring.datasource.driver-class-name=org.postgresql.Driver

zk.hosts=<ZK_HOST>\:2181
zk.root=/sax

gcp.dataproc.restendpoint=https://dataproc.googleapis.com/v1/
gcp.compute.restendpoint=https://compute.googleapis.com/compute/v1/
deployment.environment=dev
Copy the downloaded .json key has been created for the Service account to Gathr/lib/ folder.
Edit the env-config.yaml file:
vi Gathr/conf/yaml/env-config.yamlSearch for zk: and update the zk_host:
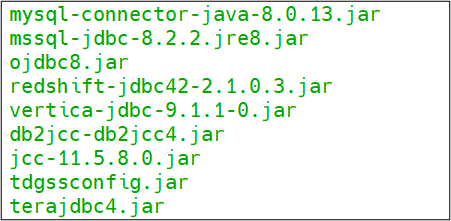
zk:
hosts: "<zk_host>:2181"
gcp: instance.url: "http://<gathr_host>:8090/gcp-dataproc-service" regions: "us-east1" ##comma separated GCP Region names gcs.config.bucket: "<gcp_bucket_name>" ##provide same gcp bucket which we have created earlier gcs.jar.uploadPath: "gs://<gcp_bucket_name>/gathr-pipelines" isEnabled: "true" databricks.isEnabled: "false" jsonPath: "<gathr_installation_path>/Gathr/lib/<service_acc_key>.json"For Gathr to connect with JDBC components like MS-SQL, Vertica, DB2, Teradata, etc., place the third party JDBC jars on Gathr/server/tomcat/lib/ and Gathr/conf/thirdpartylib/ folders. The bundle of jars will be shared with you that contains all the required jars.
Below are the jars to be placed in the above-mentioned folders.

Start Gathr now with config.reload=true,
cd Gathr/bin./startServicesServer.sh -config.reload=trueLogs are in
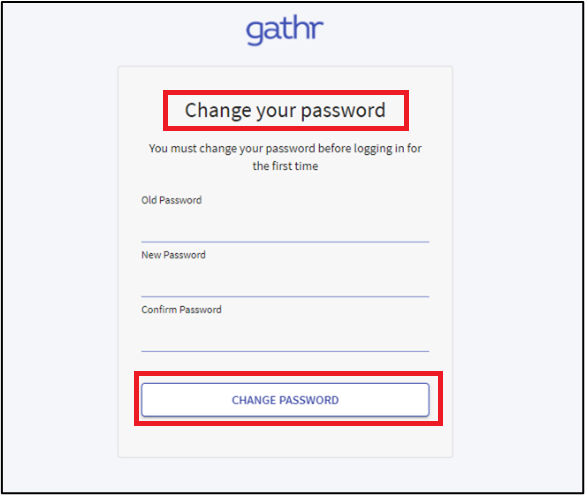
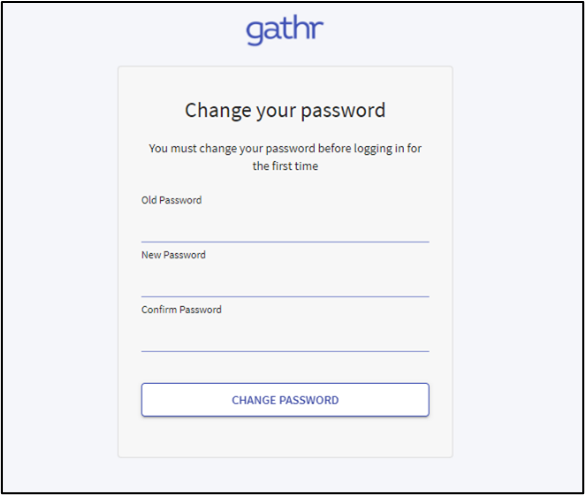
/logs and /server/tomcat/logs. You can check the log files in these directories for any issues during the installation process. Change the superuser password after you start Gathr for the first time with fresh database. Change password and then login screen will appear, and you can login with new credentials:

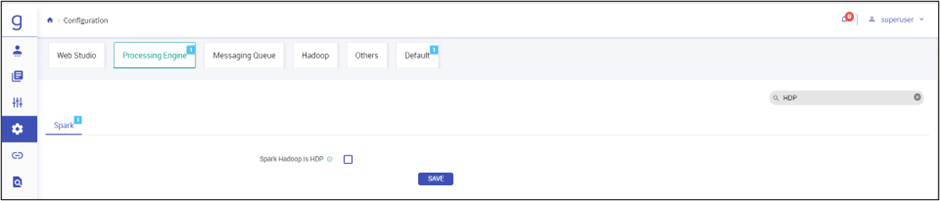
Once you login with superuser credentials, navigate to Configuration > Processing Engine > Search HDP in search box and Disable Spark Hadoop is HDP option. Click SAVE.
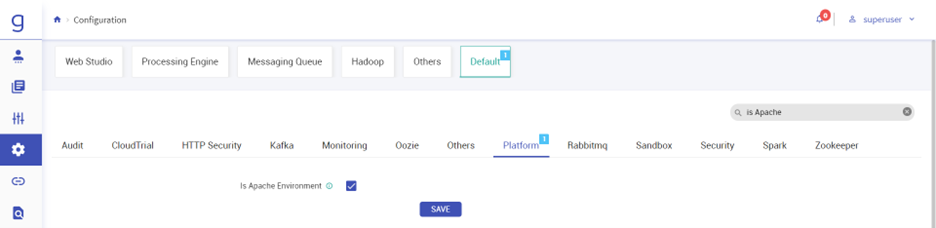
Navigate to Configuration > Default > Platform and search is Apache in search box and enable the is Apache Environment check box. Click SAVE.
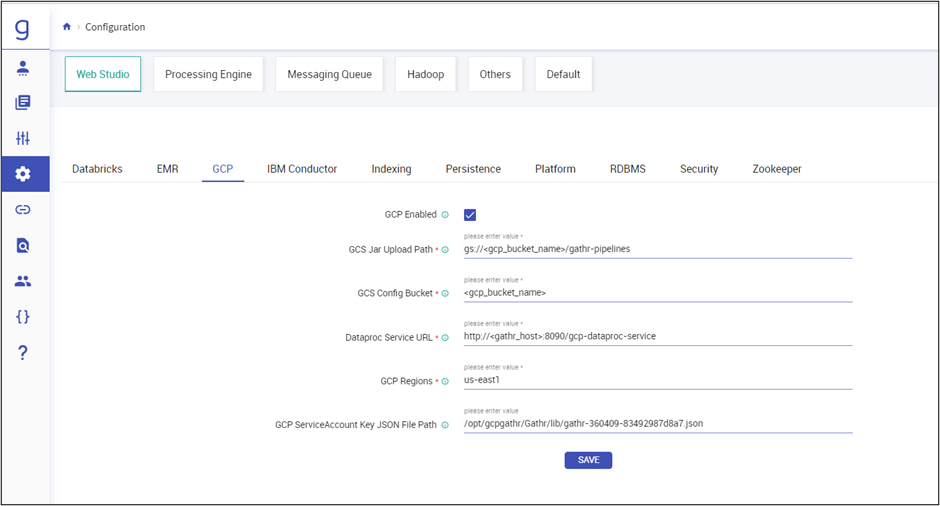
Option to change GCP Configurations from Gathr UI is available. Navigate to Configuration > Web Studio > GCP. Fron here, you can update GCP configurations like adding GCP regions, Changing bucket name, etc.
Gathr Installation (Manual Mode)
Create a directory where you want to Install Gathr & Copy the Gathr tar bundle to that directory and extract it.
Navigate to Gathr/conf directory and edit the config.properties file:
vi config.propertieszk.hosts=<zk_host>\:2181 sax.zkconfig.parent=/sax-config_<Gathr_machine_IP> cluster.manager.enabled=false loadConfigOnStartUp=true sax.zookeeper.root=/sax kerberos.security.enabled=false password.encryption.required=true deployment.mode=standalone keytab.conf.file.path=/tmp/kerberosRun DDL & DML scrips for Gathr database:
If Gathr is running on a different server other than the postgres server, then before running db_dump install postgres clients on Gathr VM.
Create a db_dump.sh script as mentioned below:
cd Gathr/db_dumpvi db_dump.sh#!/bin/bash #run command ./<shell script> <machin ip where DB is present> <scrpt location till db_dump> <DB name> eg. : ./db_sql.sh 172.26.49.38 /tmp/db_dump test1234 echo "DB dump on $1 machine script are in $2 location" echo "DB name $3" if echo "$3"|grep -i act then psql -U postgres -d $3 -a -f $2/pgsql_1.2/activiti.sql -W -h $1 -w postgres else for i in pgsql_1.2 pgsql_2.0 pgsql_2.2 pgsql_3.0 pgsql_3.2 pgsql_3.3 pgsql_3.4 pgsql_3.5 pgsql_3.6 pgsql_3.7 pgsql_3.8 pgsql_4.0 pgsql_4.1 pgsql_4.2 pgsql_4.3 pgsql_4.4 pgsql_4.4.1 pgsql_4.5 pgsql_4.6 pgsql_4.7 pgsql_4.8 pgsql_4.9 pgsql_4.9.1 pgsql_4.9.2 pgsql_4.9.3 pgsql_4.9.3.1 pgsql_5.1.0 pgsql_5.1.1 pgsql_5.3.0 pgsql_5.3.1 do if echo $i|grep -i pqsql_1.2 then for j in streamanalytix_DDL.sql streamanalytix_DML.sql logmonitoring_DML.sql do psql -U postgres -d $3 -a -f $2/$i/$j -W -h $1 -w postgres done else for j in streamanalytix_DDL.sql streamanalytix_DML.sql do psql -U postgres -d $3 -a -f $2/$i/$j -W -h $1 -w postgres done fi done fichmod +x db_dump.shexport PGPASSWORD=<postgres_password>Next, run the below script:
./db_dump.sh <postgres_IP> <Gathr_installation_dir>/Gathr/db_dump <database_name>Copy your downloaded .json key that has been created for Service account to Gathr/lib/ folder.
Edit env-config.yaml
vi Gathr/conf/yaml/env-config.yamla) Search zk: and edit the zk configurations:
zk:
               hosts: "<zk_host>:2181"
b) Search jdbc: and update database configurations:
jdbc:
               password: "<postgres_password>"
               driver: "org.postgresql.Driver"
               url: "jdbc:postgresql://<postgres_IP>:5432/<db_name>"
               username: "postgres"
c) Search database.dialect: and update as per the database:
database.dialect: "postgresql"d) Search rabbitmq: and update RabbitMQ configurations:
rabbitmq:
               password: "<rmq_password>"
               port: "5672"
               isSSLEnabled: "false"
               stompUrl: "http://<rmq_host>:15674/stomp"
               host: "<rmq_host>:5672"
               virtualHost: "/"
               username: "<rmq_username>"
               web.url: "http://<rmq_host>:15672"
e) Search elasticsearch: and update Elasticsearch configurations.
elasticsearch:
   cluster.name: "<es_cluster_name>"
   connect: “<es_host>:9300"
   http.connect: "<es_host>:9200"
   embedded.data.dir: "/tmp/eDataDir"
   embedded.http.enabled: "true"
   embedded.node.name: "sax_es_node"
   embedded.data.enabled: "true"
   embedded.local.enabled: "false"
   httpPort: "9200"
   zone: "us-east-1"
   security.enabled: "false"
   authentication.enabled: "false"
   username: ""
   password: ""
   ssl.enabled: "false"
   keystore.path: "es-certificate.p12"
   keystore.password: ""
   connectiontimeout: "30"
   sockettimeout: "50"
   requesttimeout: "50"
   http.port: "9200"
f) Search sax.installation.dir: and update the Gathr Installation path.
sax.installation.dir: "<gathr_Installation_dir>/Gathr"g) Search sax.web.url: and update the Gathr URL.
sax.web.url: "http://<gathr_host>:8090/Gathr"h) Search sax.ui.host and sax.ui.port and update the respective values.
sax.ui.host: "<gathr_host>"
sax.ui.port: "8090"
i) Search gcp: and update the GCP Configurations. Copy the downloaded .json key created for Service account to Gathr/lib/ folder.
gcp:
   instance.url: "http://<gathr_host>:8090/gcp-dataproc-service"
   regions: "us-east1"  ## comma separated list of GCP regions.
   gcs.config.bucket: "<gcs_bucket>"    ##Specify the bucket we created after launching VM’s.
   gcs.jar.uploadPath: "gs://<gcs_bucket>/gathr-pipelines"
   isEnabled: "true"
   databricks.isEnabled: "false"
   jsonPath: "<gathr_Installation_dir>/Gathr/lib/<gathr_key.json>"
j) Search for “isHDP:” and set the property to false:
hadoop:
   isHDP: "false"
Edit common.yaml file:
vi Gathr/conf/yaml/common.yamlSearch for isApache: and set that property as true.
isApache: "true"Navigate to Gathr/server directory and extract the tomcat folder.
Now copy Gathr.war and gcp-dataproc-service.war from Gathr/lib/ directory to Gathr/server/tomcat/webapps/ directory.
Unzip Gathr.war and gcp-dataproc-service.war
cd Gathr/server/tomcat/webapps/unzip Gathr.war -d Gathr && rm -rf Gathr.warunzip gcp-dataproc-service.war -d gcp-dataproc-service && rm -rf gcp-dataproc-service.warEdit the application.properties file in gcp-dataproc-service/WEB-INF/classes/
cd Gathr/server/tomcat/webappsvi gcp-dataproc-service/WEB-INF/classes/application.propertiesUpdate the JDBC and Zookeeper details:
#DEV
spring.datasource.url=jdbc:postgresql://<postgres_IP>:5432/<db_name>
spring.datasource.username=postgres
spring.datasource.password=<postgres_password>
spring.datasource.driver-class-name=org.postgresql.Driver

zk.hosts=<zk_host>\:2181
zk.root=/sax

gcp.dataproc.restendpoint=https://dataproc.googleapis.com/v1/
gcp.compute.restendpoint=https://compute.googleapis.com/compute/v1/
deployment.environment=dev
For Gathr to connect to JDBC components like MS-SQL, Vertica, DB2, Teradata, etc., place the third party JDBC jars in Gathr/server/tomcat/lib/ and Gathr/conf/thirdpartylib/ folders.
The bundle of jars will be shared with you that contains all the required jars.
Below is the list of jars which we need to place in the above-mentioned folders.
Start Gathr with config.reload=true,
cd Gathr/bin./startServicesServer.sh -config.reload=trueLogs are available in
/logs and /server/tomcat/logs. You can check the log files in these directories for any issues during the installation process.
Open Gathr:
http://<gathr_host>:8090/GathrAccept the End user License agreement and Click Next.
Upload the license and click on Confirm.
Change the superuser password after you start Gathr for the first time with fresh database. Change password and then login screen will appear, and you can login with new credentials.

You can also change GCP Configurations from Gathr UI. Navigate to Configuration > Web Studio > GCP. Update GCP configurations like adding GCP regions, changing bucket name, etc.

Post Deployment Setup in Gathr
After successfully deploying Gathr, the post-deployment setup involves key tasks to ensure a seamless and secure experience. This includes creating a workspace and user, conducting basic sanity checks for the Gathr application, enabling SSL for enhanced security, configuring externalization properties for partial templates, and initiating the Frontail server to monitor the Gathr application effectively.
Create Workspace and User
You can create workspace and user in Gathr. You can authenticate Workspace user for GCP, either by login as Superuser and then navigate to Manage Workspace -> Create Workspace section or by login as Workspace user and then navigate to Manager Users -> Edit User section.
Login to Gathr using superuser creds and navigate to Manage Workspace tab.
Do a Basic Sanity Check
Performing a basic sanity check is crucial before using Gathr. This step ensures that all essential components are functioning properly, laying the foundation for a smooth experience.
Launch Dataproc Cluster from Gathr
Effortlessly manage Dataproc clusters in Gathr with the steps given below:
Login to Gathr Application with your workspace user you have created in previous steps.
Navigate to the Cluster List View tab:
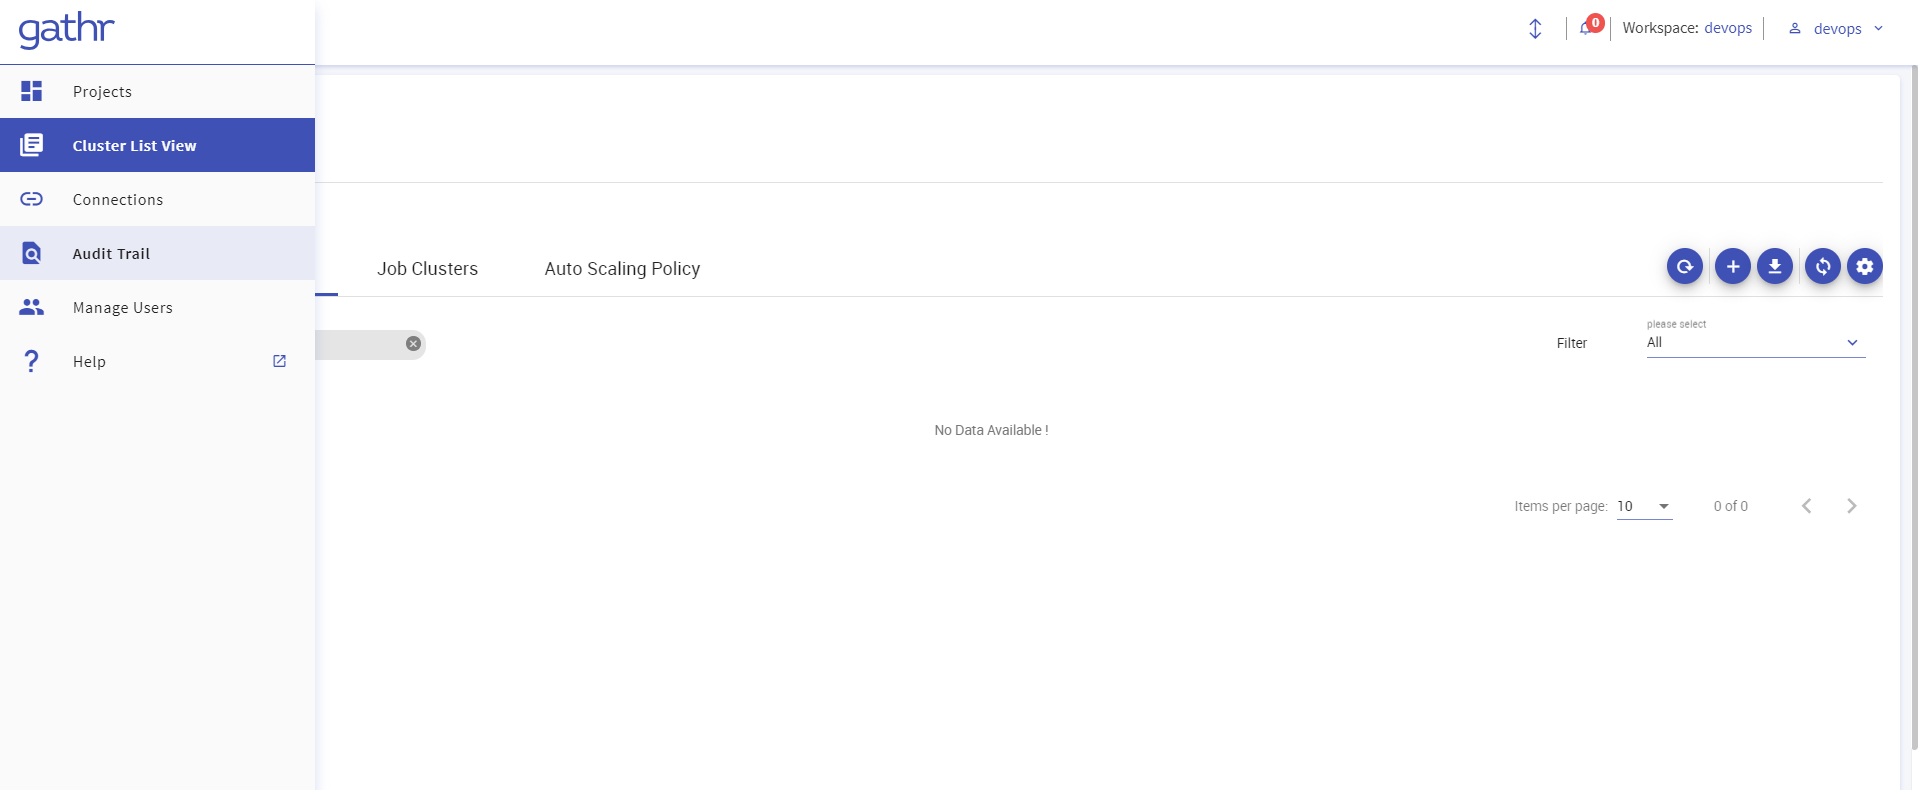
Click on “+” icon on the right, to create a new cluster.
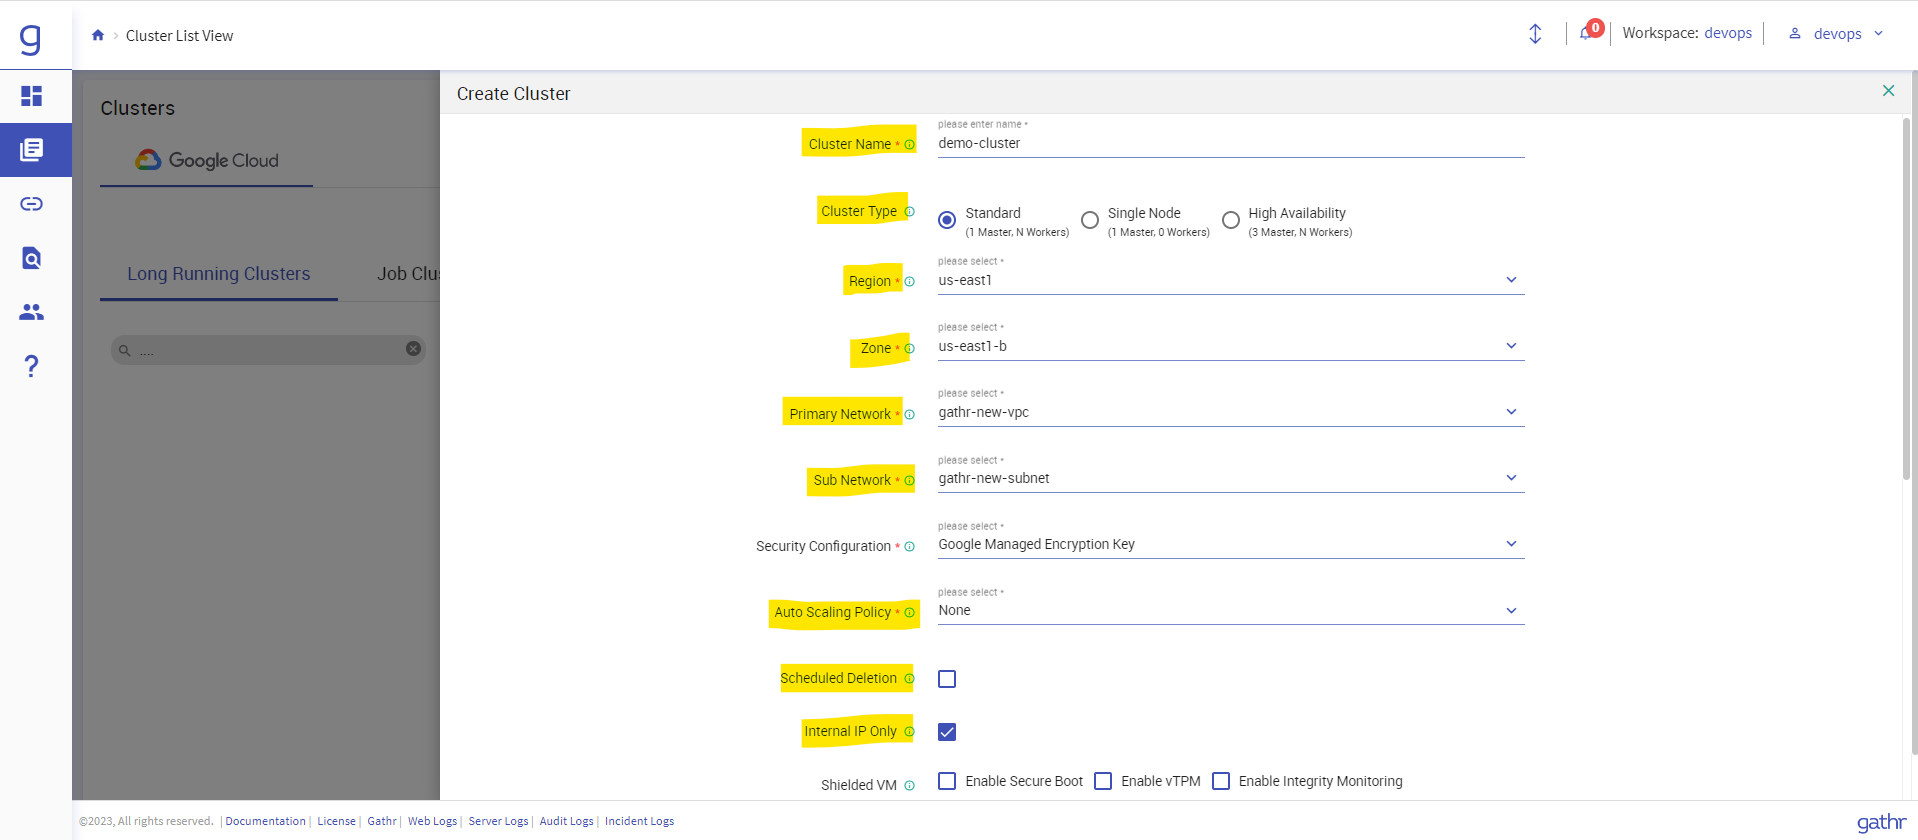
Provide the below details:
Cluster Name: Any random name to your dataproc cluster
Cluster Type: Standard, Single Node or HA.
Region, Zone: Region and zone where you want to launch cluster.
Primary Network: VPC network which we created.
Subnetwork: Subnet which we created.
Autoscaling Policy: you can create an Autoscaling policy if you want GCP to manage the scaling of cluster resources based on the load. To create a policy, Go to Cluster list view -> Auto Scaling Policy -> “+” icon to create a new policy. (Here we are going with None option for basic Sanity)
Scheduled deletion: Enable this option to delete your cluster on a scheduled time or for some idle period.
Internal IP only: enable this option to launch dataproc cluster with private IP only.
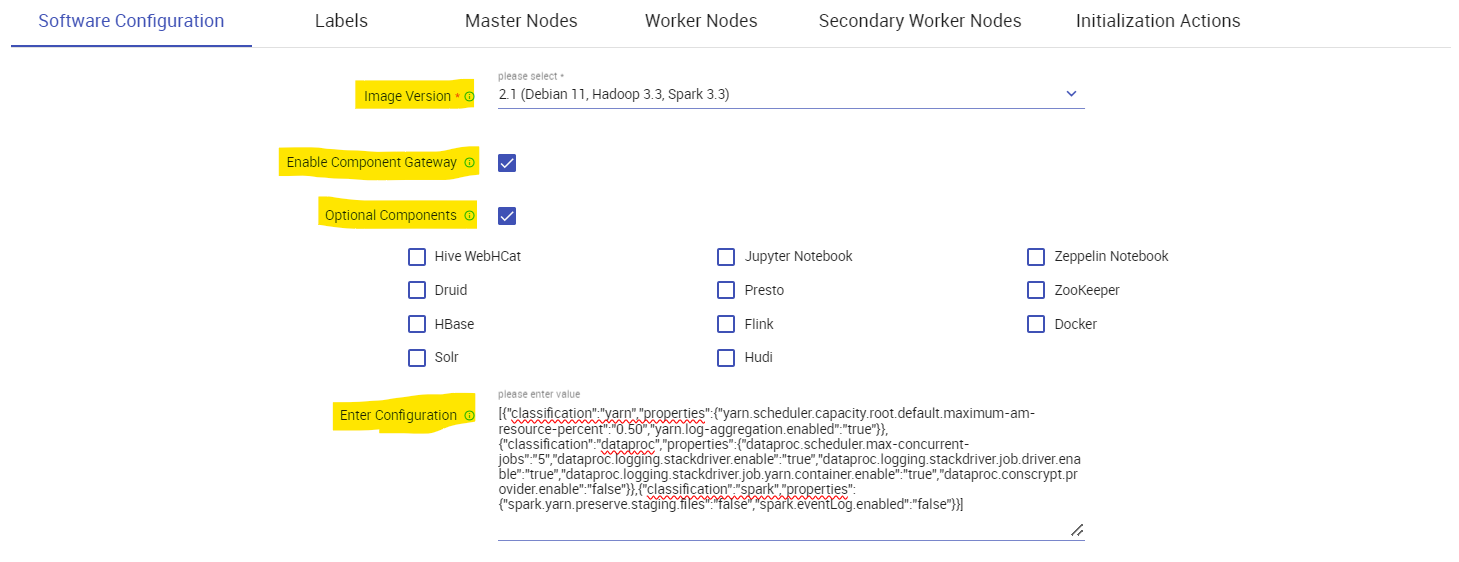
On the Software configuration page Select:
Image Version: The image which you dataproc cluster will be using (Debian 11, Rocky Linux 8, or Ubuntu 20.04)
Optional Components: You can select additional services to run on your dataproc cluster like Solr, HBase, Zookeeper, etc.
Enable Component Gateway: Enable this if you want to access Web UI of the Optional components you selected above.
Enter Configurations: You can pass spark configurations using this section.
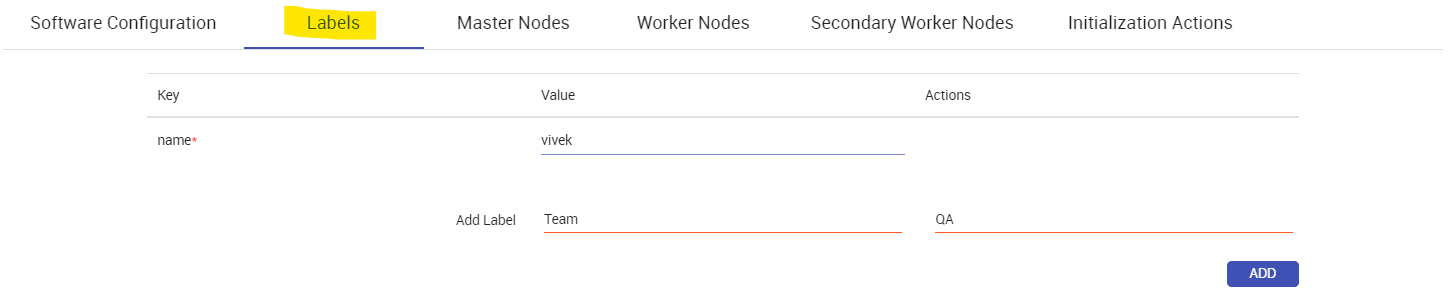
In labels Section you can add labels to your dataproc cluster:
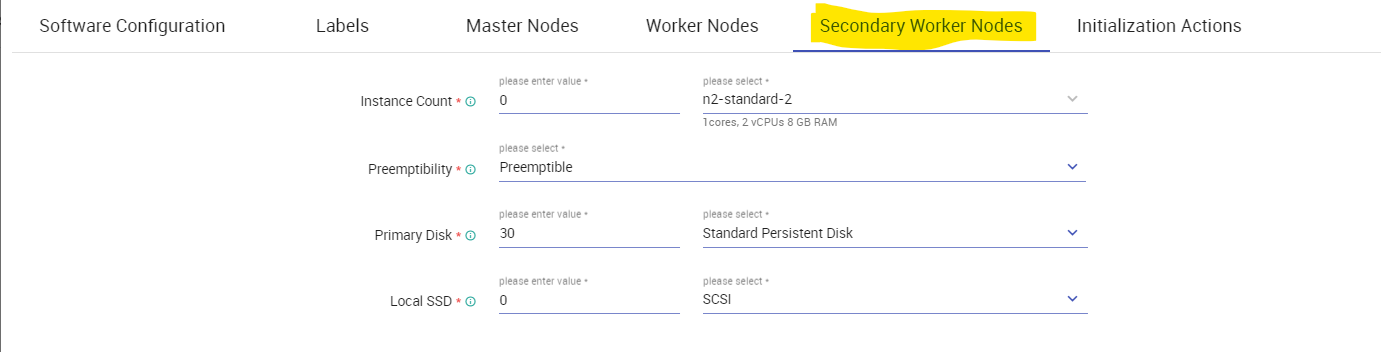
In Master Nodes & Worker Nodes Section you can select Machine type, Series, Instance type, Disk for your Master, and worker nodes respectively.
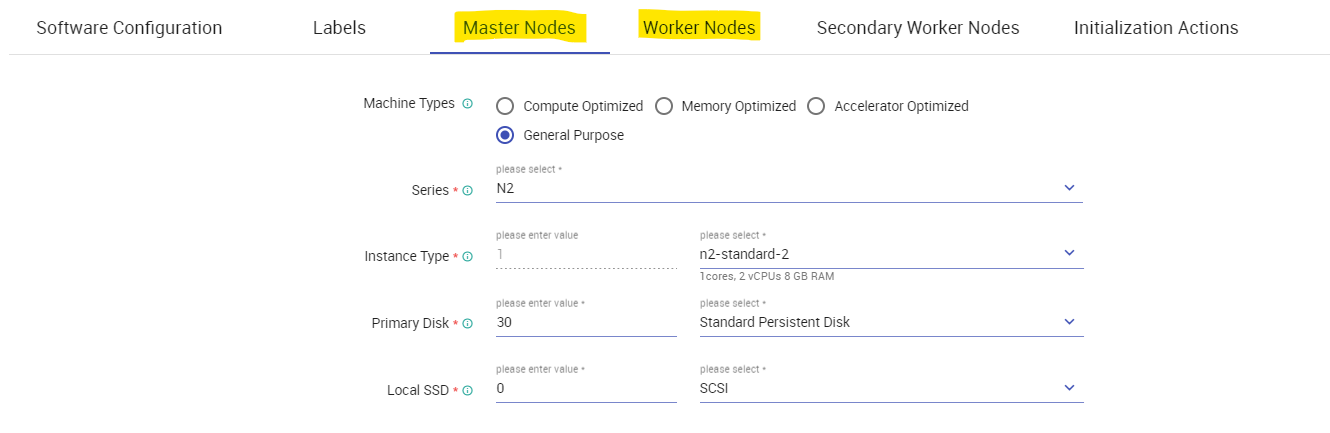
You can also add secondary worker nodes if required. By default, the instance count for Secondary worker node would be zero (0).
In Initialization actions, you can give bootstrap scripts to run on the dataproc instances while launching. We can use this feature to Copy/Import our SSL certificates to the cluster, Installing python Libraries, etc.

After Providing all the details click on “SAVE AND CREATE” button -> Your Cluster will be created on GCP:
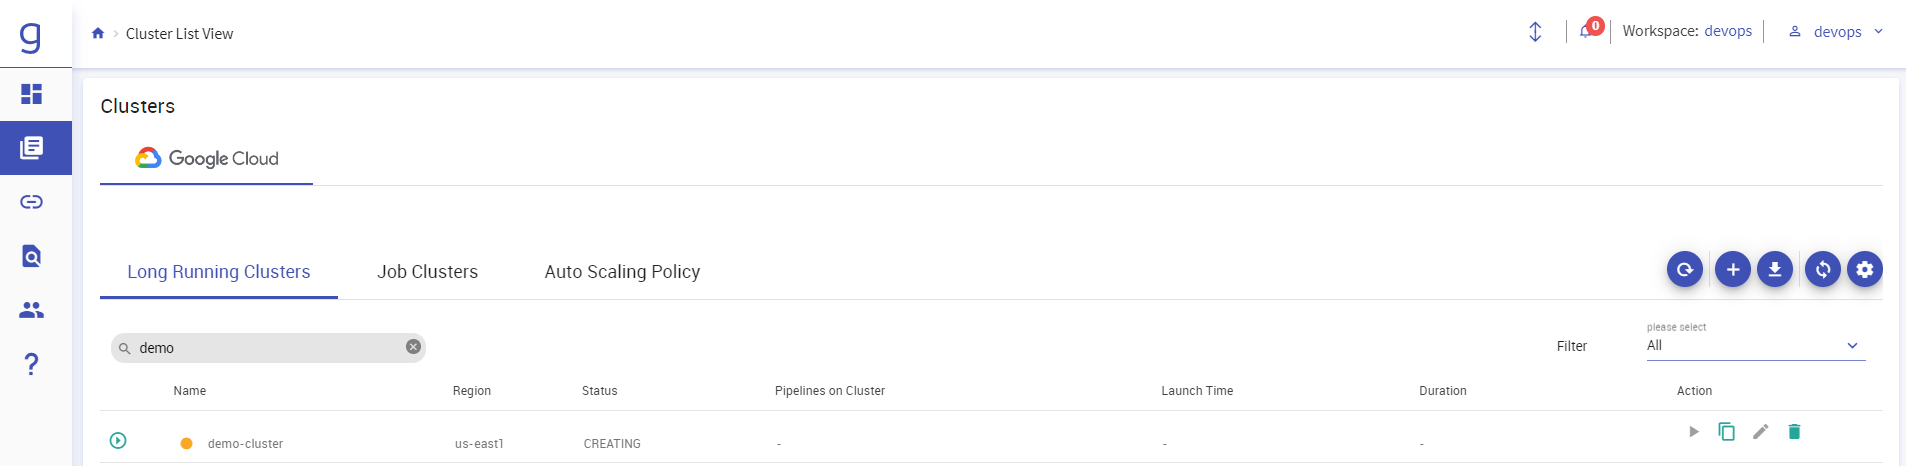
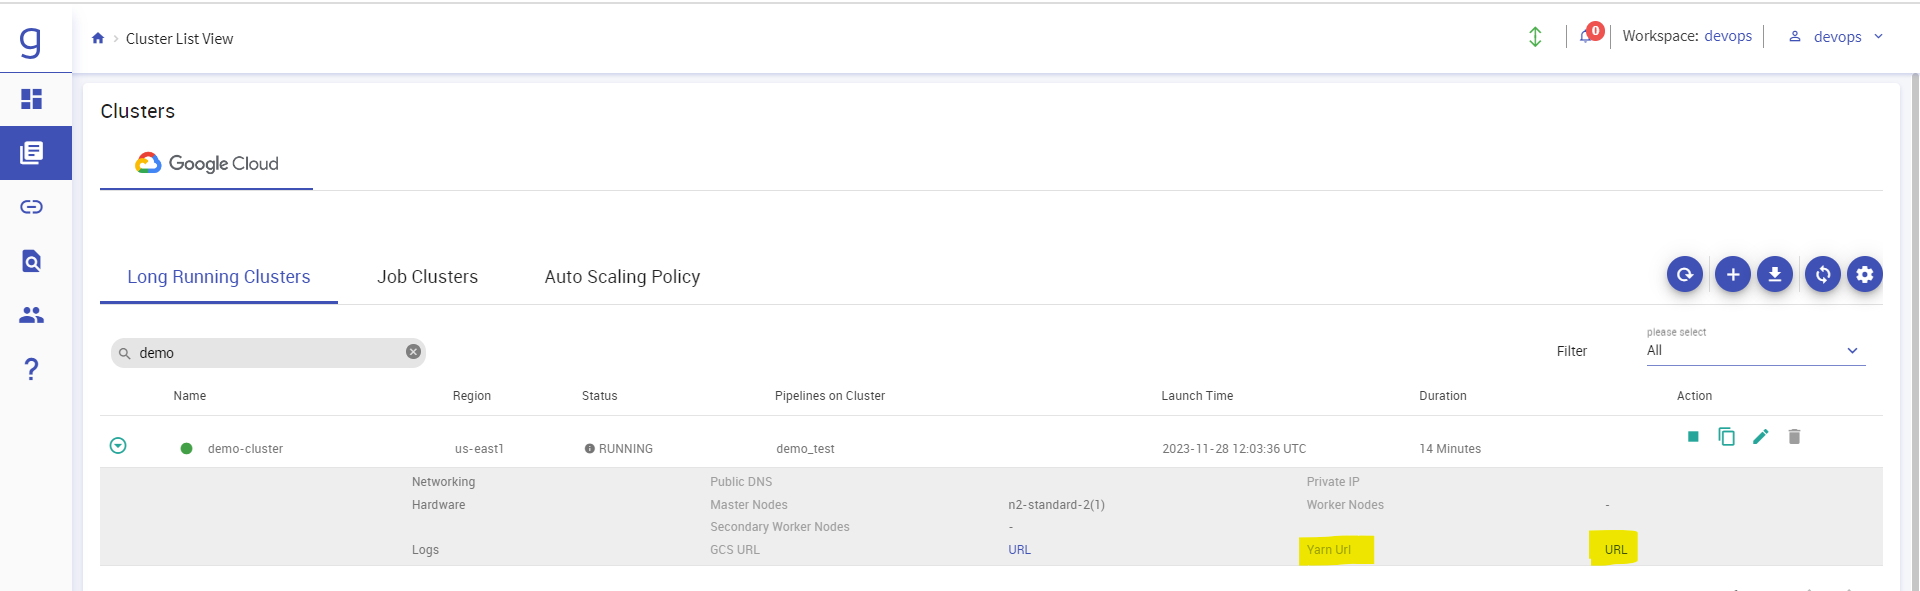
You can check the status of the cluster from GCP Console:

Submit Pipelines from Gathr
Submit a pipeline to Dataproc cluster directly from Gathr to make sure the installation is successful.
In the example given below, a sample Data Generator to RMQ pipeline is created to test the Installation.
Login with your workspace user and Navigate to the Projects tab.
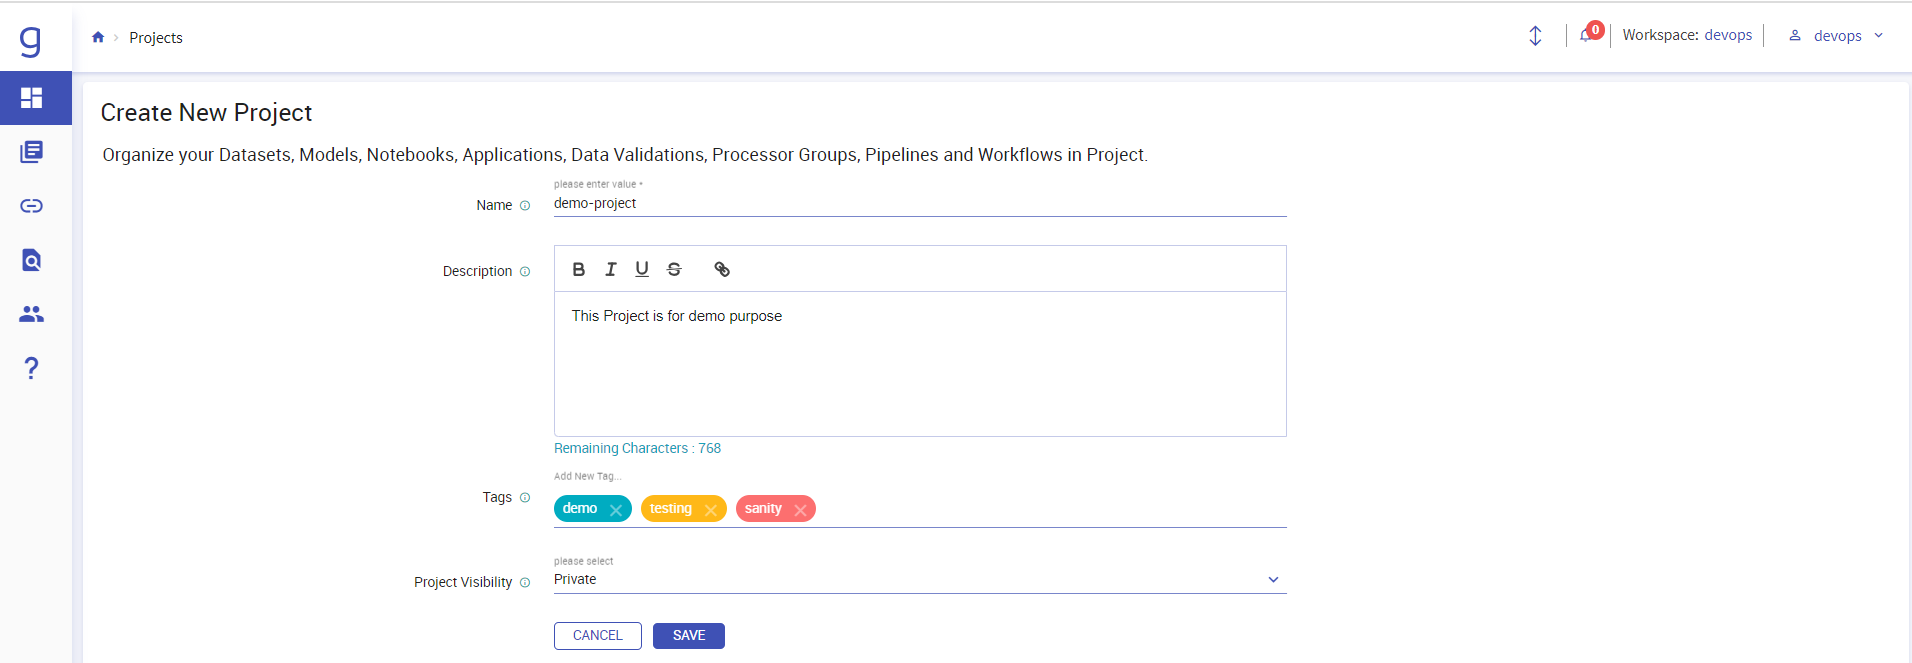
Click on “+” icon at the right to create a new Project. Here give the details of you project and click on “SAVE”.
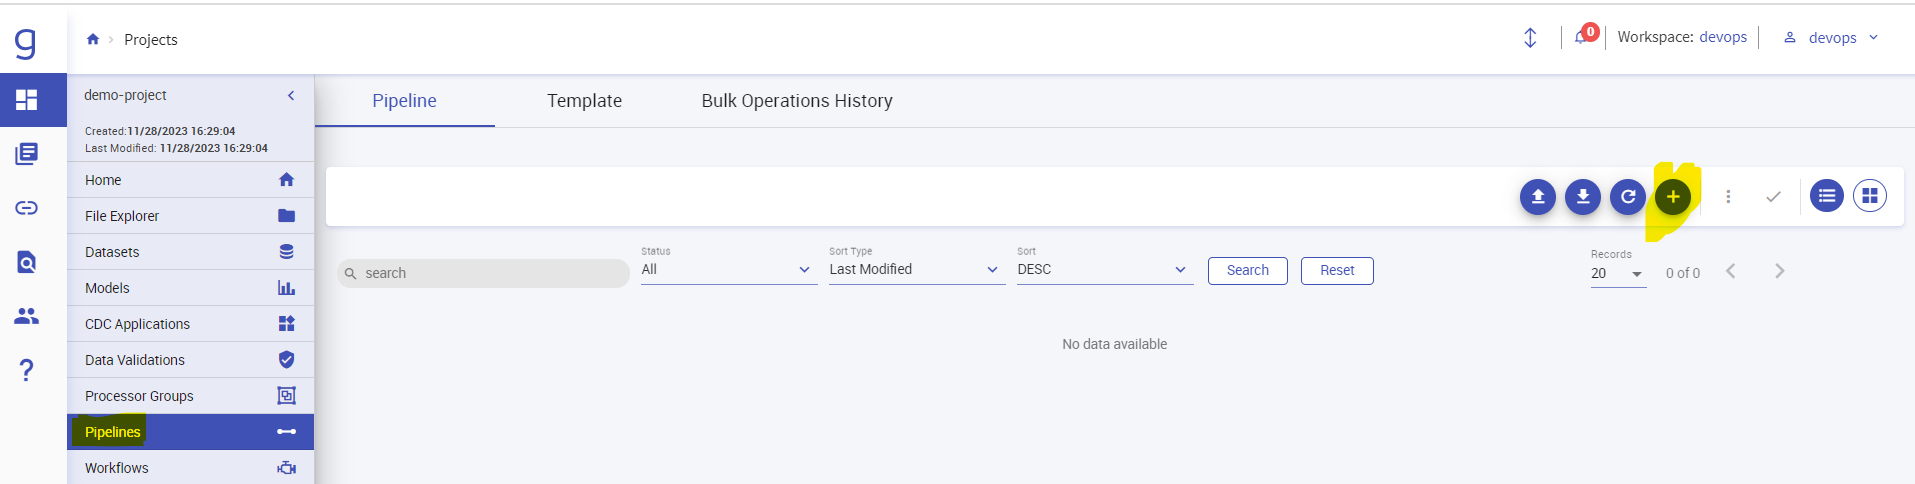
Your Project will be created, and you will be redirected inside your project. Now click on the Pipelines section on the left panel.
After that Click on “+” icon on the right to create a new pipeline.
Once you click on Create New pipeline button you inspect session will be started automatically. Wait till the session icon turns to green color.
You can also initiate the inspect session manually after logging in to your workspace.
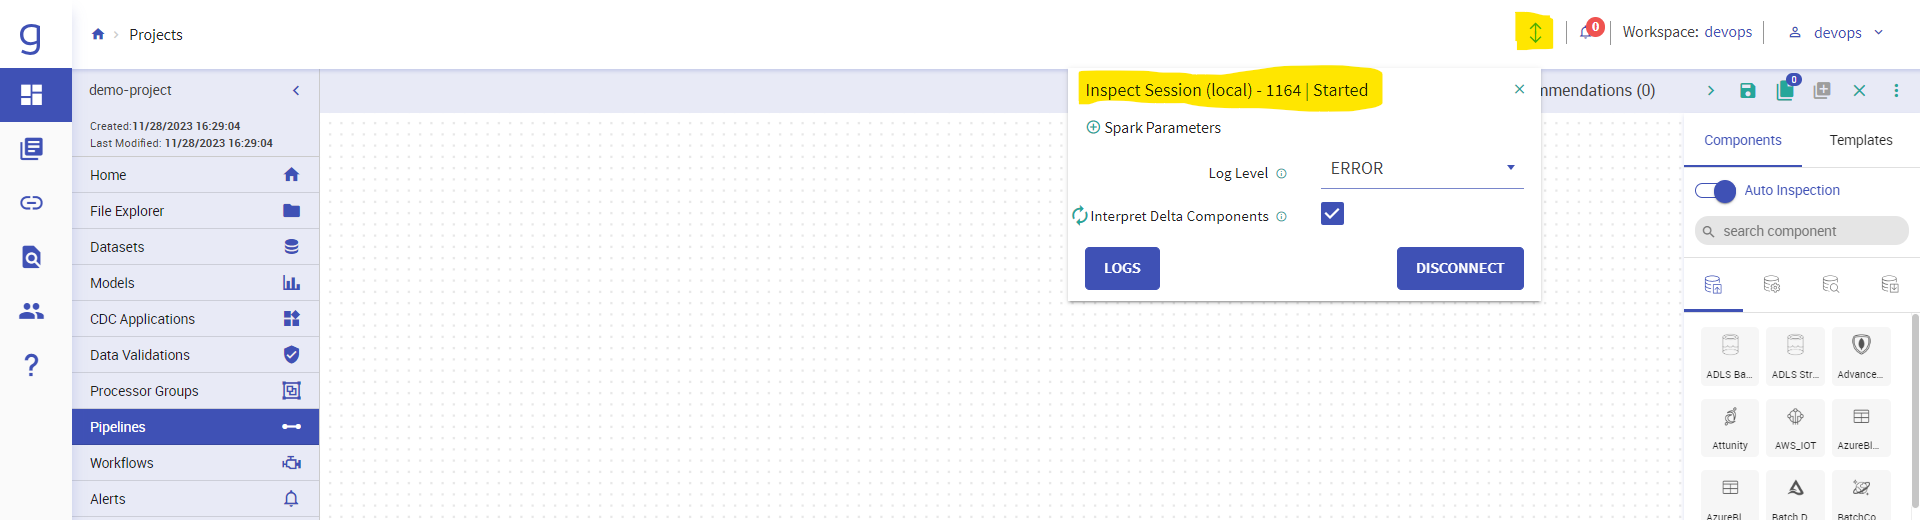
Once your Inspect session turns to green, you can start creating the pipeline.
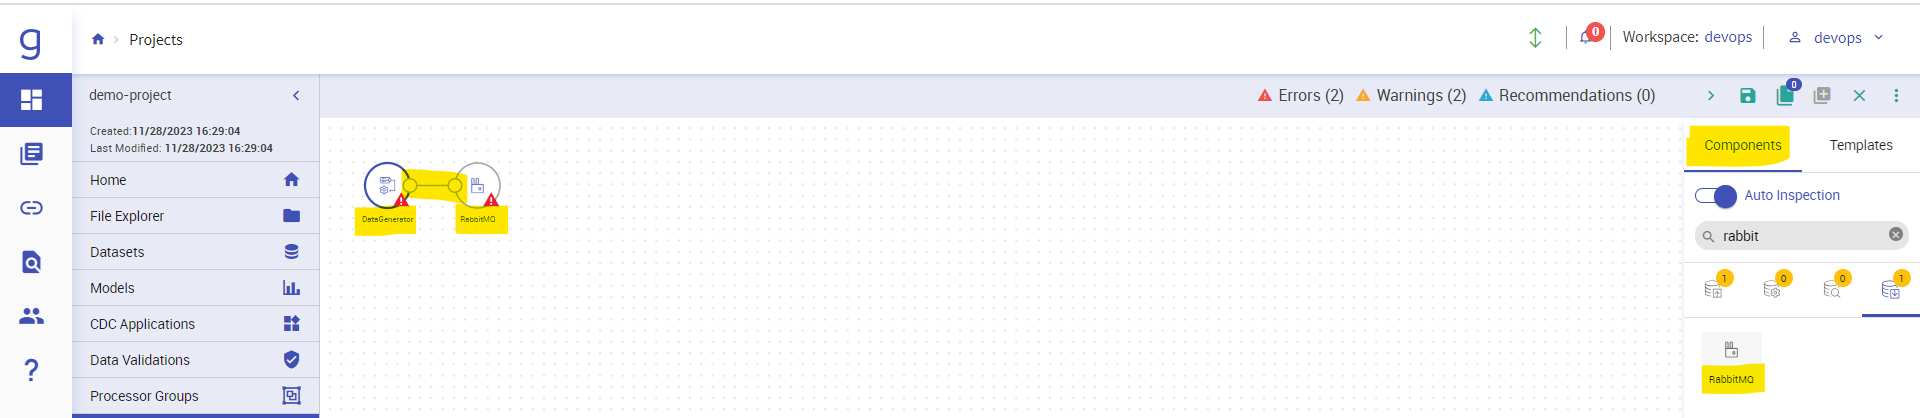
Select Data Generator as a source and RabbitMQ as emitter from the components tab on the right and join the source and emitter as seen in the image below:
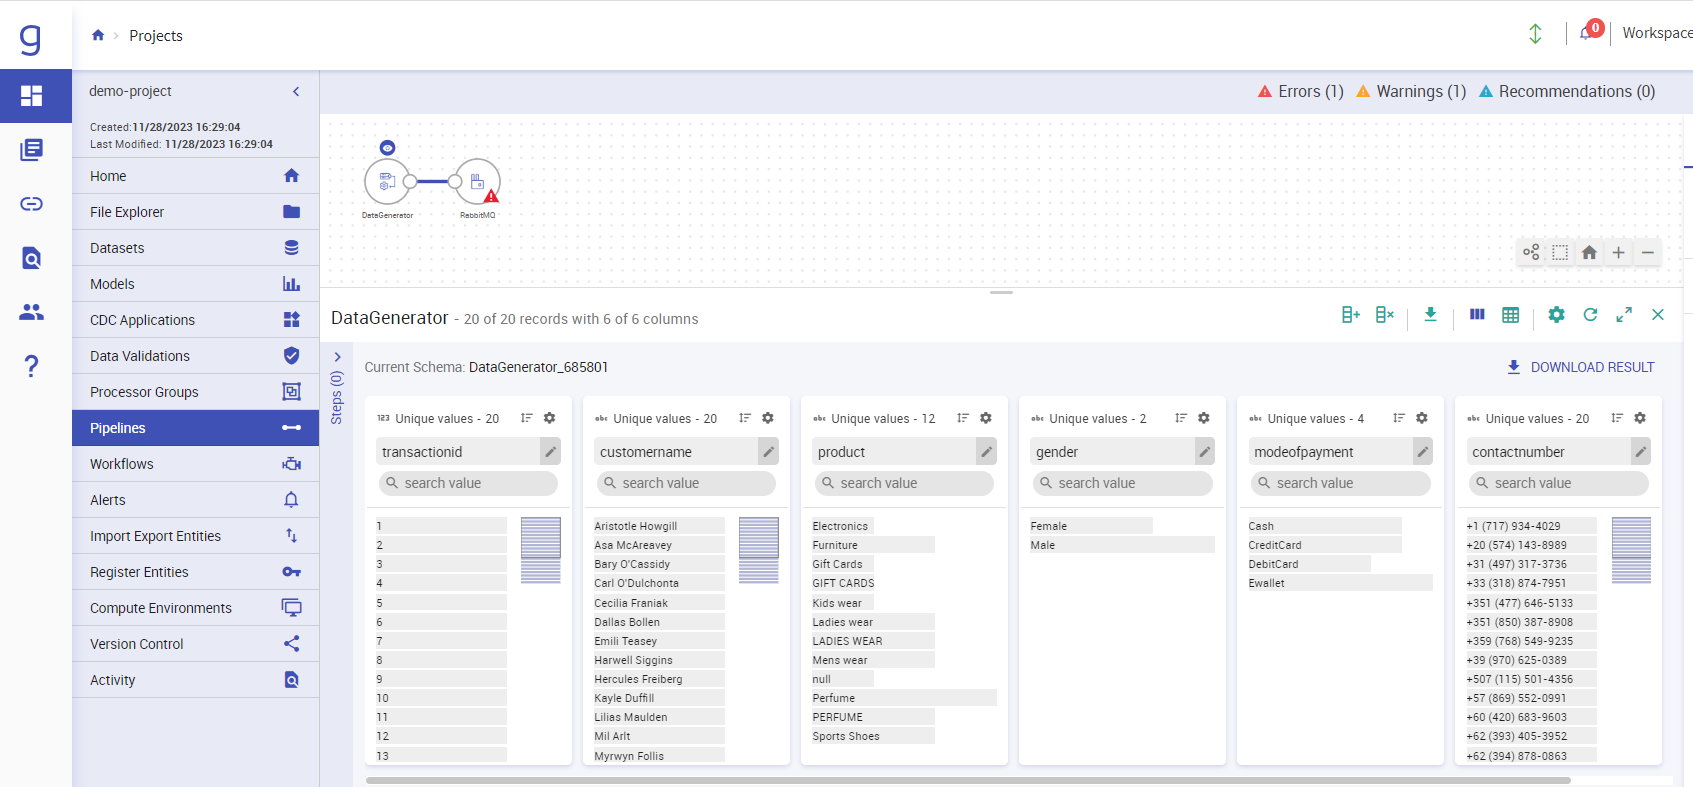
Click on Data generator component and upload any CSV file with or without headers and click on “Next” till you reach “Done”.
Now, click on RabbitMQ component, Provide the details such as Exchange Name, Queue name, Output fields, etc.
For Checkpoint Storage location you can use either HDFS, S3 or GCS connection but make sure these connections should be created on Gathr and should be available.
After Giving all the details click on “NEXT” till “DONE”.
Now save the Pipeline by clicking on the save button at top right corner and give a name to the pipeline.
After giving name click on save and exit button:
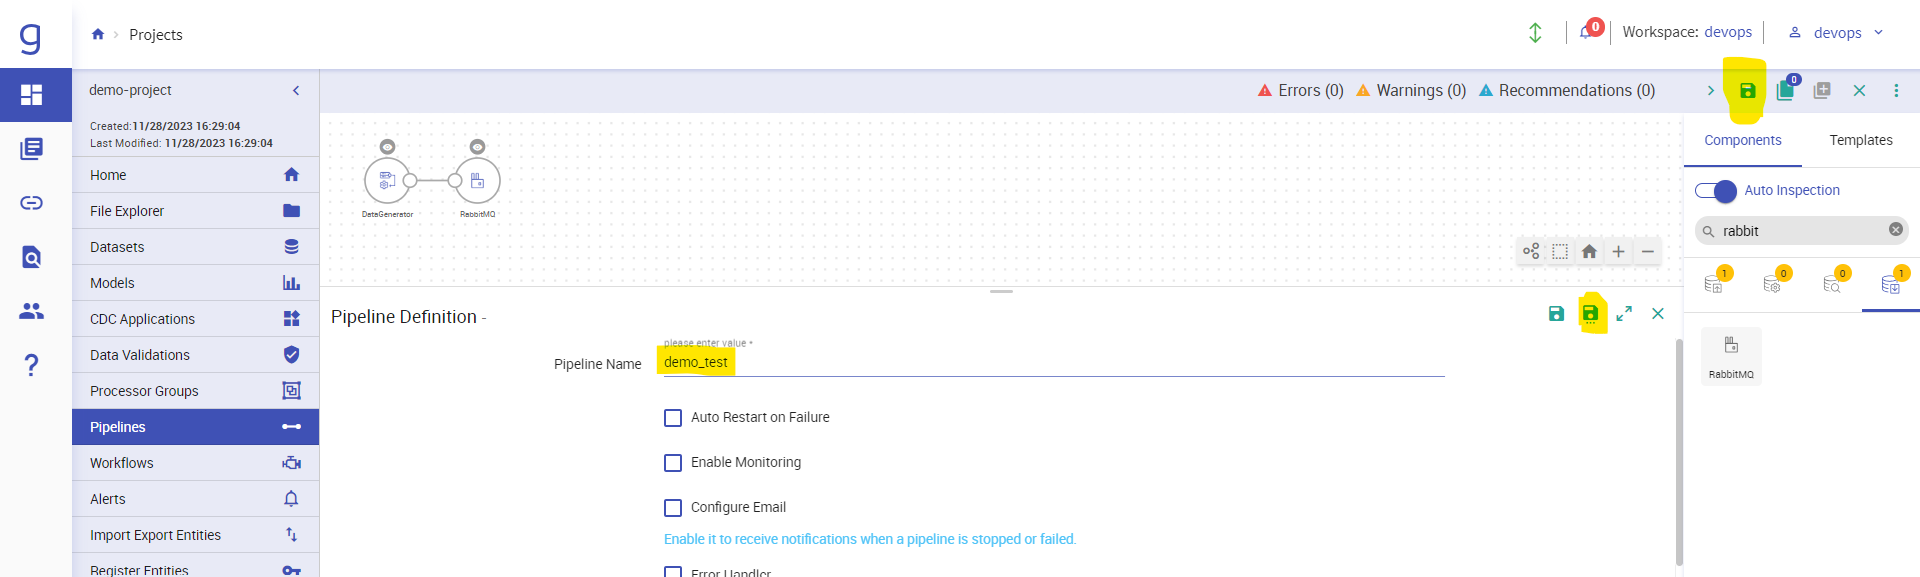
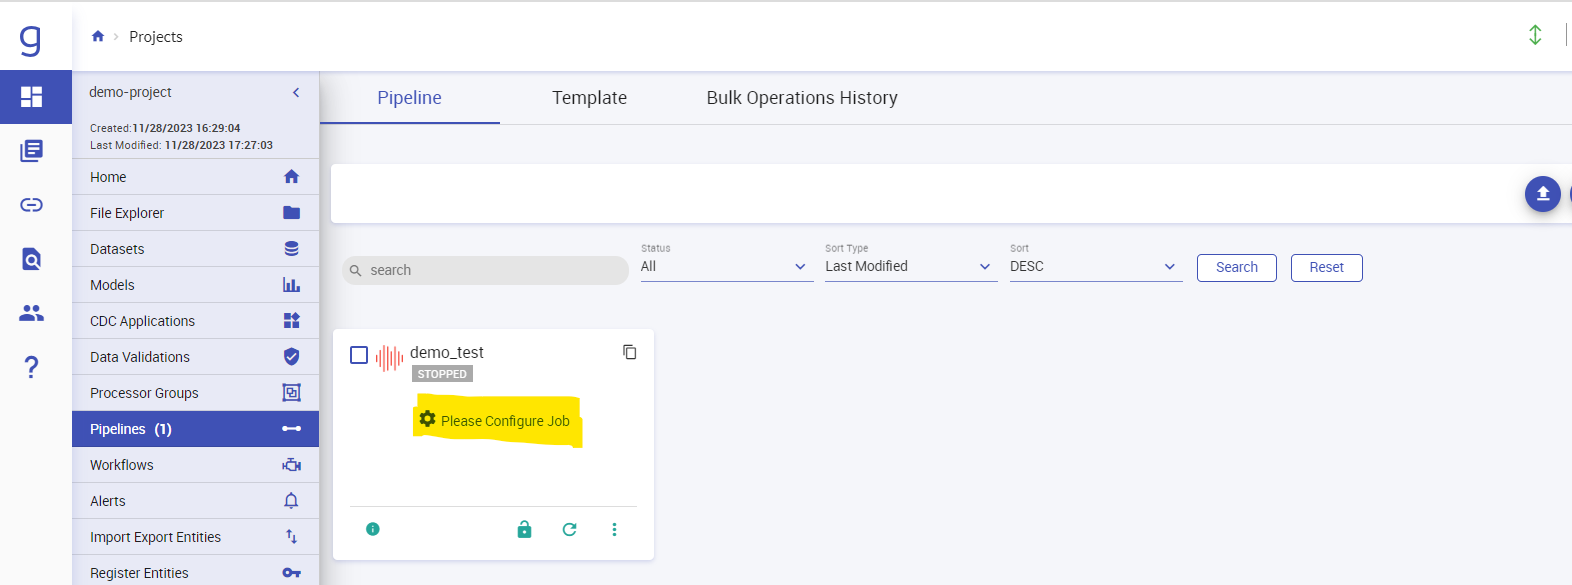
Now your pipeline is ready to be executed. We need to configure the pipeline first before starting it. Click on “Configure Job” option.
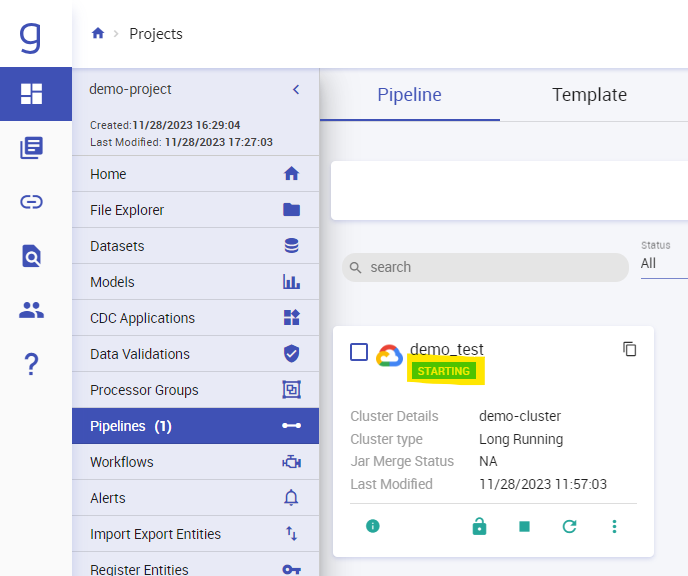
Select Cluster type as Long Running Cluster and select the cluster which we just now created and click on confirm.

Now start the pipeline. Check the status of the pipeline:
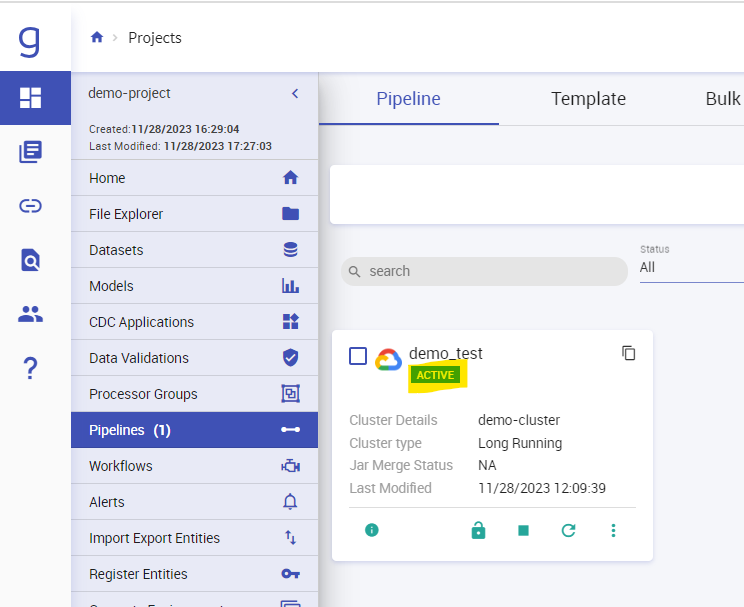
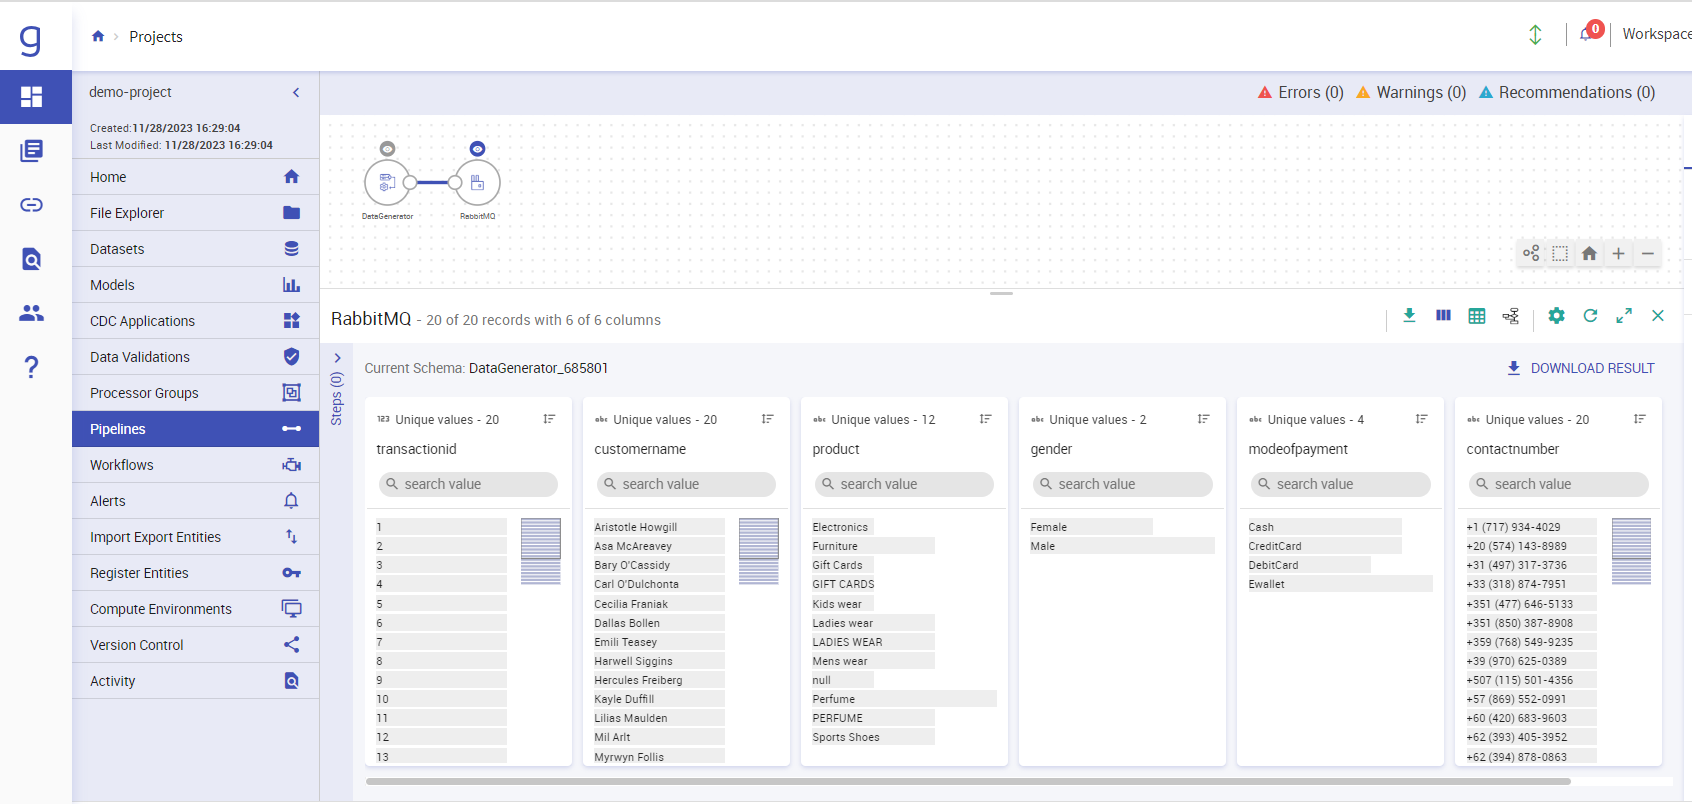
Once your pipeline is active check the data on RMQ:
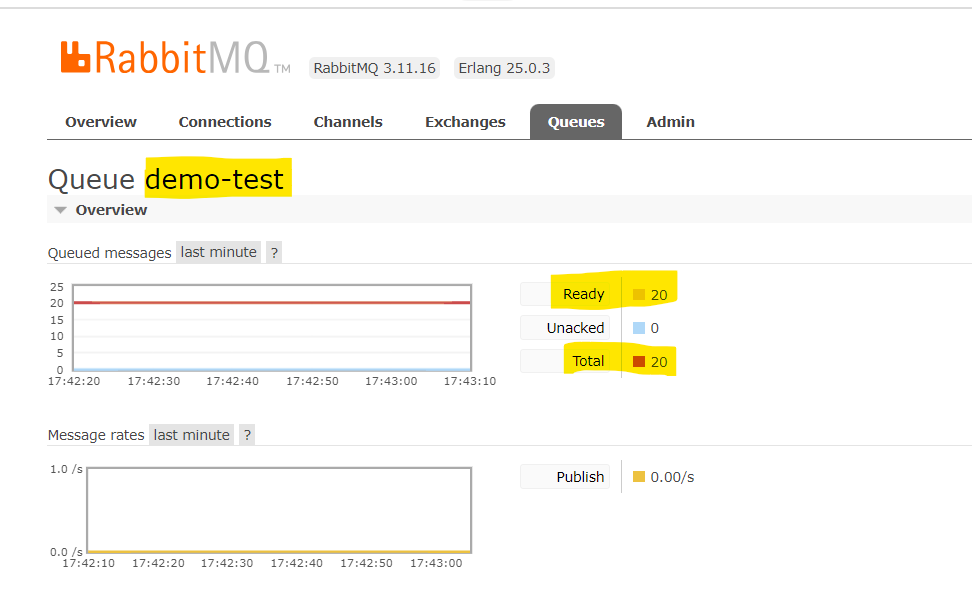
This means that the sample pipeline ran successfully and data got emitted at RMQ. You can stop the pipeline from the Gathr UI.
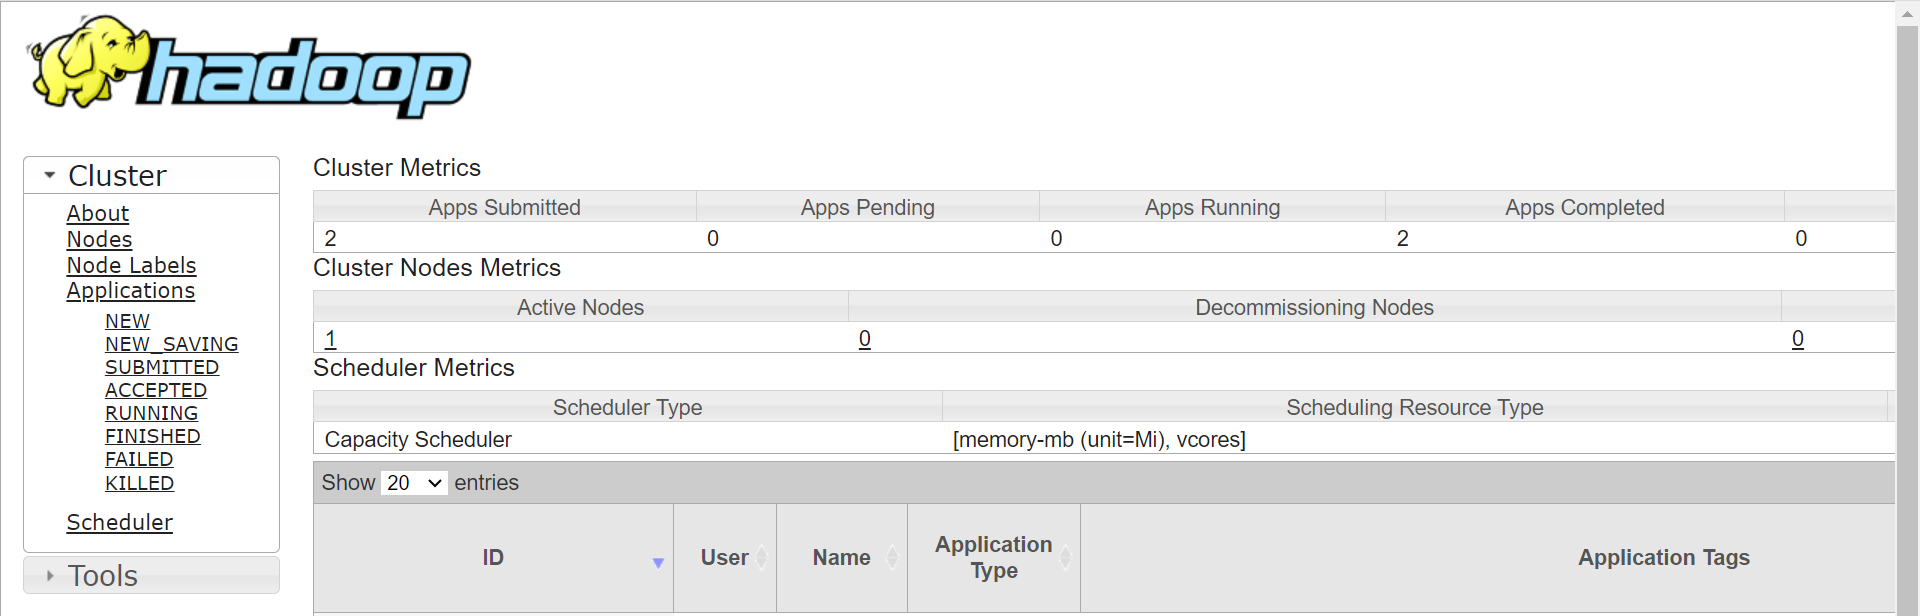
To access YARN UI, go to cluster list view page click on your cluster name -> Click on YARN URL button.
You will be redirected to YARN UI. You can check your jobs and check the logs from here.
Enable SSL
Follow the steps given below to enable SSL on Gathr.
Stop the Gathr Application.
cd Gathr/bin

./stopServicesServer.sh
Edit the server.xml file for tomcat:
cd Gathr/server/tomcat/conf

vi server.xml
Update the connector section in server.xml as below:
<Connector compressibleMimeType ="application/json,text/html,text/xml,text/css,text/javascript, application/x-javascript,application/javascript" compression="on" compressionMinSize="128" noCompressionUserAgents="gozilla, traviata" port="8443" protocol="HTTP/1.1" SSLEnabled="true"
               maxThreads="200" scheme="https" secure="true"
               clientAuth="false" sslProtocol="TLS"
               keystoreFile="/path/to/keystore.jks"
               keystorePass="<keystore_file_password>"
After Enabling SSL, Gathr will start on 8443 port. Update this change in env-config.yaml as well.
cd Gathr/conf/yaml

vi env-config.yaml
Search for “sax.ui.port:” and update the 8090 port with 8443:
sax.ui.port:
"8443"Search for “sax.web.url:” and update the port as well as change the protocol from http to https:
sax.web.url: “
https://<gathr_host>:8443/Gathr”Search for “gcp:” and update the port and protocol here as well:
gcp:
instance.url: “
https://<gathr_host>:8443/gcp-dataproc-service”
Update common.yaml file:
cd Gathr/conf/yaml

vi common.yaml
Search for “sax.http.prefix:”
sax.http.prefix: “
https://”
Now start Gathr with config.reload=true
cd Gathr/bin

./startServicesServer.sh -config.reload=true
Now you will be able to access Gathr on
https://<gathr_host>:8443/Gathr.
Enable Externalization Properties for Partial templates
Stop the Gathr Application:
cd Gathr/bin
./stopServicesServer.sh
Copy web-services.war from Gathr/lib to Gathr/server/tomcat/webapps
cd Gathr/lib/

cp web-services.war Gathr/server/tomcat/webapps/

cd Gathr/server/tomcat/webapps/
Unzip web-services.war
unzip web-services.war -d web-services && rm -rf web-services.warNow edit the application.properties & externalization.properties file:
vi web-services/WEB-INF/classes/application.propertiesHere, change the zk.host:
- zk.hosts=
<zk_host>:2181 - zk.root=/sax
vi web-services/WEB-INF/classes/externalization.propertiesHere, change below properties:
FILE_F1.PATH=
<gathr_installation_dir>/Gathr/externalRDS_R1.SCHEMA_TABLE_NAME=
<postgres_table>##Give Postgres table which you want to externalizeS3_S3INSTANCE.PATH=automation/externalization/
R1.host=
<postgres_host>R1.port=5432
R1.databasename=
<database_name>##datbase name where your externalized table is presentR1.username=postgres
R1.password=
<postgres_password>R1.driverclass=org.postgresql.Driver
R1.url=jdbc:postgresql://
<postgres_host>:5432/<postgres_table>S3INSTANCE.aws.key.id=
<AWS_ACCESS_KEY_ID>S3INSTANCE.secret.access.key=
<AWS_SECRET_ACCESS_KEY>S3INSTANCE.s3protocol=s3
S3INSTANCE.bucketname=
<S3_BUCKET>S3INSTANCE.path=user/xslt.xslt
- zk.hosts=
Update the external.config.schema.endpoint.url in common.yaml:
cd Gathr/conf/yaml

vi common.yaml
search “external.config.schema.endpoint.url:” and update the http protocol, Gathr Host, and Port as below:
If your Gathr is SSL:
- external.config.schema.endpoint.url: “https://
<gathr_host>:8443/web-services/template”
If you Gathr is non-SSL:
- external.config.schema.endpoint.url: “http://
<gathr_host>:8090/web-services/template”
- external.config.schema.endpoint.url: “https://
Start Gathr with config.reload=true
cd Gathr/bin

./startServicesServer.sh -config.reload=true
Check if externalization is enabled or not from Gathr UI:
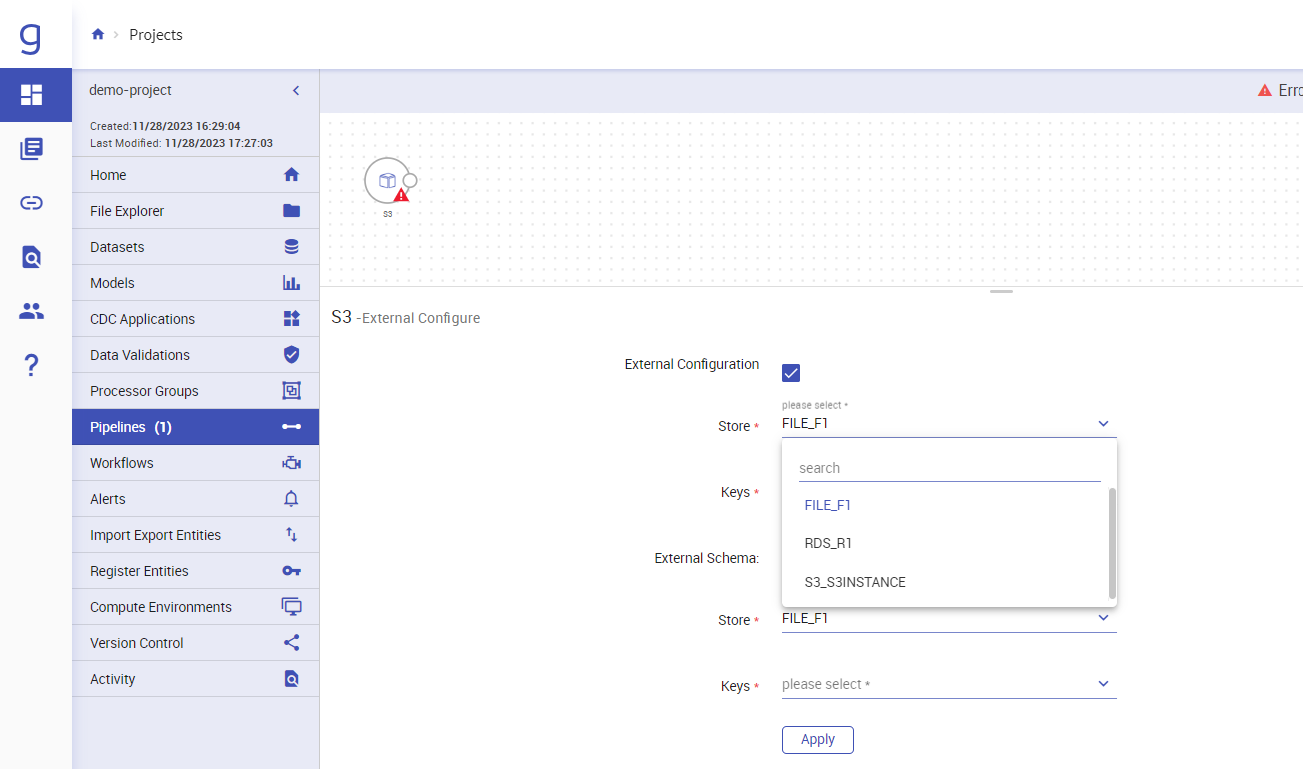
- Add any component on pipeline page and right click on that component and click externalize:
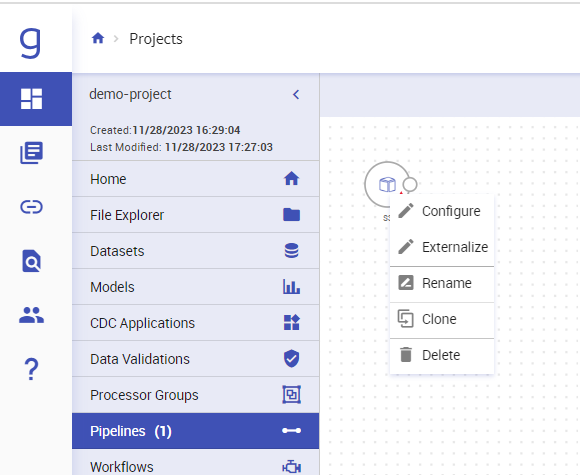
- Click on External Configuration and in Store drop down you will see 3 properties now:
Start Frontail Server
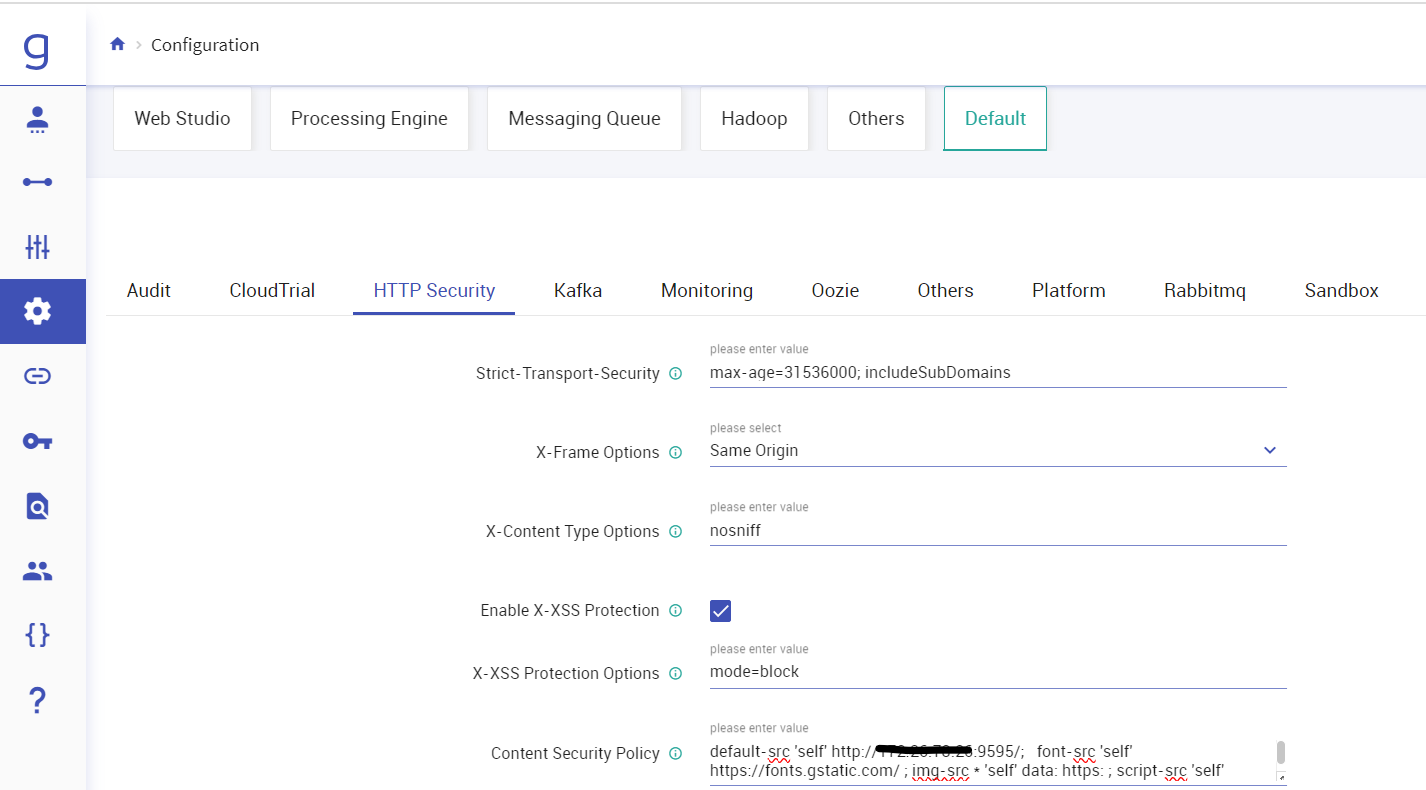
Login with superuser creds on Gathr, navigate to Configuration -> Default -> HTTP Security.
In the content security policy section Update your Gathr URL and click on “SAVE”.
In case you Gathr is SSL enabled, You need to start frontail server by providing SSL certs in arguments as below:
cd Gathr/bin

./startFrontailServer.sh -key.path=/etc/ssl/certs/my_store.key -certificate.path=/etc/ssl/certs/gathr_impetus_com.pem
Now repeat the same Step no. 1 and this time update your Gathr URL with https and 8443 port.
Now Click on web logs at the bottom of Gathr UI:

You will be able to access the web logs:

If you have any feedback on Gathr documentation, please email us!