Processors
Processors are built-in operators for processing the data by performing various transformations and analytical operations.You can use as many processors in a pipeline as you need.
StreamAnalytix supports broadly three types of data pipelines:
Storm Streaming, Spark Streaming and Spark Batch Pipelines.
For Spark streaming and Storm, you can use the following processors:
|
Processors |
Description |
Spark |
Storm |
|---|---|---|---|
|
Generate alerts based on specified rules. |
Yes |
Yes |
|
|
Performs aggregation function over streaming data.
|
Yes |
No |
|
|
Performs min, max, count, sum, or avg operations on incoming message fields. |
No |
Yes |
|
|
Implements custom logic in a pipeline. |
Yes |
Yes |
|
|
Enables registration of a user defined CEP Query.
|
No |
Yes |
|
|
Performs aggregation function on the input streams cumulatively.
|
Yes |
No |
|
|
Remove duplicate values from an input stream.
|
Yes |
No |
|
|
Enables registration of CEP queries with pre-defined actions. |
No |
Yes |
|
|
Assigns value to the missing records. |
Yes |
No |
|
|
Defines the quality rules for data and perform actions on the faulty data. |
Yes |
No |
|
|
Enables data enrichment. |
Yes |
Yes |
|
|
Produces multiple output for one input data. |
Yes |
No |
|
|
Filters input stream values based on specified rules. |
Yes |
Yes |
|
|
Groups input streams by a key. |
Yes |
No |
|
|
Detects common and unique values from two or more input streams. |
Yes |
No |
|
|
Joins two or more input streams. |
Yes |
No |
|
|
Returns Paired Dstream having dataset of (Key, Value) pairs. |
Yes |
No |
|
|
Stores RDD data into memory. |
Yes |
No |
|
|
Enables to write your custom code in Python language. |
Yes |
No |
|
|
Performs incremental updates on Hive table using events captured from RDBMS. |
Yes |
No |
|
|
Reshuffles data in the RDD to balance the data across partitions. |
Yes |
No |
|
|
Run SQL queries on streaming data. |
Yes |
No |
|
|
Add missing events in incoming batches. |
Yes |
No |
|
|
Enables to write your custom code in Python language. |
Yes |
No |
|
|
Sorts value of input stream in ascending or descending order. |
Yes |
No |
|
|
Performs take (n) operation on the dataset. |
Yes |
No |
|
|
Collects input streams over a time period or range. |
No |
Yes |
|
|
Enables to perform operations on messages that are in the form of key value pair. |
Yes |
No |
|
|
Performs union of two or more input streams. |
Yes |
No |
|
|
Collects incoming data for specified window duration. |
Yes |
No |
Alert processor notify users about occurrence of an event during pipeline execution.
Note: Alert processors used in Storm pipelines require that the “AlertPipeline” pipeline under SuperUser home> Data pipeline is running.
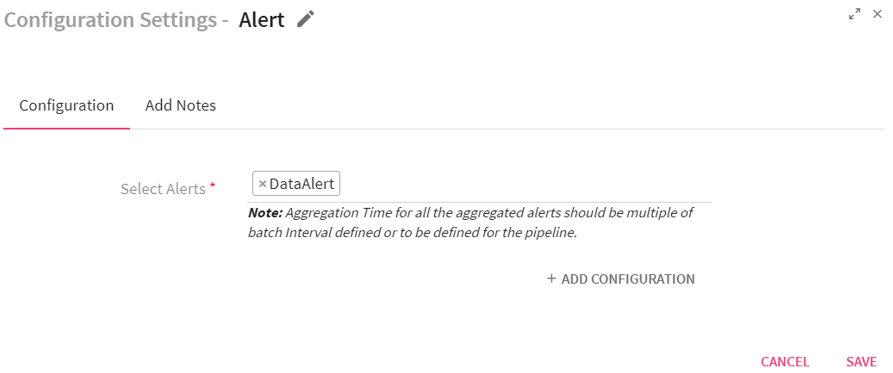
Configuring Alert Processor for Spark Streaming pipelines
To add an Alert Processor into your pipeline, drag the processor to the canvas and right click on it to configure.
|
Field |
Description |
|---|---|
|
Select Alerts |
All the configured alerts will be listed here.Select the alert that you want to be notified for. |
|
ADD CONFIGURATION |
Enables to configure additional properties. |
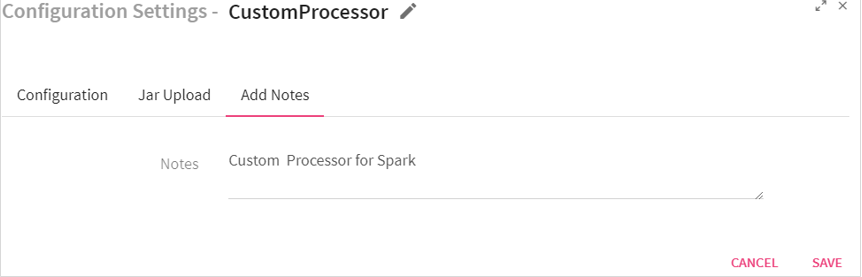
Click on the Add Notes tab.
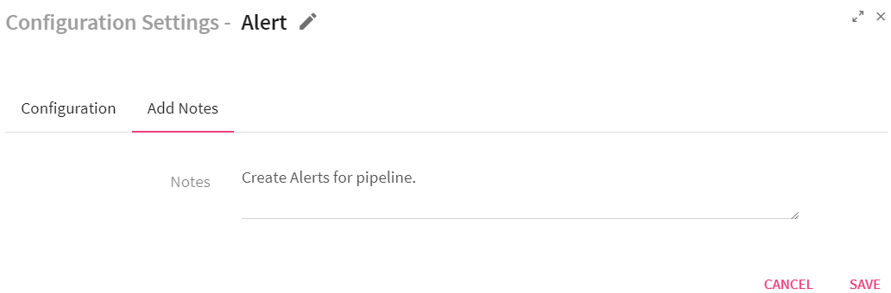
You can write notes in the space provided.
Click on the SAVE button after entering all the details.
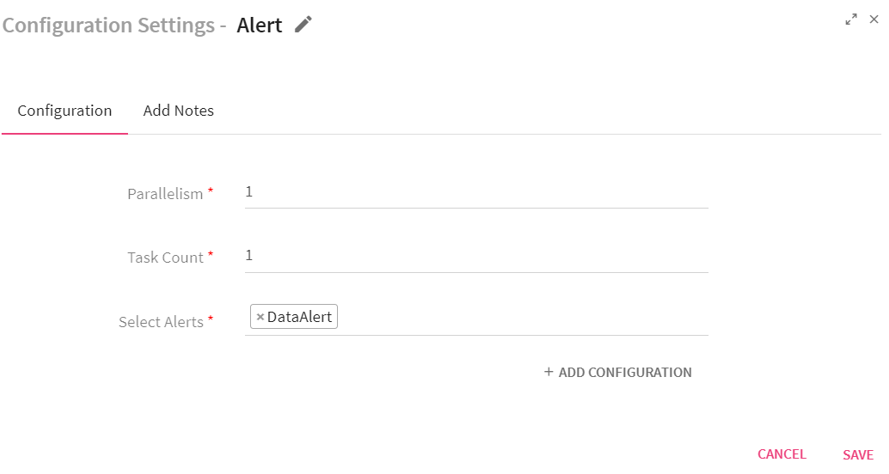
Configuring Alert Processor for Storm Streaming pipelines
To add an Alert Processor into your pipeline, drag the processor to the canvas and right click on it to configure.
|
Field |
Description |
|---|---|
|
Parallelism |
Number of executors (threads) of the processor. |
|
Task Count |
Number of instances of the processor. |
|
Select Alerts |
All the configured alerts will be listed here. Choose the alert that you want to be notified for. |
Click on the Add Notes tab. You can write notes in the space provided.
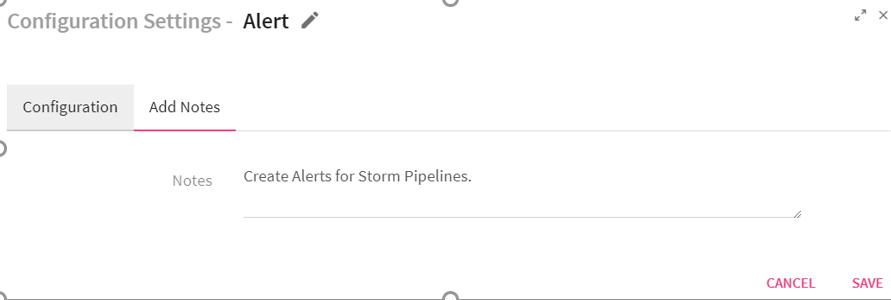
Click on the SAVE button after entering all the details.
How to View Generated Alerts
To view generated Alerts, go to your Workspace > Alerts > Information.
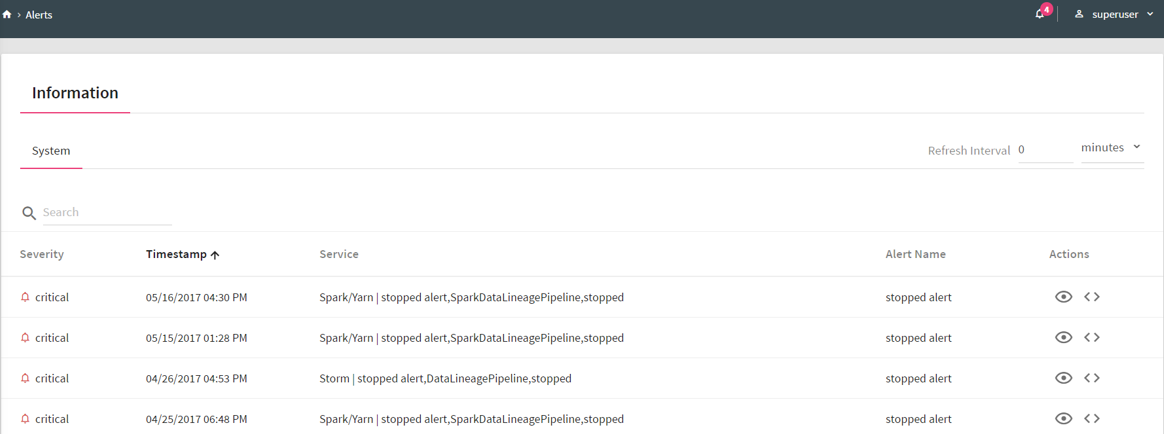
The bell icon on top right of the page shows notification of alerts generated. For example, if you see 4 next to Bell icon, it indicates 4 alerts are generated.
If you click on the Bell icon, you can view the alerts generated. The system will display last twenty alerts at a time.
Refresh Interval: The time interval after which you want to refresh or reload the page. For example, if Refresh Interval is 5 minutes, page will be refreshed after 5 minutes.
Actions:
The following two types of actions can be performed on the Alerts.
1. View Description: The Alert description which you entered at the time of creation of Alert can be viewed by clicking on the eye  icon.
icon.
2. View Message Source: The Source record for which alert is generated can be viewed by clicking on the View Message Source  icon.
icon.
Use Case: The Alert processor triggers a notification when the specified conditions are met. For example, if the pipeline error record count is > 5 the system should generate an alarm when enabled.
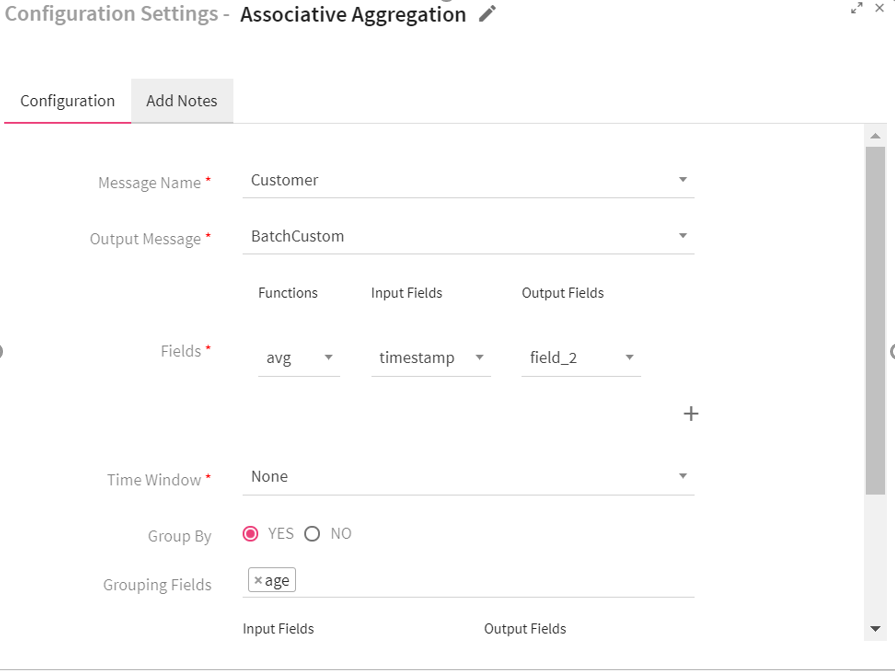
Configuring an Associative Aggregation Processor for Spark Streaming Pipelines
To add an Associative Aggregation Processor into your pipeline, drag the processor on the canvas and right click on it to configure.
|
Field |
Description |
|---|---|
|
Message Name |
Message on which Aggregation query has to be applied. |
|
Output Message |
Output Message which holds the aggregation result. |
|
Field attributes: |
|
|
Functions |
Functions supported by Associative Aggregation processor: Min, Max, sum, count and avg. |
|
Input Fields |
Input field over which the selected aggregation function is applied. |
|
Output Fields |
Output field where the aggregation result gets stored. |
|
Time Window |
Time window options. None: Does not apply the window operation on data. Fixed Window: Window length and sliding interval remains same. Sliding Window: Enables to configure the window length and sliding interval. |
|
Group By |
Enables to perform aggregation functions over whole batch or the group of data. Yes: when selected yes, choose fields that are to be used for grouping. |
|
Add Current Timestamp |
When selected, adds current timestamp in the output message. |
Click on the Add Notes tab.
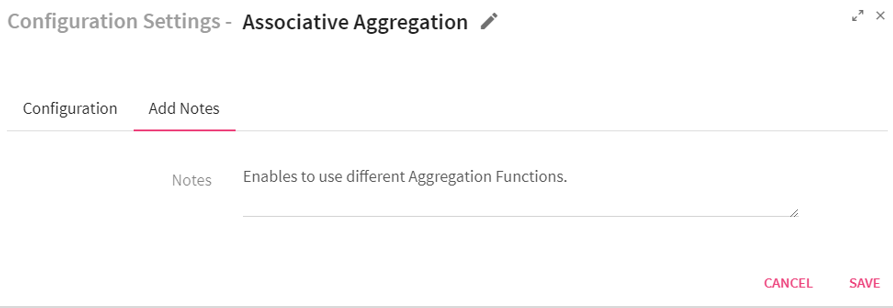
Enter the notes in the space provided.
Click on the SAVE button after entering all the details.
Use Case: This processor is used when you want to perform aggregation functions over the real time streaming data. The aggregation functions which can be applied are min, max, avg , sum and count. For example, you can use the aggregation function avg for computing the average of events in a transaction based on the duration of a transaction.
The following table lists the functions supported by Aggregation processor.
|
Average |
Performs min, max, count, sum, or avg operations on incoming message fields. |
|
Sum |
Sum function totals all the defined field values. |
|
Count |
Count function counts the number of fields. |
|
Minimum |
Minimum function displays the minimum value of the defined fields. |
|
Maximum |
Maximum function displays the maximum value of the defined fields. |
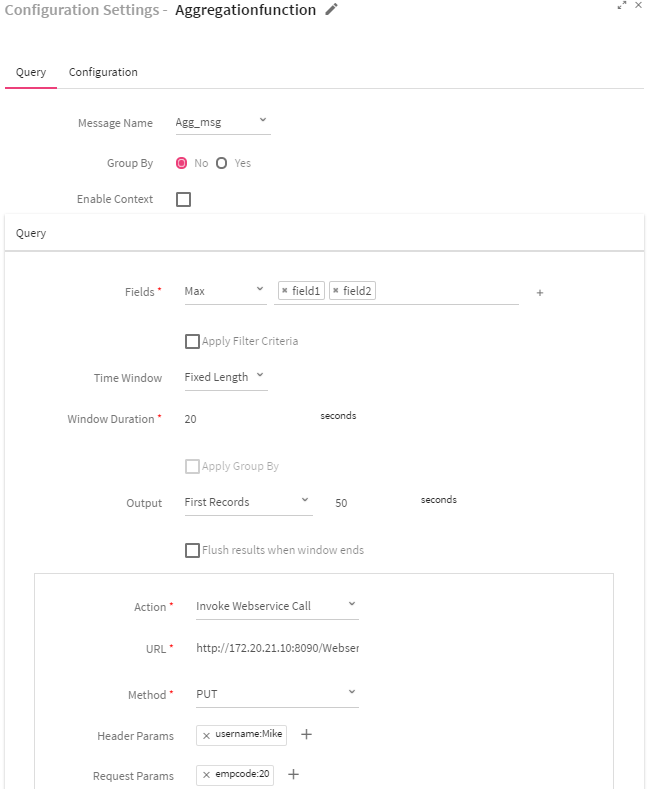
Configuring an Aggregation Function Processor for Storm Streaming pipelines:
To add an Aggregation Processor into your pipeline, drag the processor to the canvas and right click on it to configure.
|
Field |
Description |
|---|---|
|
Query Tab Attributes |
|
|
Message Name |
Select the message from the list on which Statistical CEP query has to be applied. |
|
Group By |
Apply Group By or not Yes: Enables to select fields on which grouping has to be done. Default is No. |
|
Enable Context |
When selected, execution of all subsequent queries will be bound by the context. The system displays three input boxes: Context Name, Start Name and End Time.
Specify the Start Time and End Time for executing the queries in standard cronjob format. |
|
Fields |
Fields on which aggregation has to be applied. |
|
Apply Filter Criteria |
Select the checkbox if you wish to apply filter criteria on the incoming messages. |
|
Time Window |
Time window options: Fixed Length: When selected, configured aggregation functions get applied over the fixed window data .
Sliding Window: When selected, configured aggregation functions gets applied over the moving window. |
|
Window Duration |
Time window in seconds. |
|
Apply Group By |
Select the checkbox for grouping query result with message fields. |
|
Output |
Controls the rate of flow of events.
All Records: When selected, all records will be displayed in the output. First Records: When selected, first record will be displayed in the output. Last Records: When selected, last records will be displayed in the output. |
|
Flush result when window ends |
When selected, records will be sent to output when the window ends. |
|
Add Action |
Link used for adding additional actions. |
|
Action |
Actions that can be performed on query result.
Invoke WebService Call: Query output will be pushed to WebService. If you select Invoke WebService Call action, you will view four additional fields: URL, Method, Header Params and Request Params.
Custom Delegate: Query output will be generated in Custom delegate code. If you select Custom Delegate action, you will view two additional fields: Class Name and Init Params. |
|
URL |
End point where data needs to be pushed. |
|
Method |
HTTP methods:
POST: Requests data from a specified source. PUT: Submits data to a specified resource. |
|
Header Params |
Enables to add Header Parameters Click on the + (plus) sign for adding the parameters. Specify the below information:
Name: Header parameter name. Value: Header parameter value. |
|
Request Params: |
Enables to add request parameters. Click on the + (plus) sign for adding the request parameters. Specify the below information:
Name: Request parameter name. Value: Request parameter value. |
|
Add Query |
Enables to add multiple queries. Add Query link is enabled only if Enable Context checkbox is selected.
You can add only a single query, If Enable Context checkbox is not selected. |
|
Class Name |
Class that holds Aggregation function result. |
|
Init Params |
Initialization parameters of the class. |
Use Case: The Aggregation processor is used when you want to perform Aggregation operations over real time streaming data.For example, you can use the Aggregation function max for computing the maximum salary of an employee in an organization..
Description
It is a processor available for you to create a custom business logic.
Implements the ‘com.streamanalytix.framework.api.processor.JSONProcessor ‘interface and provides custom business logic in implemented methods.
Pre-requisites
To use a custom processor, you need to create a jar file containing your custom code. Then upload the jar file in a pipeline or as a registered component.
To write a custom logic for your custom channel, download the Sample Project.
Import the downloaded Sample project as a maven project in Eclipse. Ensure that Apache Maven is installed on your machine and that the PATH for the same is set.
Implement your custom code. Build the project, to create a jar file containing your code, using the following command:
mvn clean install –DskipTests.

If the maven build is successful, you need to upload the jar on the pipeline canvas as shown below.
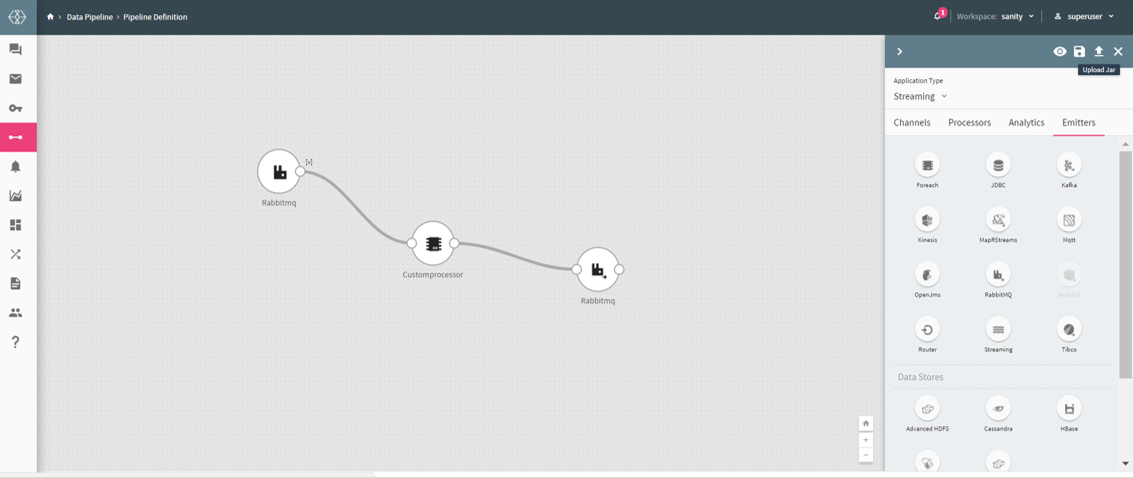
Custom Processor for Spark
Custom processor for Spark supports writing code in Java and Scala programming languages. It provides two types of implementations: Custom and Inline as Scala.
The Custom implementation allows you to write the code in Java language whereas Inline as Scala implementation enables to write the code in Scala programming language.
The Inline as Scala is an enhancement over the Custom implementation as it enables to write the entire Scala code in a processor itself . If the build is successful, code can be used in the pipeline.
Custom Code for your sample Project
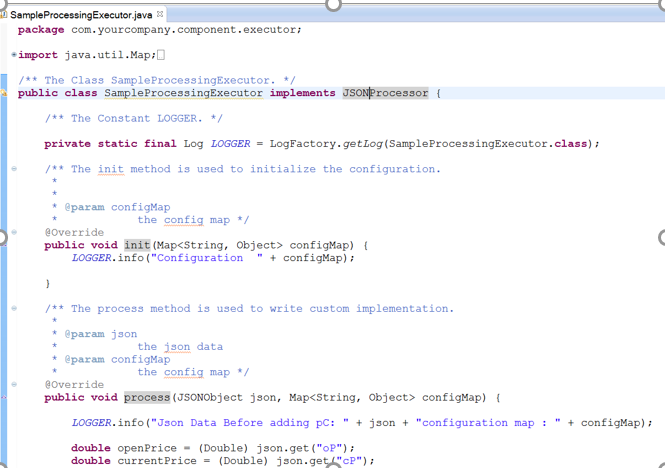
You have to implement ‘com.streamanalytix.framework.api.processor.JSONProcessor’ interface and provide the custom business logic in implemented methods while using a custom processor in pipeline.
Shown below is a sample class structure:
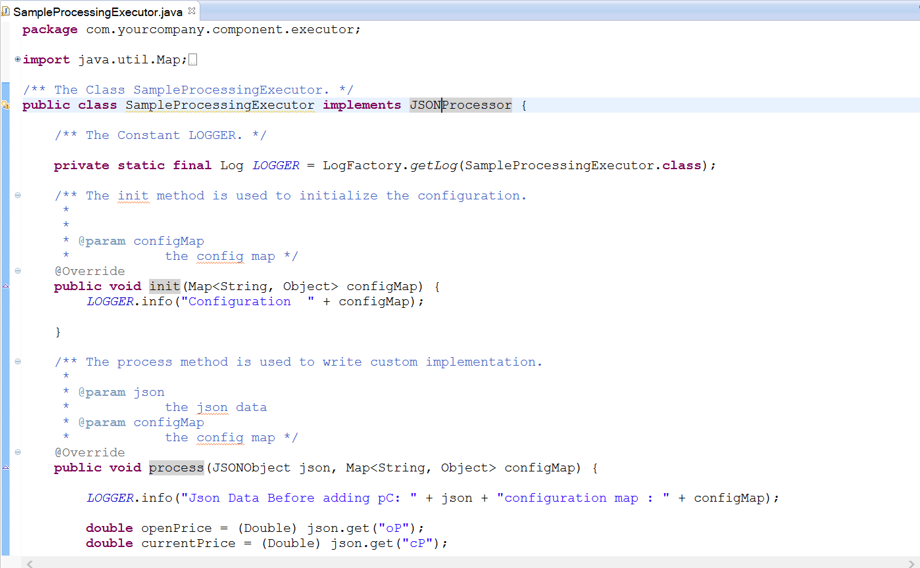
There are three methods to implement.
1. Init: Enables to enter any initialization calls.
2. Process: Contains actual business logic .This method is called for each and every tuple.
3. Cleanup: All resource cleanup occurs in this method.
Configuring Custom Processor for Spark
To add a Custom Processor into your Spark pipeline, drag the custom processor on the canvas. Right click on it to configure as explained below.
Option 1: selected Implementation as Custom
|
Field |
Description |
|---|---|
|
Output Message |
Contains all the output fields after applying Join operation on input fields. |
|
Implementation |
Type of implementation to be performed on the processor. Select Custom if you wish to write custom business logic. |
|
Interface |
Interfaces used for the implementation of Custom Processor:
JSONProcessor: Interface which provides flexibility for implementing the business logic over the streaming JSON object. RDDProcessor: Interface which provides flexibility for implementing the business logic over the JSON RDD's. You can write transformation and action functions over it. DStreamProcessor: Interface which provides flexibility for implementing the business logic over the JSON DStream. You can write the transformation and action functions over it. PairDStreamProcessor: Interface which provides flexibility for implementing the business logic over the JSON PairDStream.You can write the transformation and action functions over it. |
|
Executor Plugin
|
Class to which the control will be passed in order to process incoming data. |
|
Add Current Timestamp |
If selected, displays timestamp for the generated result. |
Additional notes can be added by clicking on Add Notes tab.
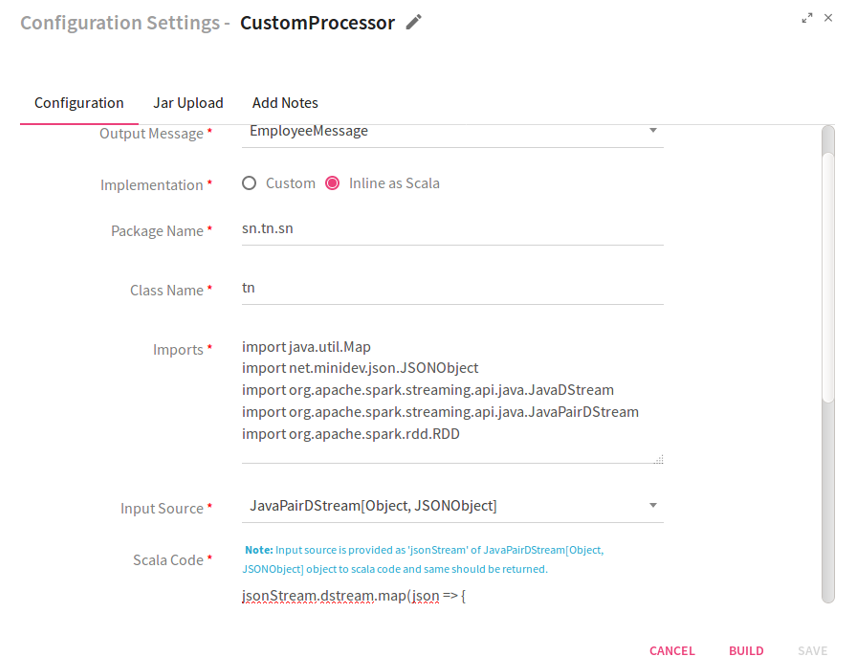
Option 2: selected Implementation as Inline as Scala
|
Field |
Description |
|---|---|
|
Output Message |
Contains all the output fields after applying Join operation on input fields. |
|
Implementation |
Select Inline as Scala, if code is to be written in Scala language. |
|
Package Name |
Package for the Scala implementation class. |
|
Class Name |
Class Name for the Scala implementation. |
|
Imports |
Import statements for the Scala implementation. |
|
Input Source |
Input source for the Scala code. It could be JSON Object, RDD JSON Object, JAVADStreamJSON Object or JAVAPairDStream[Object, JSONObject] |
|
Scala Code |
Code for performing operation over JSOnRDD object. |
|
Build |
Builds the Scala code. |
|
Add Current Timestamp |
If selected, displays timestamp for the generated result. |
Custom code for Sample Project
While using a custom processor in a pipeline, you have to implement ‘com.streamanalytix.framework.api.processor.JSONProcessor’ interface and provide the custom business logic in implemented methods while using a custom processor in pipeline.
Shown below is a sample class structure:
There are three methods for you to implement.
1. Init: Enables to enter any initialization calls.
2. Process: Contains actual business logic . This method is called for each and every tuple.
3. Cleanup: All resource cleanup occurs in this method.
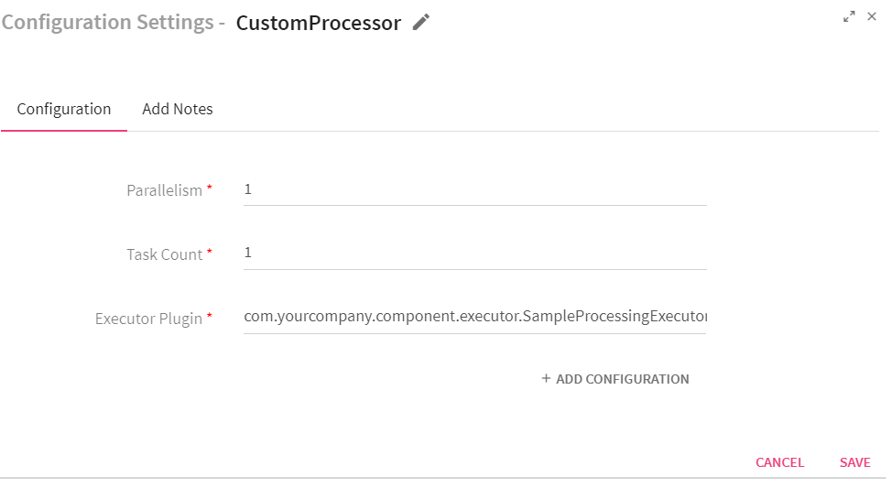
Configuring Custom Processor for Storm
To add a Custom Processor into your Storm pipeline, drag the custom processor on the canvas. Right click on it to configure as explained below.
|
Field |
Description |
|---|---|
|
Parallelism |
Number of executors (threads) of the processor. |
|
Task Count |
Number of instances of the processor. |
|
Executor Plugin |
Class to which the control will be passed in order to process the incoming data. |
|
ADD CONFIGURATION |
Enables to configure additional properties. |
Click on the Add Notes tab.
Enter the notes in the space provided.
Click on the SAVE button after entering all the details.
Use Case: The custom processor is used for components which are not inbuilt within StreamAnalytix. You can write your own custom code and implement your logic in a pipeline. For example, StreamAnalytix does not provide support for reading data from DynamoDB database. If you wish to read data from DynamoDB, you can write your own custom logic and use it in a pipeline for reading the data..
Description
Complex Event Processing aims at analyzing the data or events that flow between information systems to gain valuable information in real-time.
CEP engine enables applications to store queries and run the data. Response from the CEP engine occurs in real-time when conditions occur that match queries. The execution model is thus continuous rather than only when a query is submitted.
CEP relies on a number of techniques, including:
• Event-pattern detection
• Event abstraction
• Event filtering
• Event aggregation and transformation
CEP in StreamAnalytix is divided into three categories:
• Custom CEP
• Dynamic CEP
• Aggregation Function-Please refer to the Aggregation Function section for detailed information.
Custom CEP
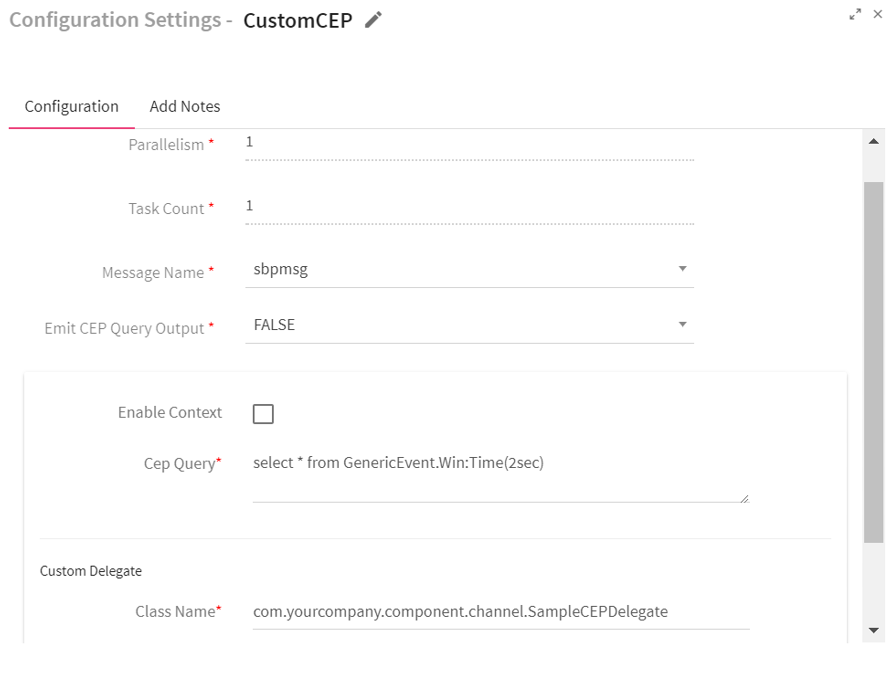
Configuring Custom CEP Processor
To add a Custom CEP Processor into your pipeline, drag the Custom CEP Processor to the canvas and connect it to a Channel or Processor. Right click on the processor to configure it.
|
Field |
Description |
|---|---|
|
Parallelism |
Number of executors or threads of the processor. |
|
Task Count |
Number of instances of the processor. |
|
Message Name |
Message name on which query has to be fired. |
|
Emit CEP Query Output |
If EmitCEPQueryOutput is set to True, processed data from this processor along with original input will be available on the next processor. If EmitCEPQueryOutput is set to False, processed data is only available to configured custom delegate. Only original input will be available on the next processor. |
|
Enable Context |
If the context is enabled, execution of all subsequent queries will be bound by the context. |
|
Context Query |
Enter the context query which is to be executed in the text box. |
|
CEP Query |
Enter the CEP query in the text box. |
|
Custom Delegate attributes: |
|
|
Class Name |
Class to which the control will be passed once the result of CEP query execution is fetched. |
|
Init Parameters |
Initialization parameter to be passed as a part of custom delegate. |
Click on the Add Notes tab.
Enter the notes in the space provided.
Click on the SAVE button after entering all the details.
Use Case: The custom CEP processor is used for performing window operations over real time streaming data.
Example:
You are getting stock price in real time and average price is to be calculated per window.
You can make use of following query for calculating average price of the stock for a window of 2 seconds.
select * from GenericEvent.win:time(2 sec)
The statement shown below will select all the events from the GenericEvent type.
The win: time syntax in the above query declares a sliding time window for 2 seconds. The query will fetch all the records when the condition is met.
If you require a subset of the data in the window, you can specify one or more filter expressions as shown below:
select avg(price) as avgPrice from GenericEvent.win:time (40 sec).
Cumulative Aggregation Processor is similar to Associative Aggregation with one deviation i.e. aggregation functions will be performed cumulatively.
Every next batch will operate on old batch aggregation results for performing the current batch aggregations.
For using cumulative aggregation, it is mandatory to configure the checkpoint in pipeline from pipeline definition.
Note: Checkpoint directory must be specific for a data pipeline. Even if you switch between the deployment modes (i.e. Local/Client/Cluster), you need to change the checkpoint directory.
Use Case: The cumulative aggregation processor is used for performing min, max, avg, sum and count aggregation functions cumulatively across the batches of incoming data.
For example, you may use this processor for calculating the number of transactions across the batches.
Configuring Distinct Processor
To add a Distinct Processor into your pipeline, drag the processor on to the canvas and right click on it to configure.
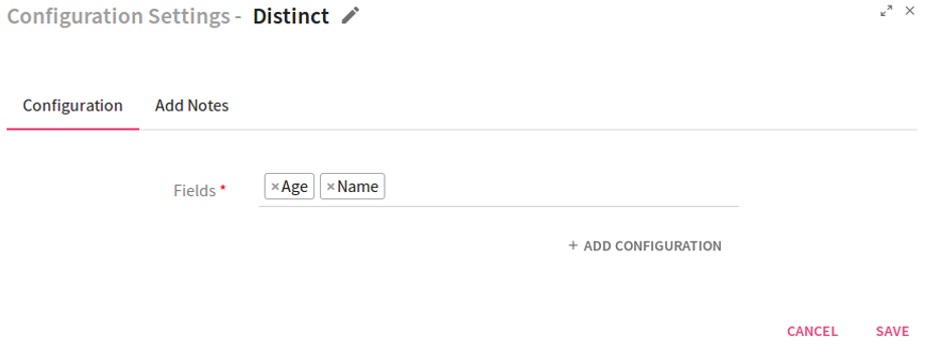
Enter the fields on which distinct operation is to be performed.
Click on the Add Notes tab. Enter the notes in the space provided.
Click on the SAVE button after entering all the details.
Use Case: The Distinct processor is used for removing non duplicated set of data using the available transformation operations.
Example to demonstrate how distinct works.
If you apply Distinct on any two fields: Name and Age, then the output for the given fields will be as shown below: I
|
Input Set {Name:xyz,Age:7} {Name:abc,Age:9} {Name:klm,Age:5} {Name:klm,Age:6} {Name:xyz,Age:5} {Name:abc,Age:9} |
Output Set {Name:xyz,Age:7} {Name:abc,Age:9} {Name:klm,Age:5} |
Configuring Dynamic CEP Processor
To add a Dynamic CEP Processor into your pipeline, drag the Dynamic CEP Processor to the canvas and connect it to a channel or processor. Right click on it to configure.
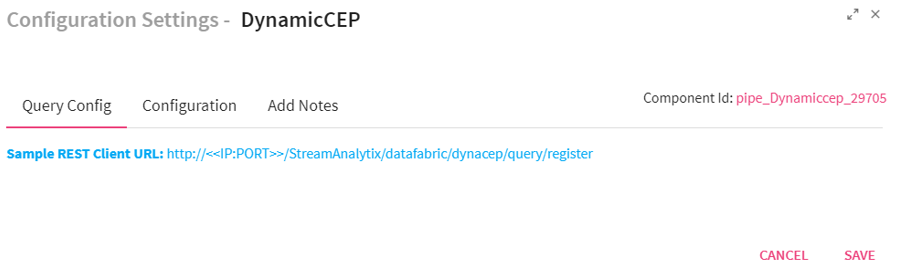
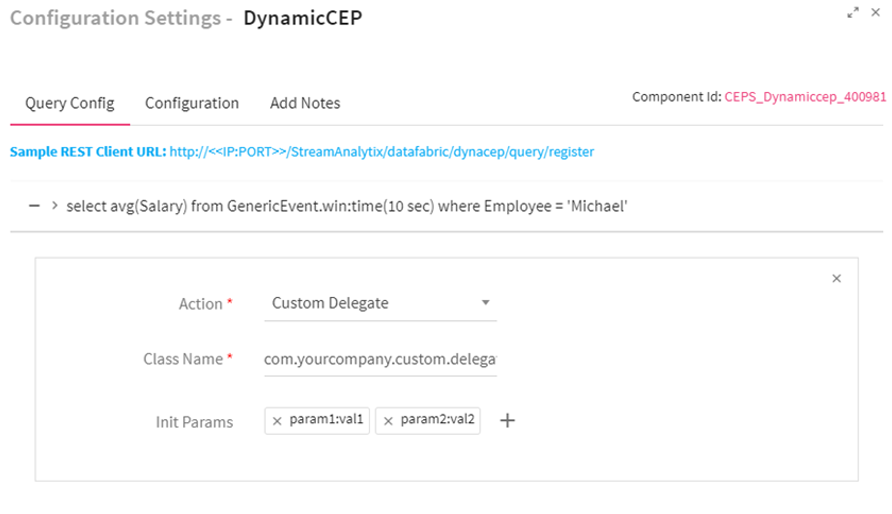
The Query config tab displays the query which is registered through Rest Client URL.
Component Id displayed on top right side of the screen determines which query is used for a particular CEP, if more than one dynamic CEP is used in same pipeline.
Configuration Settings of Dynamic CEP Processor: :
|
Field |
Description |
|---|---|
|
Parallelism |
Number of executors (threads) of the processor. |
|
Task Count |
Number of instances of the processor. |
|
Enable CEP Query Output |
If EmitCEPQueryOutput is set to True:
Enables to select only Custom delegate as Action. All other actions are disabled.
Processed data of this processor will be available on next processor.
Add action functionality is also no longer available. Only one custom action per query is allowed. If EmitCEPQueryOutput is set to False:
Enables to select all available delegate as Actions.
Processed data is only available to configured delegates. Only original input will be available on next processor.
Enables to add multiple actions per query using Add Action link or directly from REST client. |
|
ADD CONFIGURATION |
Enables to configure additional custom parameters. |
Click on the Add Notes tab.
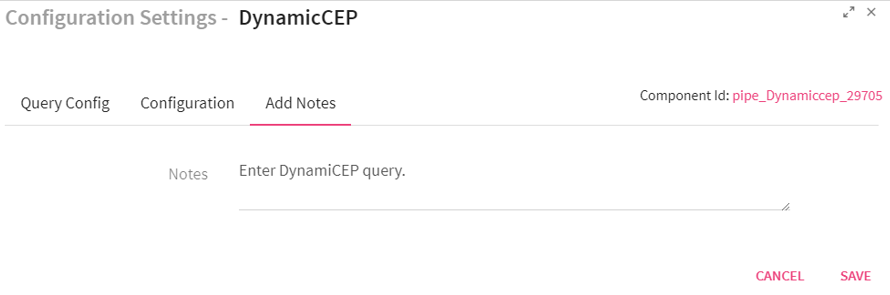
Enter the notes in the space provided.
Click on the SAVE button after entering all the details.
Configuring Dynamic CEP Query
To configure the DynamicCEP query, provide the Component ID in the REST UI.
To obtain the Component ID, edit the pipeline.
Following section specifies the metadata using REST INTERFACE which will be utilized by the StreamAnalytix platform.
For example, a sample JSON representing an employee data can be defined as follows:
{
name: employee,
age: 24,
gender:female,
email:xyz@abc.com
address:A-12
}
Streamanalytix requires configuration of an entity by defining the schema of the entity.
For making any RESTClient call, Request Header must be set to TokenName: TokenValue otherwise it gives an error of Unauthorized authentication token.
To get the Token value, go to the Manage Users tab and edit a user.
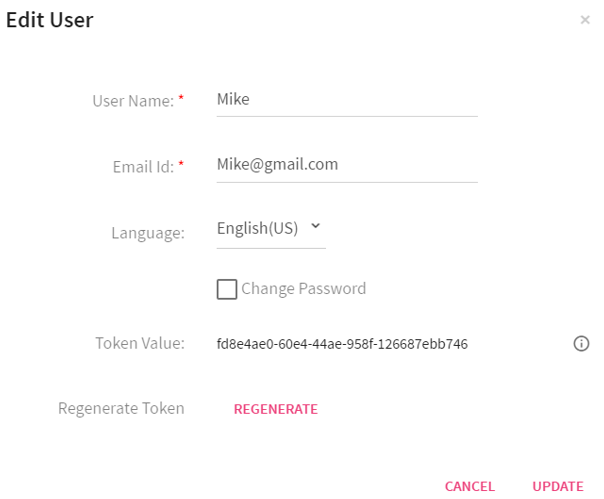
Once the Token value is copied, open the RestClient UI, create a header with name token and paste the token value.
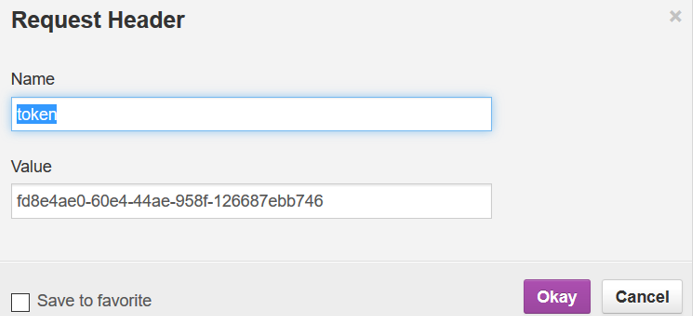
Next go to Query Config tab of DynamicCEP and copy the Sample REST Client URL:
http://<<IP:PORT>>/StreamAnalytix/datafabric/dynacep/query/register/<componentId>
Now go to Rest Client UI, paste the URL and provide the IP and PORT of the machine where StreamAnalytix is deployed.
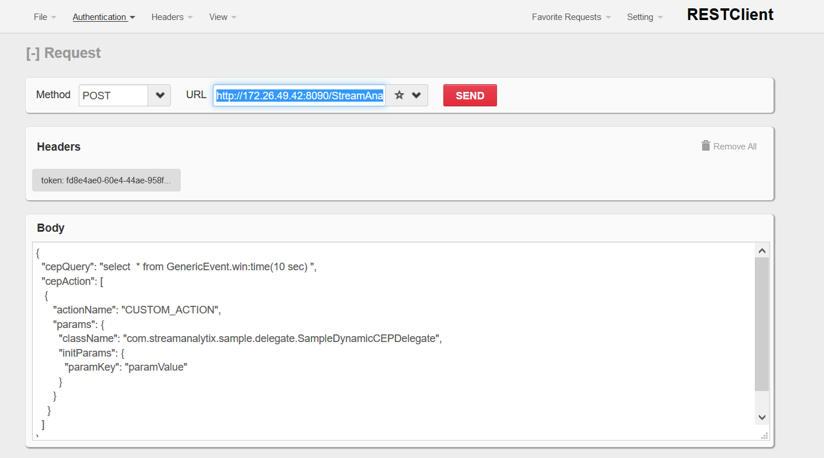
Register a CEPConfiguration
Method: Method section should have the value: POST
URL:
http://<<IP:PORT>>/StreamAnalytix/datafabric/dynacep/query/register/<componentId>
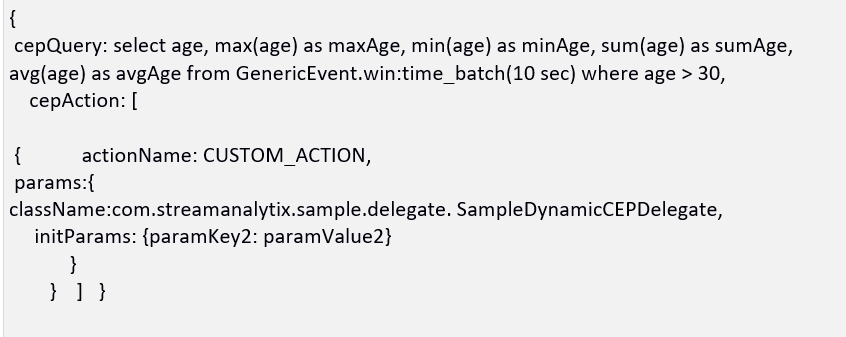
BODY: It is sample entity schema JSON, make sure that the syntax remains the same and the keys, however with the requirements, you can change the values as shown in the highlighted section of Figure below Sample Entity Schema JSON
Use the below keys for creating the entity schema JSON:

As mentioned in the above figure, the key cepAction can have multiple actions, however one action is minimum. Also regarding headerParams, requestParams and initParams keys, you can have multiple values as well or none. Before clicking Send make sure that you are logged in the StreamAnalytix platform, else an error message is shown i.e. context is not initialized.
Status SUCCESS notifies the successful completion of CEPConfiguration, keep the cepQueryId handy for further operations. This is how the CEPConfiguration registration is complete.
In case, if Emit CEP Query output is set to true, above query will not be registered successfully as multiple actions are not allowed.
Update the CEPConfiguration
Method: Method section should have the value: POST
URL:
http://<<IP:PORT>>/StreamAnalytix/datafabric/dynacep/query/update/<componentId>/<cepQueryId>
BODY: Use the keys below for updating the entity schema JSON
Status SUCCESS notifies the successful update of query.
Delete CEP configuration based on cepQueryId
Method: POST
URL:
http://<<IP:PORT>>/StreamAnalytix/datafabric/dynacep/query/delete/<componentId>/<cepQueryId>
BODY: Leave this section blank.
Delete CEP configuration based on componentId
Method: POST
URL:
http://<<IP:PORT>>/StreamAnalytix/datafabric/dynacep/query/delete/<componentId>
BODY: Leave this section blank.
Get CEP configuration based on componentId and cepQueryId
Method: GET
URL:
http://<<IP:PORT>>/StreamAnalytix/datafabric/dynacep/query/get/componentId/cepQueryId
BODY: Leave this section blank.
Once you click SEND, it returns Response that has all the CEP configuration for the given cepQueryId.
Get CEP configuration based on componentId
Method: GET
URL:
http://<<IP:PORT>>/StreamAnalytix/datafabric/dynacep/query/get/componentId
BODY: Leave this section blank.
Once you click SEND, it returns Response which has CEP configuration for the given componentId.
Get the CEP configuration
Method: GET
URL:
http://<<IP:PORT>>/StreamAnalytix/datafabric/dynacep/query/get
BODY: Leave this section blank.
Once you click SEND, it returns Response that has the CEP configuration.
Note: There can be multiple actions in a query, now if you remove the last action, the query also gets deleted. To remove action you can do so from the UI, as shown below:
Use Case: The dynamic CEP processor is used to register CEP queries with pre-defined actions (INVOKE_WEBSERVICE_CALL and CUSTOM_ACTION) on running Pipeline. It also enables dynamic configuration of queries and perform actions such as update and delete over run time.
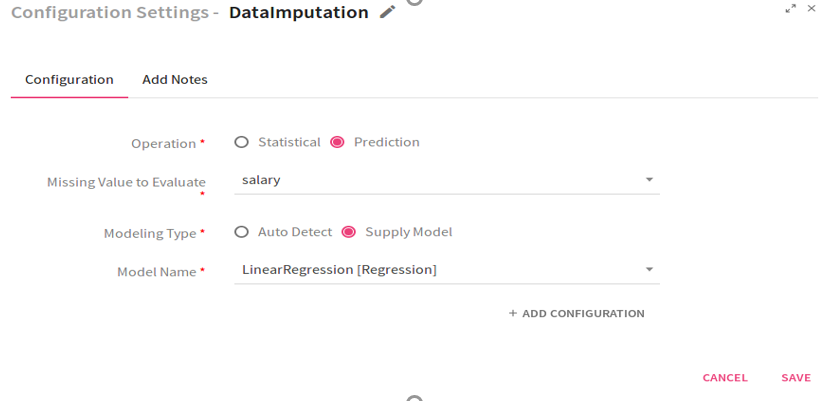
Configuring DataImputation Processor for Spark Pipelines
To add a DataImputation Processor into your pipeline, drag the processor to the canvas and right click on it to configure.
|
Field |
Description |
|---|---|
|
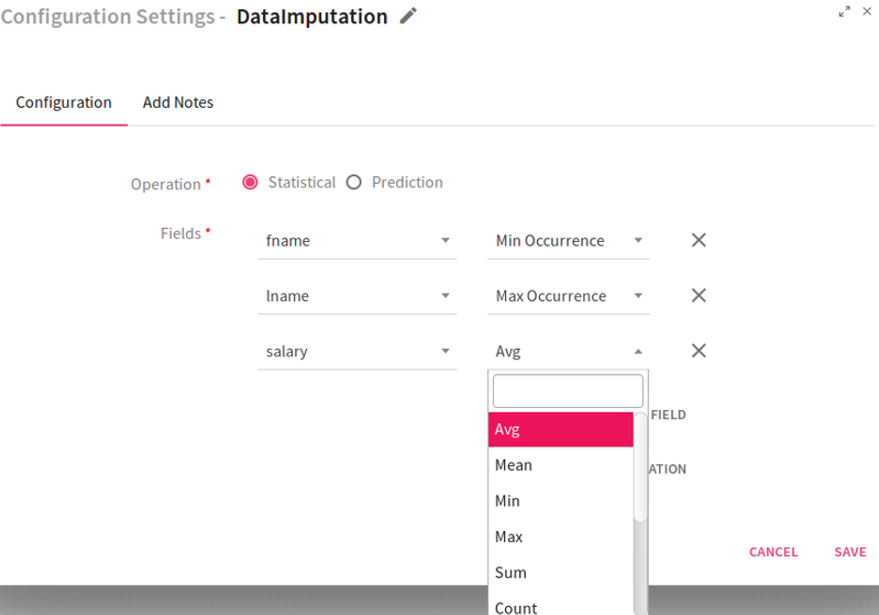
Operation |
Type of operations to be performed by the Analytics processor:
Statistical: imputes the missing value of the field by using the statistical operation. The following statistical operations can be performed. Avg: Calculates the average value and assigns it to the missing field record. Mean: Calculates the mean value and assigns it to the missing field record. Min: Calculates the minimum value and assigns it to the missing field record. Max: Calculates the maximum value and assigns it to the missing field record. Sum: Calculates the total and assigns it to the missing field record. Count: Determines the total number of records and assigns it to the missing field record. Standard deviation: Calculates the standard deviation and assigns it to the missing field record. Min Occurrence: Calculates the minimum occurrence of records and assigns it to the missing field record. Max Occurrence: Calculates the maximum occurrence of records and assigns it to the missing field record.
Prediction: Imputes the missing/null value of the field with the Machine learning analytics models. |
|
Fields |
This option is visible only when you select the Operation as Statistical. Select the field from the drop down list on which missing values are to be imputed. Select the corresponding Statistical operation to be performed on it from the drop down list. |
|
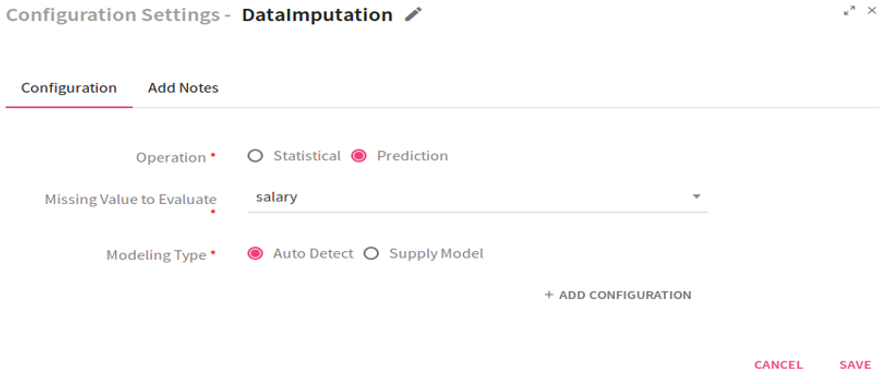
Missing Value to Impute |
This option is visible only when you select the Operation as Prediction. Select the missing value which is to be evaluated from the drop down list. |
|
Modeling Type |
This option is visible only when you select the Operation as Prediction.
Auto Detect: Model gets trained by Machine learning algorithms in a batch to predict the missing or null values. For a model to get trained, one record in a batch should have all the values.
Supply Model: Missing values are imputed on the basis of the model provided. |
|
Model Name |
This option is visible, if you select Modeling type as Supply Model. Select the registered model from the drop down list. |
Configuration settings when the Operation selected is Prediction and Modeling Type Auto Detect:
Configuration settings when the Operation selected is Prediction and Modeling Type Supply Mode:
Click on the Add Notes tab and enter the notes in the space provided.
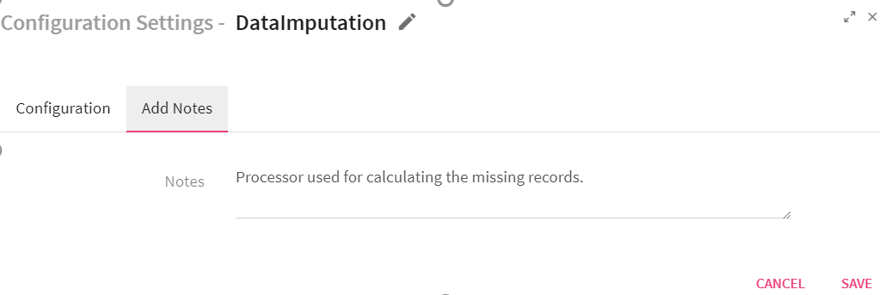
Click on the SAVE button after entering all the details.
Note: The Data Imputation processor will work only on JSON message type. There should be at least one non-empty record having all message fields in the incoming data.
Use Case: The DataImputation processor is used for replacing the missing data with substituted values.For example, if the value of field “ID” is missing in data , this processor can be used for computing the value of field “ID”..
Define the quality rules for data and perform necessary action on the faulty data with the help pf DQM processor.
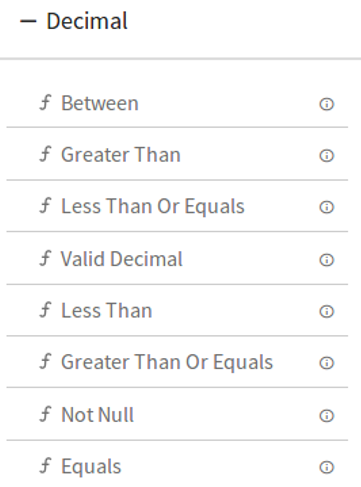
DQM Processor performs series of Validation on individual field of data along with Actions on functions in case if applied validation fails. Varieties of validations are available for each Data Type such as Not Null, Contains, and Starts With and Ends With.
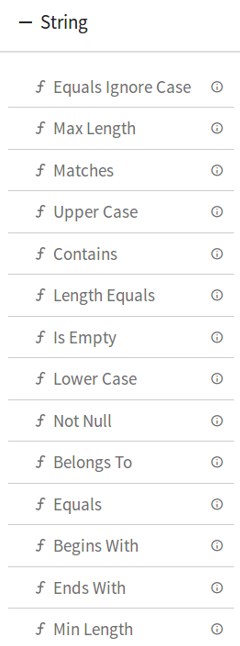
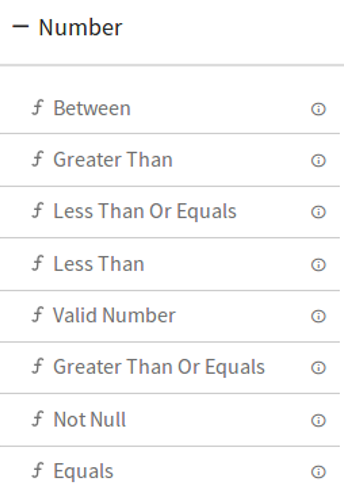
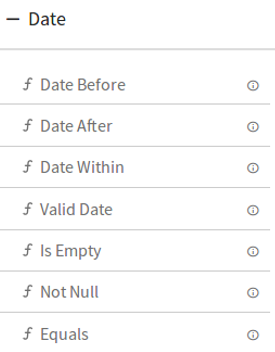
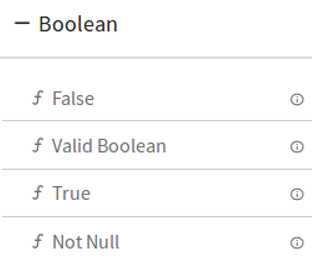
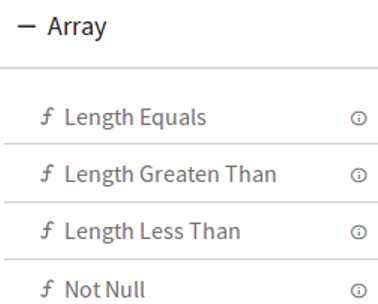
DQM processor has eight categories of Validation functions, one for each Data Type.
Data Type
1.String
2.Number
3.Decimal
4.Date
5.Boolean
6.Array
7.IP
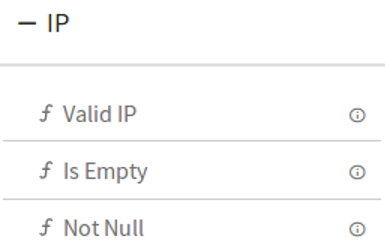
8.Geo
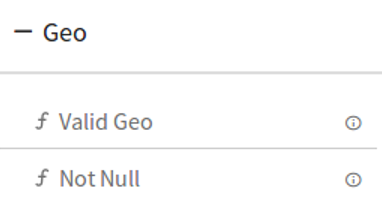
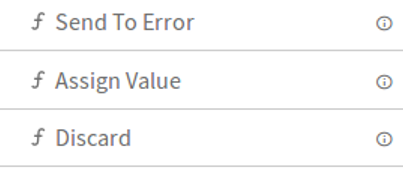
DQM Processor has three Action functions that are triggered when Validation fails:
1.Send To Error –It persist the invalid record in configured Error Handler Target and discard the record for further processing in pipeline. Error Handler becomes mandatory once you select “Send To Error” action.
2.Assign Value –It gives option to assign the static as well dynamic value from other fields.
3.Discard –It discard the record for further processing in pipeline.
Configuring DQM Processor:
To add a DQM Processor into your pipeline, drag the DQM Processor to the canvas and connect it to a channel or processor. Right click on it to configure.
On the configuration canvas of Data Quality processor, select fields, then drag and drop the Validation and Action functions.
Choose a field in Message Panel from Configuration, respective data type validations will be expanded in Function Panel as shown in picture:
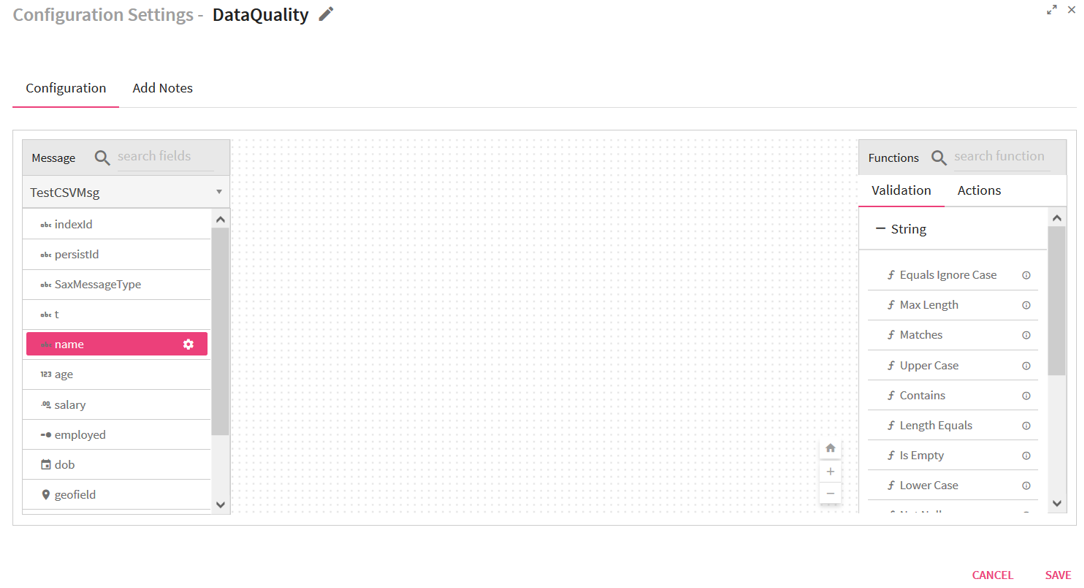
After selecting the Message, Drag and Drop the Validation functions and connect them.
Connecting lines show the Logical operator, AND/OR over it.
By default, the AND operator is selected, but it can be toggled to OR operator via right click on it as show below:
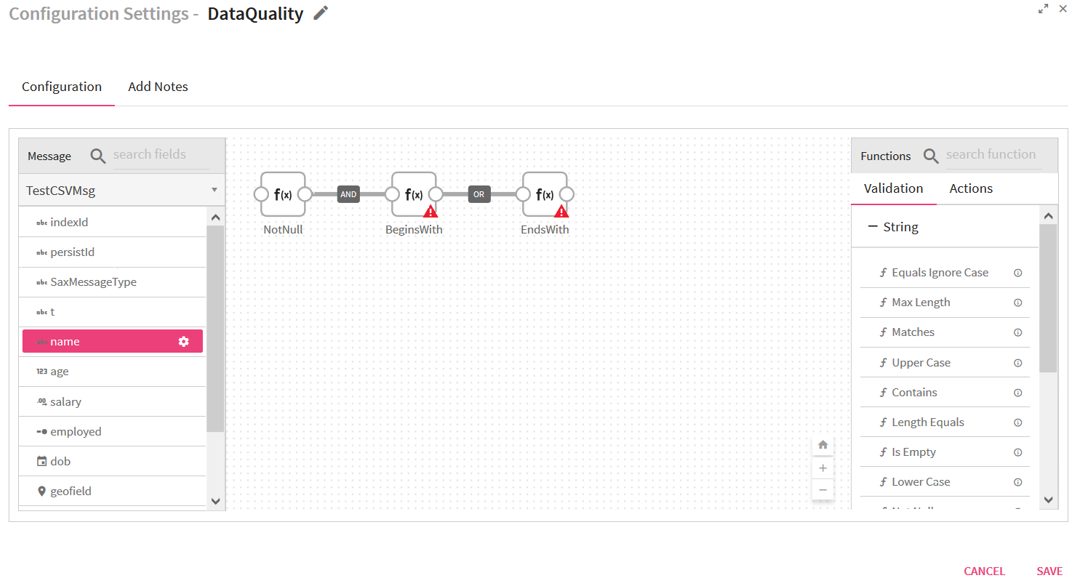
Most of validation functions in Data Quality processor does not require user input such as Not Null, Is Empty, Upper Case etc, hence no error icon gets visible on top of them but there are some validation functions which requires user input and shows the error(red) icon for configuration.
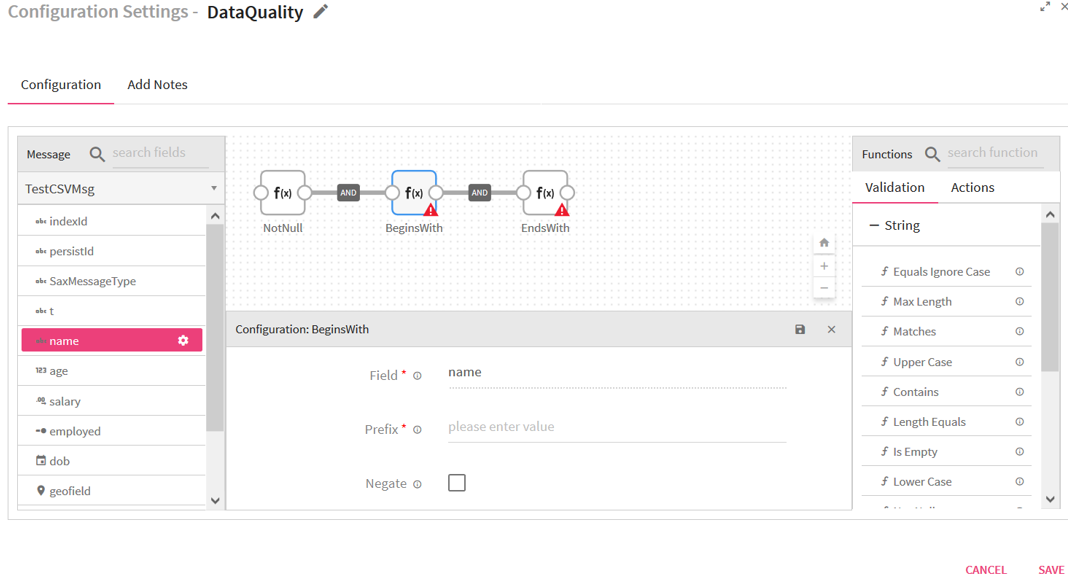
Right click on the field(message) to configure the required input for validation function.
Configuration panel also shows the the Negate option so that same validation function can be utilized with reverse condition as shown below in the picture.
Once all of the validations are configured, you can add a Action function at the end. This action function gets triggered if validation fails as shown below in the picture.
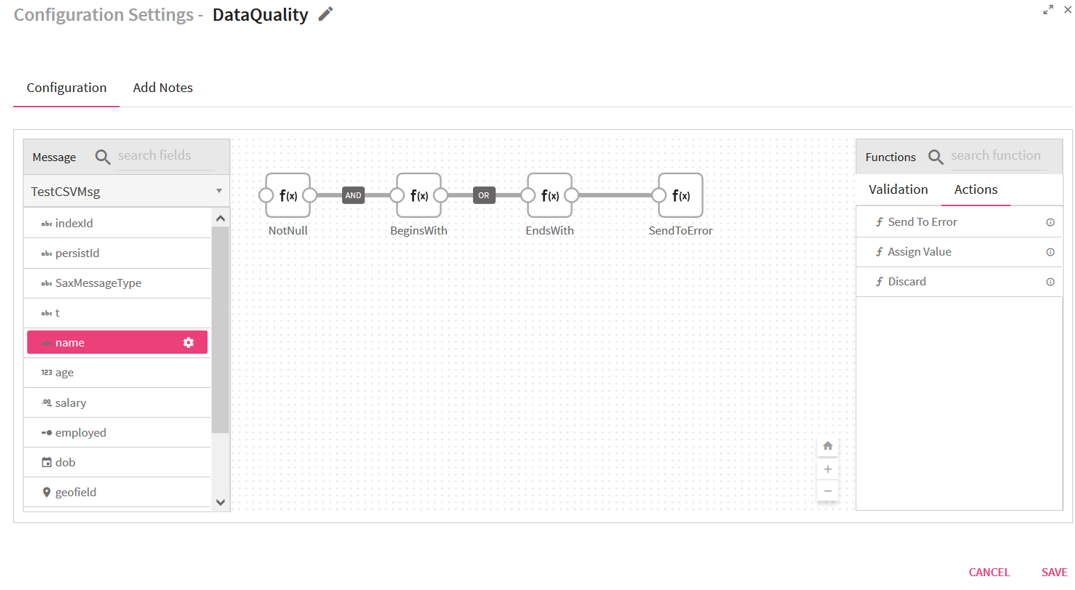
You can select multiple fields and define the validations as it is defined for name field in above picture.
Enricher processor enables you to enrich an incoming message field with the data that is not provided by the external data sources.
Enricher processor supports:
• MVEL expressions
• out-of-the-box lookup functions
• Date
• String
• User defined functions
Configuring Enricher Processor for Spark Streaming pipelines
To add an Enricher Processor into your pipeline, drag the processor to the canvas and right click on it to configure as explained below.
|
Field |
Description |
|---|---|
|
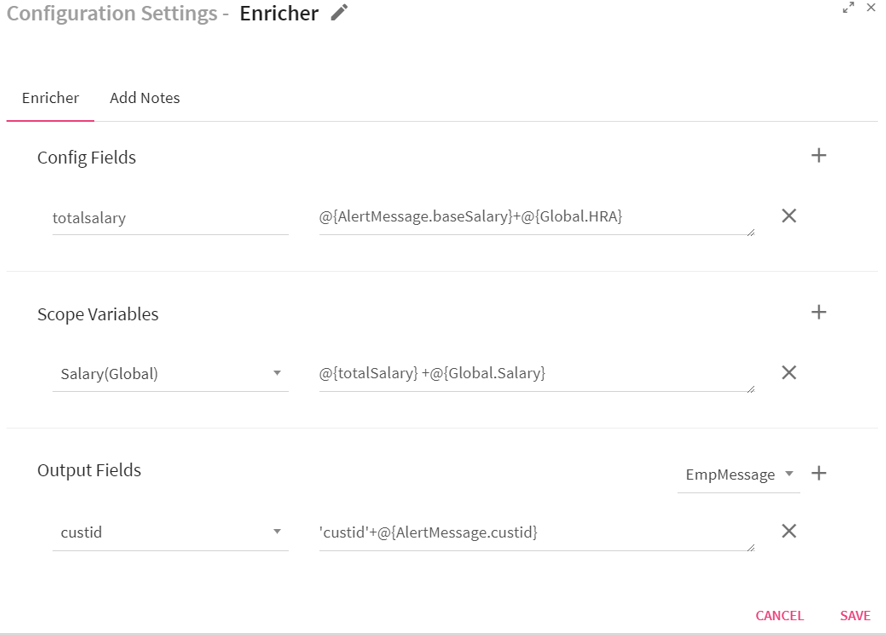
Config Fields |
Config fields are used to create local variables. |
|
Add Config Fields |
Additional Config fields can be added by clicking on the plus sign(+). |
|
Scope Variable |
Following three kind of scope variables can be updated in pipeline: Global: Variable accessible to all the pipelines of any workspace. Workspace: Variable accessible to all the pipelines of the workspace. Pipeline: Variable accessible only to the corresponding pipeline. Select the required scope variable from the list.Enter the value that needs to be updated using an expression, function, variable or constant value. To lookup for enricher function, put a dollar sign($) in input box. To lookup for message fields and scope variables put @(at the Rate) symbol in input box. |
|
Add Scope Variables(+) |
Additional scope variables can be added by clicking on the plus sign(+) |
|
Output Fields (+) |
Select a message on which Enricher has to be applied from the list (shown on right side of screen). Additional output fields can be added by clicking on the plus sign(+). |
|
Select Fields |
Selected fields will be the part of output data. Provide the value that needs to be enriched using an expression, function, variable or a constant value. To lookup for Enricher functions, put a dollar sign ($) in the input box. |
Click on the Add Notes tab.
You can write notes in the space provided.
Click on the SAVE button after entering all the details.
The configuration details are same for Spark and Storm.
Use Case The Enricher processor is used for enriching the data value.
For example, if the cost price of a product is $150 and VAT = 2.5%. Real price of product will be cost price +VAT.
You are able to enrich the real price using this processor.
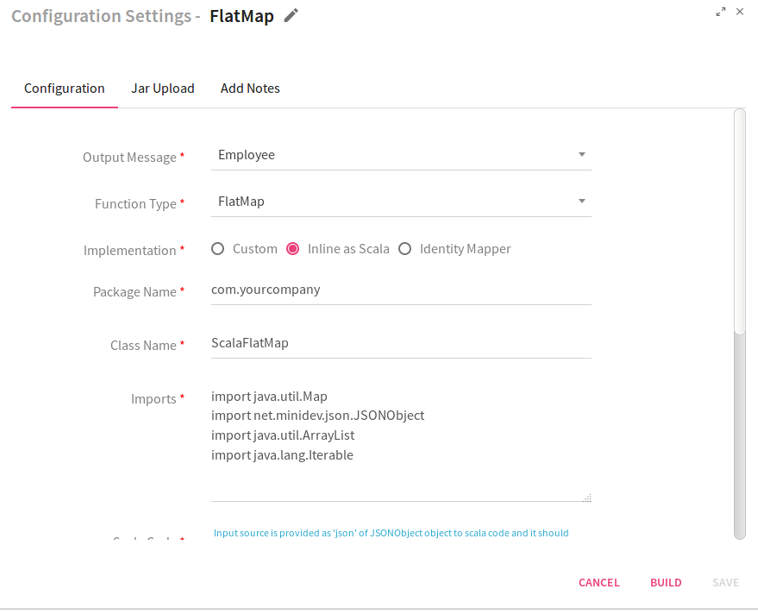
Configuring FlatMap Processor for Spark Pipelines
To add a FlatMap Processor into your pipeline, drag the processor on the canvas and right click on it to configure.
|
Field |
Description |
|---|---|
|
Output Message |
Message that holds output of FlatMap processor. |
|
Function Type |
Functions to be performed on the processor : FlatMap: Operates on single DStream data and returns a plain Dstream output list.
FlatMapToPair: Operates on paired Dstream data and returns a paired Dstream output list. |
|
Implementation |
Type of implementation to be performed on the processor:
Identity Mapper: Select Identity Mapper, if one to one output is to be produced.
Custom: Select Custom, if Custom implementation is to be provided.
The system displays an additional field Executor Plugin when the option selected is Custom.
Inline as Scala: Select Inline as Scala if you wish to write the code in Scala language. |
|
Package Name |
Package for the Scala implementation class. |
|
Class Name |
Class Name for the Scala implementation class. |
|
Imports |
Import statements for the Scala implementation. |
|
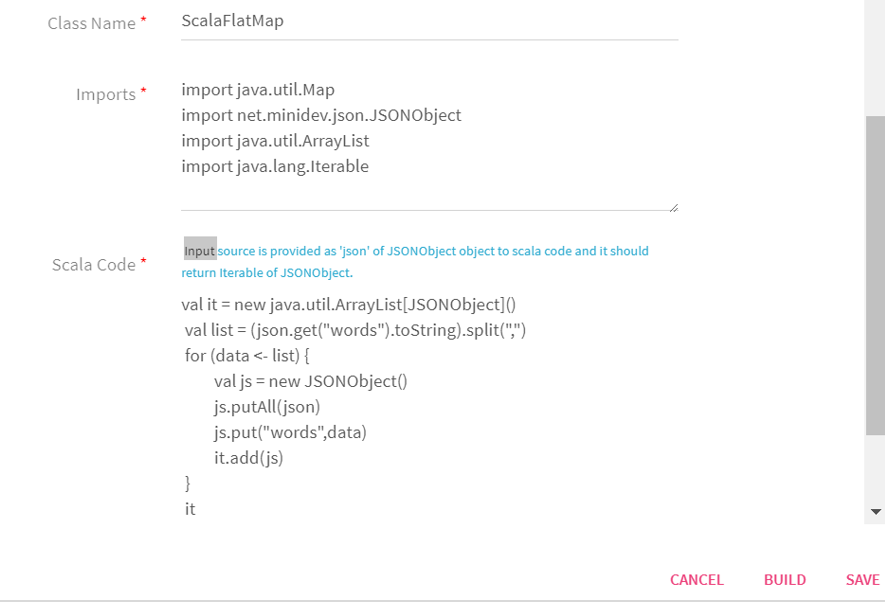
Scala Code |
Scala code implementation to perform the operation. For FlatMap Input source is provided as json of JSONObject to Scala code. It returns iterable of JSONObject.
For FlatMapToPair Input source is provided as key of Object and json of JSONObject to Scala code. It returns Iterable[scala.Tuple2[Object,JSONObject]] of Object. |
Next, click on the Jar Upload tab. Jar file is generated when you build Scala code by clicking on BUILD button. You can upload the third party jars from here so that the API's can be utilized in Scala code by adding the import statement.
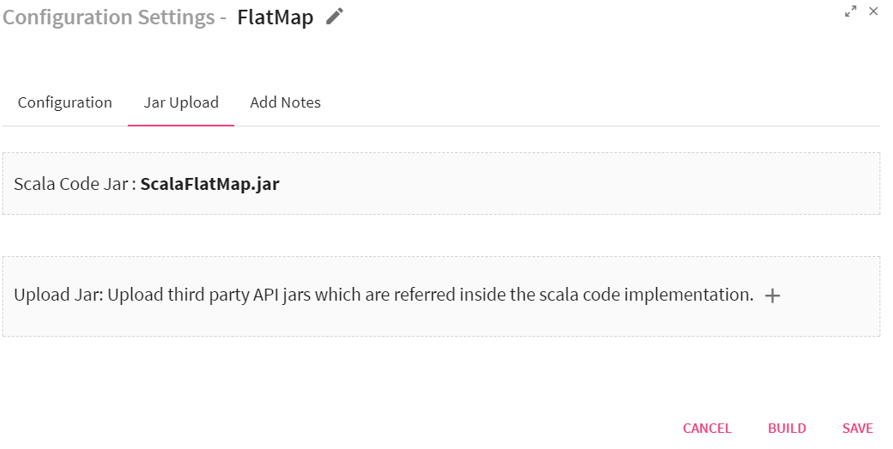
You can add notes by clicking on Add Notes tab.

Click on the SAVE button after entering all the details.
Use Case: The FlatMap processor produces multiple outputs for one input data. The FlatMap function returns an array, list or sequence of elements instead of a single element.For example, you can create multiple JSON objects from a single JSON object.
Configuring Filter Processor for Spark Streaming pipelines
To add a Filter Processor into your pipeline, drag the processor to the canvas and right click on it to configure.
|
Field |
Description |
|---|---|
|
Config Fields |
Enables to create local variables |
|
Message Name |
Select a message on which Filter rule is to be applied. |
|
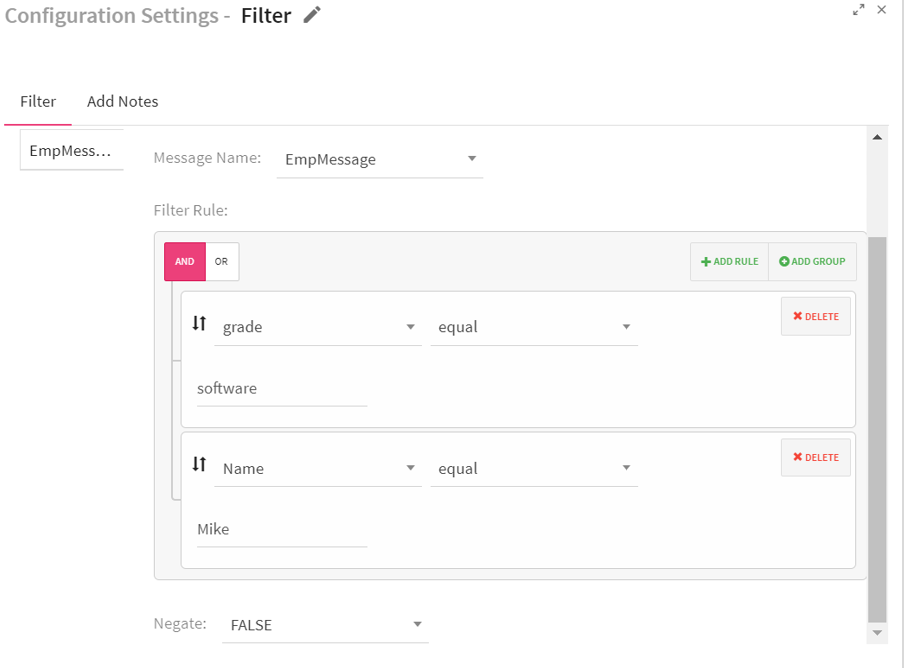
Filter Rule |
Enables to create a filter rule. The Rule applies filter on the data or fields based on the criteria provided. For example, grade contains software and Age > 30 |
|
Add Rule |
Enables to configure additional rules. |
|
Add group |
Additional groups can be added using Add group link. Rule(s) clubbed with either AND or OR operator comes under a group i.e. (Rule1 AND/OR Rule2) For example, (grade contains software) AND (name contains Mike) You need multiple groups for adding multiple operators. |
|
Delete |
Enables to delete added group or rule. |
|
Negate |
If Negate is true, the filter criteria are evaluated as NOT of the given criteria.
If Negate is false, then the filter criteria are evaluated as it is. By default it is set to false. |
|
Add New Criteria |
Enables to configure additional criteria. |
|
Up and Down arrows |
Enables to move the groups and rules up and down . |

Click on the Add Notes tab. Enter the notes in the space provided.
Click on the SAVE button after entering all the details.
The configuration properties are same for Storm Streaming and Spark.
Use Case: The Filter processor is used to display specific records by using filter criterion. For example, you can define the Filter rule: grade contains “software” and name contains “Mike”. The system will fetch all the records which meet this criteria.
Configuring Group Processor for Spark Pipelines
To add a Group Processor into your pipeline, drag the processor to the canvas and right click on it to configure.
Note: Kafka topic should pre-exist which you are going to use in Group Processor.
|
Field |
Description |
|---|---|
|
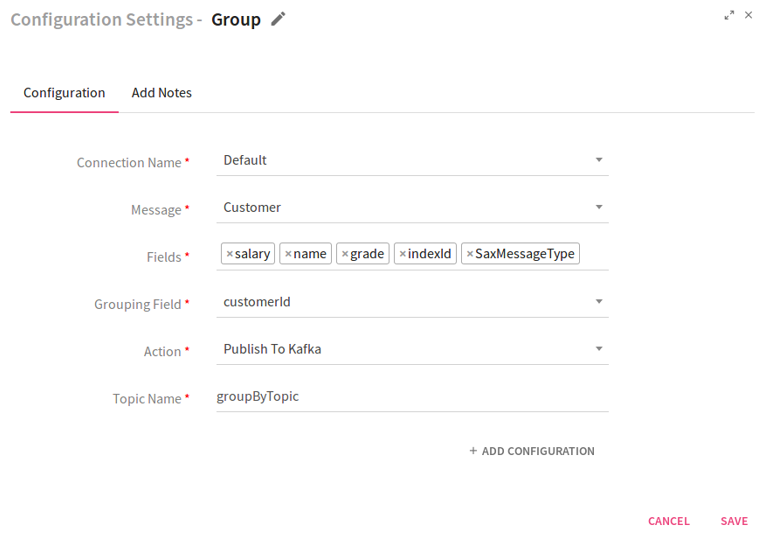
Connection Name |
Select the connection where data needs to be sinked processed by the Group Processor |
|
Message |
Select the message whose fields are to be grouped. |
|
Fields |
Select the message fields which are to be grouped. |
|
Grouping Field |
Select the field on which grouping is to be done.. |
|
Action |
Enables publishing grouped results to Kafka. |
|
Topic Name |
Kafka topic where results are published. |
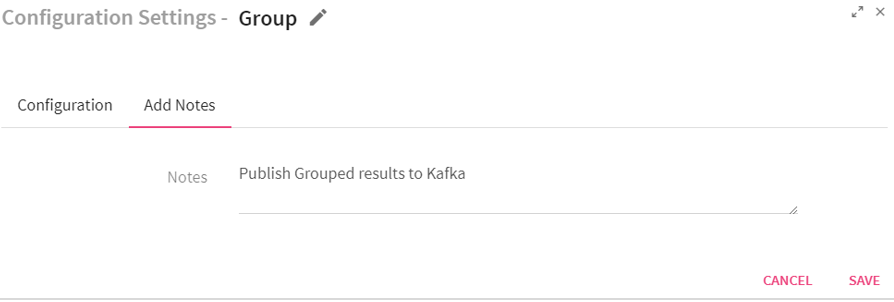
Click on the Add Notes tab. Enter the notes in the space provided.
Click on the SAVE button after entering all the details.
Use Case: The Group processor is used for grouping the data on the basis of a key.
For example, there can be customer orders having fields: customerId(1, 2, 3..), orderId and orderDate. This processor can help you in listing the customers on the basis of customerid.
Record with customerid 1 will be displayed at first number.
Record with customerid 2 will be displayed at second number.
Intersection Processor is not configurable.
Use Case:
The Intersection processor is used when two or more input streams are intersected. It looks at elements of both the datasets and returns the elements that are available across both datasets.
Example to demonstrate how Intersection works:
|
Input Set 1 {name:xyz,rating:7} {name:abc,rating:9} {name:klm,rating:5} |
Input Set 2 {name:xyz,rating:7} {name:abc,rating:9} {name:abc,rating:9} |
|
Output Set after applying Intersection Operation {name:xyz,rating:7} {name:abc,rating:9} |
|
Configuring Join Processor for Spark Pipelines
To add a Join Processor into your pipeline, drag the processor to the canvas and right click on it to configure.
|
Field |
Description |
|---|---|
|
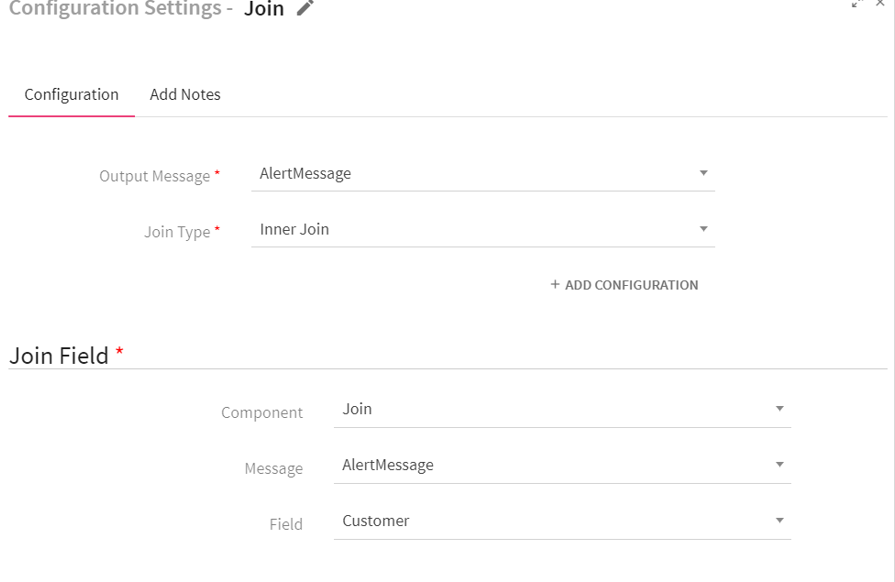
Output Message |
Message that holds the result of the Join operation. |
|
Join Type |
Type of Joins that can be performed over Input data. Inner join Left Outer join Right Outer Join Full Outer join Cross Join |
|
Component |
Previous component connected to this Processor will be shown in drop-down list. Select the component on which join operation is to be applied.. |
|
Message |
Messages used in the previous component will be shown in drop-down list. Select the message on which join operation is to be performed. |
|
Field |
Select the field on which join operation is to be performed.
|
Click on the Add Notes tab. Enter the notes in the space provided.
Click on the SAVE button after entering all the details.
Use Case: The join processor is used for performing different type of Join operations on data. Join operations which can be performed are Inner join, Left Outer join, Right Outer Join, Full Outer join and Cross Join over the incoming data.
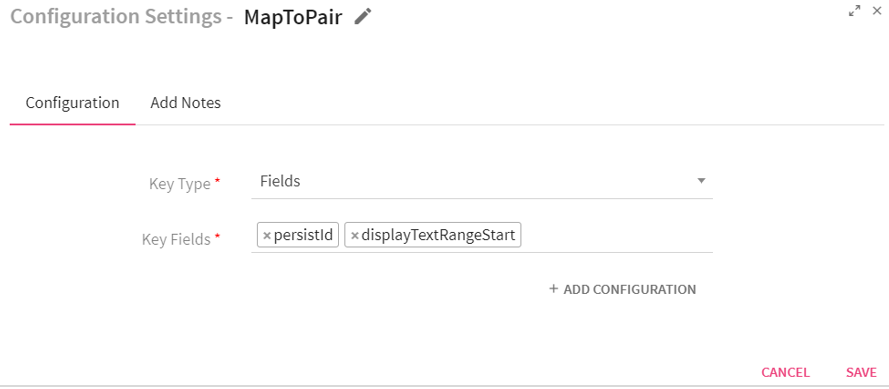
Configuring MapToPair Processor for Spark Pipelines
To add a MapToPair Processor into your pipeline, drag the processor on the canvas and right click on it to configure.
|
Field |
Description |
|---|---|
|
Key Type |
Enables to select the key.
Fields: If selected Fields, system displays Key Fields input box.
Custom: If selected Custom, system displays an input box Key. |
|
Key Fields/Key |
Key Fields: Select the message fields that are to be used as key. Key: User defined key. |
Click on the Add Notes tab.
Enter the notes in the space provided.
Click on the SAVE button after entering all the details.
Use Case: The MapToPair processor returns Paired Dstream having dataset of (Key, Value) pairs. For example, you can fetch the data on the basis of a key defined as “Name”. The system will fetch all the values based on this key.
Configuring Persist Processor for Spark Pipelines
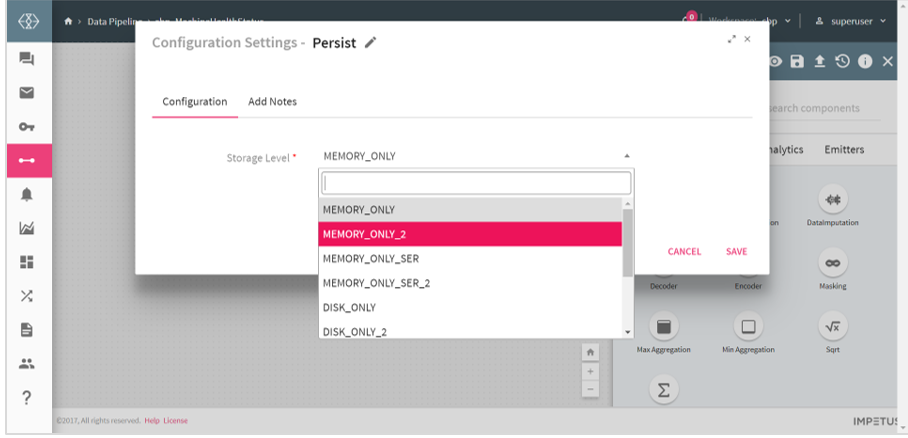
Storage levels are meant to provide different substitutions between memory usage and CPU efficiency.
Select the Storage level from the given list.
1. MEMORY_ONLY: Stores RDD as reserialized Java objects in the JVM. If the RDD does not fit in memory, some partitions will not be cached and will be recomputed each time they are needed. This is the default level.
2. MEMORY_AND_DISK: Stores RDD as deserialized Java objects in the JVM. If the RDD does not fit in memory, store the partitions that do not fit on disk, and read them from there when they are needed.
3. MEMORY_ONLY_SER: Stores RDD as serialized Java objects (one-byte array per partition). This is generally more space-efficient than deserialized objects, especially when using a fast serializer, but more CPU-intensive to read.
4. MEMORY_AND_DISK_SER: Similar to MEMORY_ONLY_SER, but spill partitions that do not fit in memory to disk instead of precomputing them each time they are needed.
5. MEMORY_ONLY_2: Same as the levels above, but replicate each partition on two cluster nodes.
6. MEMORY_AND_DISK_2: Same as the levels above, but replicate each partition on two cluster nodes.
7. DISK ONLY: Store the RDD partitions only on disk.
8. MEMORY_ONLY__SER_2: Same as MEMORY_ONLY_2 but stores the RDD as serialized java objects.
9. DISK_ONLY_2: Same as DISK_ONLY but RDD is replicated on two nodes.
10. MEMORY_AND_DISK_SER_2- Same as MEMORY_AND_DISK_2 but stores the RDD as serialized java objects.
Click on the Add Notes tab. Enter the notes in the space provided.
Click on the SAVE button after entering all the details.
Use Case: The persist processor is used when you want to save intermediate partial result of a pipeline and reuse it in subsequent stages. This intermediate result is stored in memory or disk.
For example, if you need to store data on disk, you can make use of storage level DISK_ONLY.
The python processor allows you to:
1.Write custom PySpark code for defining transformations on Spark RDDs.
2.Write custom python code for processing input records at runtime
Below table describes the input fields for configuring the Python Processor:
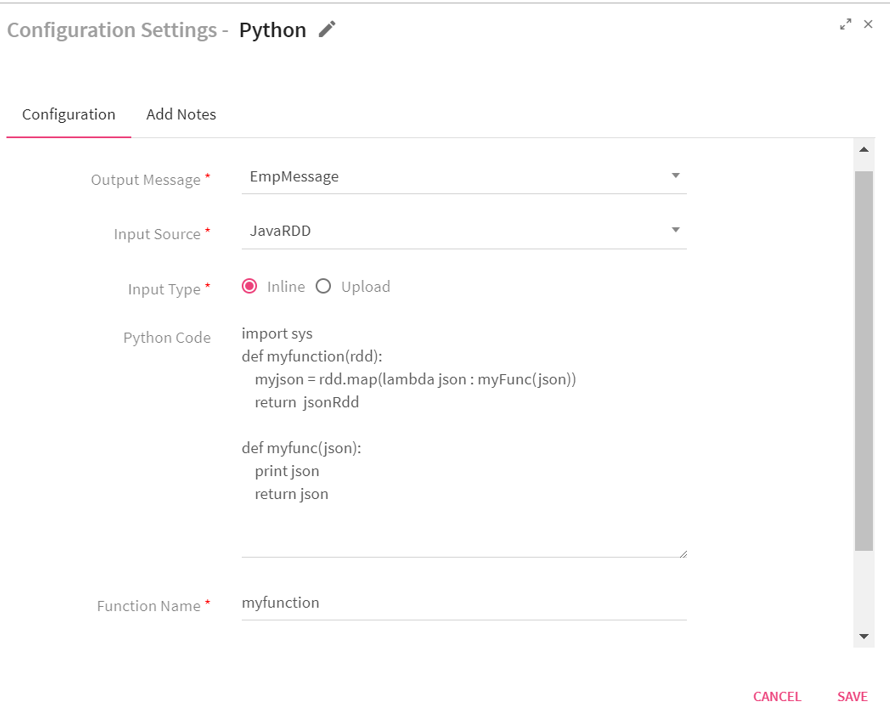
Configuring Python Processor for Spark Pipelines
To add a Python Processor into your pipeline, drag the processor on the canvas and right click on it to configure.
|
Field |
Description |
|---|---|
|
Output Message |
Defines the type of message that is emitted from the python processor |
|
Input Source |
Input type to the custom python function that will be called by StreamAnalytix. JavaRDD: Input provided is RDD of JSON object. The custom python function is expected to also return an RDD of JSON object. |
|
Input Type |
Inline: This option allows user to enter custom python code inline. Upload: This option allows user to upload a file containing custom python code. Function Name should be available in uploaded file. For example, if function name is myfunction, this function should be present in the uploaded python file(.py) file.. |
|
Python Code |
Enables to write the python processing logic.
|
|
Function Name |
Python function which is to be executed. |
|
Add Current Timestamp |
When selected, adds the current timestamp in the output message. |
|
Add Configuration |
Enables to add Additional properties. |
While saving a pipeline with Python Processor, an additional spark configuration needs to be added in the Extra Spark Submit options –
Note: Use the correct spark home environment in the below path.
Click on the Add Notes tab and enter the notes in the space provided.
Click on the SAVE button after entering all the details.
Below is an example of custom python code to show the usage of this processor
In this example, we have used an existing scikit-learn model that was persisted using scikit’s joblib.dump method.
Load the persisted pickled model and predict the class of input data records.
|
def customPyFunction(myrdd): myrdd = myrdd.map(lambda jsonobj : predictOutput(jsonobj)) return myrdd
def predictOutput(jsonInput): import json import numpy as np from sklearn.externals import joblib jsonOutput = jsonInput model = joblib.load('/home/sax/logreg.pkl') sampleinput = np.array([[jsonInput.get('SepalLength'), jsonInput.get('SepalWidth')]]) a = model.predict(sampleinput) b = a.astype('U') jsonOutput[u'Species'] = b[0] retval = json.loads(json.dumps(jsonOutput)) return retval |
In the above code, StreamAnalytix will call customPyFunction and pass RDD of JSON objects.
We want to predict the class of each input record using the previously created model, we would need to call the predictOuput function on each of these records. Hence, we use Pyspark’s map transformation on the given input RDD.
The map transformation predicts the class of each record adds it to the corresponding json object and then returns a new RDD. This new RDD is returned back to StreamAnalytix for further processing/persisting.
Here, the customPyFunction is executed on the Spark Driver and the predictOuput function is executed on the Spark Executors.
It is assumed that Python modules - numpy, scipy and scikit-learn - are installed on all the nodes of the cluster and the pickled model is also available at a common path on all the nodes of the cluster. This is required to enable distributed/parallel computing of the custom python code.
Below is a pictorial representation of how StreamAnalytix puts all this together.
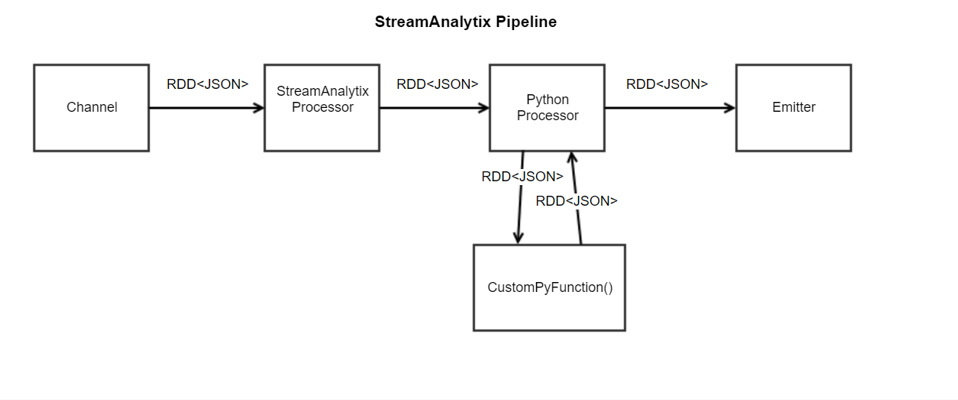
Use Case: The Python Processor is used for writing custom code in Python language. This code can be used for processing the data coming within the pipeline.
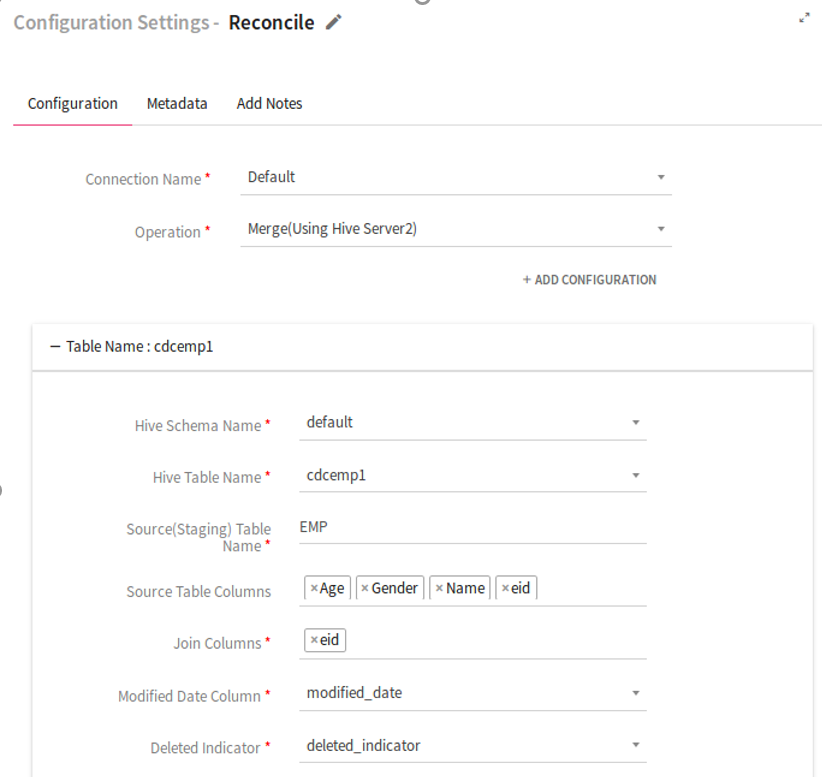
Configuring Reconcile Processor
To add a Reconcile Processor into your pipeline, drag the processor on to the canvas.
|
Field |
Description |
|---|---|
|
Connection Name |
Select a Hive connection in order to perform data operation on Hive table. |
|
Operation |
Select the operation which is to be reconciled on Hive table.
Union(Using HiveContext): Runs union query using the HiveContext API Merge(Using HiveServer2): Runs merge INTO query using the HiverServer2 API |
|
Add Configuration |
Enables to configure additional custom Hive properties. |
|
Table Section |
Enables to map a Hive table for reconcile operation. |
|
Hive Schema Name |
Specifies Database name in which target table resides. |
|
Hive Table Name |
Table on which Hive operation is to be performed. |
|
Source (Staging) Table Name |
Name of the source table on which operation is to performed. All the incoming records with Source Table Name goes to configured hive table. |
|
Source Table Columns |
Name of the source table columns as specified in incoming data of pipeline. |
|
Join Columns |
Name of the columns for performing the Join operation. |
|
Modified Date Columns |
Hive table column which shows the most frequent updated records. |
|
Deleted Indicator |
Hive table column which shows the deleted records .. |
|
Partition Columns |
Hive table column used for updating the identified Hive partitions based on incoming data. |
|
Add New Table |
Option to add one more table to reconcile. |
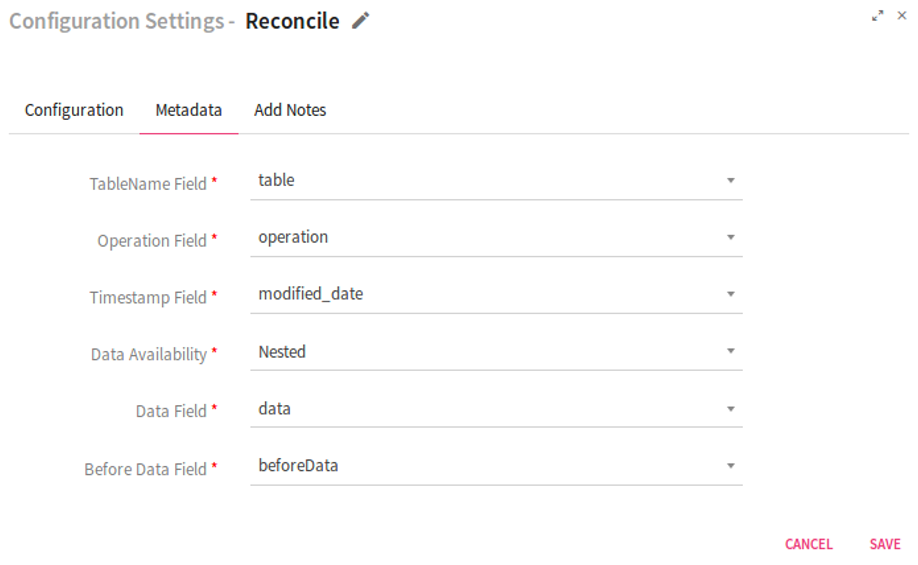
Metadata tab: Configuration of Metadata fields which are a part of incoming data.
|
Field |
Description |
|---|---|
|
TableName field |
Specifies the field name which holds the value of table name in incoming data. |
|
Operation field |
Specifies the field name which holds the operation type in incoming data. |
|
Timestamp field |
Specifies the field name which holds the timestamp value in incoming data. |
|
Data Availability |
Flag used for identifying Data availability in incoming message.
Nested: Data available inside the nested JSON key.
Direct: Data available directly in JSON |
|
Data Field |
Specifies the field name which holds the incoming data. |
|
Before Data Field |
Specifies the field name which holds the old data in case of update and delete operations |
Note: In case of Merge operation, the target table should be transactional and stored as ORC.
Click on the Add Notes tab. Enter the notes in the space provided.
Click on the SAVE button after entering all the details.
Use Case: The Reconcile processor is used when you wish to perform incremental updates ((DML and DDL operations) on Hive table using events captured from RDBMS.
Configuring Repartition Processor for Spark Pipelines
To add a Repartition Processor into your pipeline, drag the processor on the pipeline canvas and right click on it configure.

Enter the number of executors of a processor in the Parallelism field.
Click on the Add Notes tab. Enter the notes in the space provided.
Click on the SAVE button after entering all the details.
Use Case: The Repartition processor is used for reshuffling the data in Resilient Distributed Datasets(RDD). It creates either more or fewer partitions in order to balance data across them and shuffles data over the network.
For example, you can use single partition if you wish to write data in a single file.Multiple partitions can be used for writing data in multiple files.
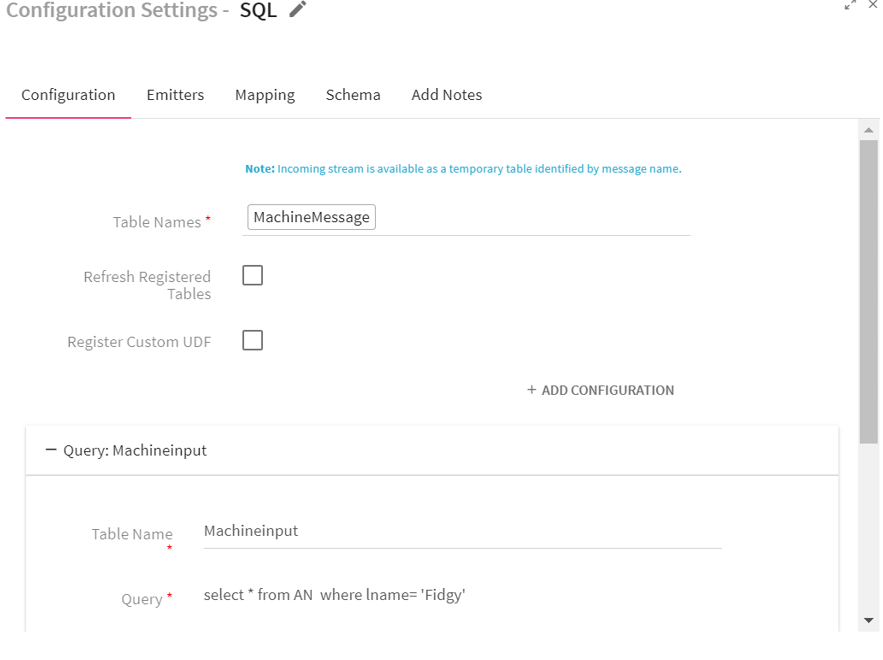
Configuring SQL Processor for Spark Pipelines
To add a SQL Processor into your pipeline, drag the processor to the canvas and right click on it to configure as explained below.
|
Field |
Description |
|---|---|
|
Table Names |
Displays all the registered tables. Also incoming stream is available as a temporary table identified by message name. Select the tables for performing SQL operation |
|
Refresh Registered Tables |
When enabled, refreshes the registered table in every batch. |
|
Register Custom UDF |
When enabled, allows you to add or register Custom UDF for Spark SQL UDF Name: Name of the custom UDF as defined in Spark SQL Full-Qualified Class Name: Fully qualified class name that contains the UDF implementation. |
|
Query section: Enables to add multiple queries which are executed over different tables |
|
|
Table Name |
Temporary table name which holds the executed query result. |
|
Query |
SQL Query to be fired on the selected tables. |
|
Add New Query |
Enables to add multiple queries. |
|
Emit Query Output |
Message that goes to the next component. It could be either incoming message or output from one of the query. |
Make sure that while registering custom UDF you upload the jar using upload jar feature .
Go to the Emitters tab to define the sink where the query output will be stored.

|
Field |
Description |
|---|---|
|
Query |
Enables to select multiple queries in order to perform the emit operation. |
|
Data Sink |
Select S3/HDFS/Rabbitmq/kafka/Es/Hbase/Solr as data sink to save query output. |
|
Connection Name |
Choose available connection for data sink. |
|
Data Format |
Data format to save output i.e CSV and Json. |
Go to the Mapping tab. Map your query output fields to the selected output message fields.
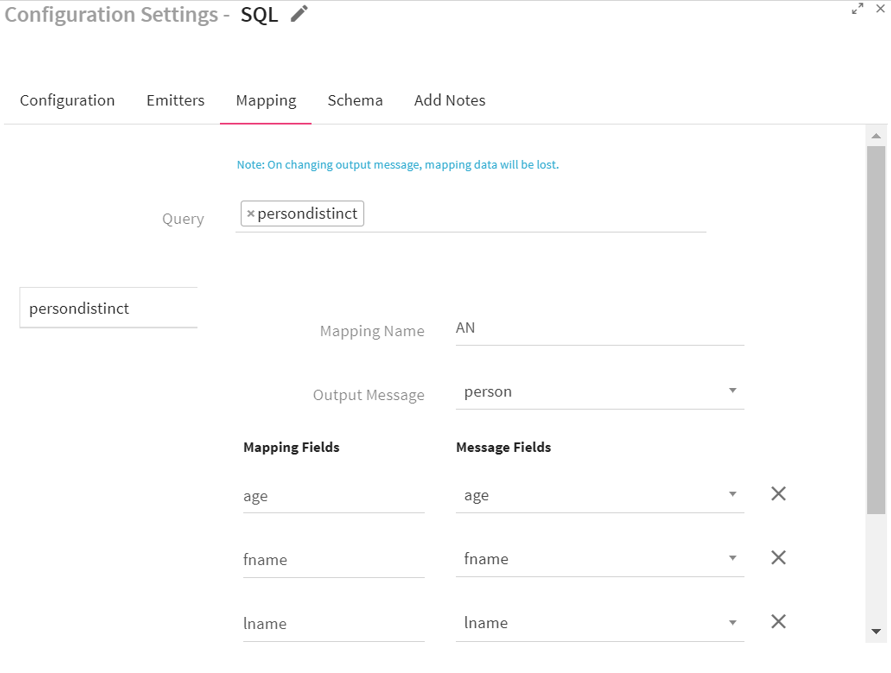
Select table/query for which mapping has to be done. Select an output message for that table/query.
After selecting message, you will have to map its fields.
For mapping the query table fields with message fields, click on Add Fields link.
On clicking on add fields link; the tab on the right lists a drop down with output message fields . In the left tab , you will have to write the table/query output fields to map with one of the output message fields.
|
Field |
Description |
|---|---|
|
Query |
Select the query for which mapping has to be done. Enables to select multiple queries. |
|
Mapping Name |
An alias for the mapping. |
|
Output Message |
Message that holds the output of selected table. |
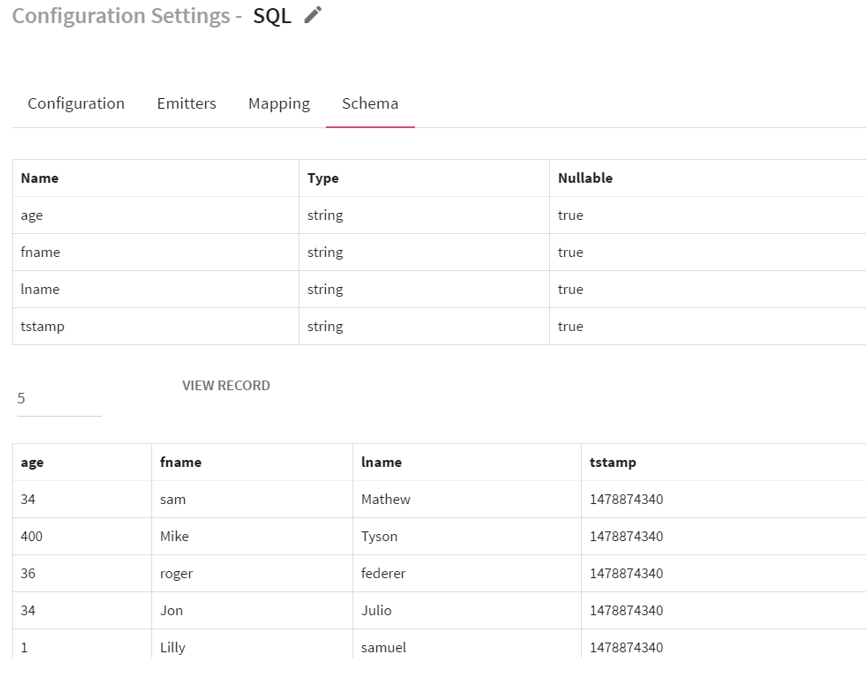
You can also view schema of used registered table under Schema tab by selecting the table name.
You can use SQL processor emitters to dump any of the table output data to Kafka, RabbitMQ, HDFS, S3, Elasticsearch, Hbase and Solr. For SQL emitters: Elasticsearch, SOLR and Hbase, you will have to create/select mapping.
Click on the Add Notes tab. Enter the notes in the space provided.
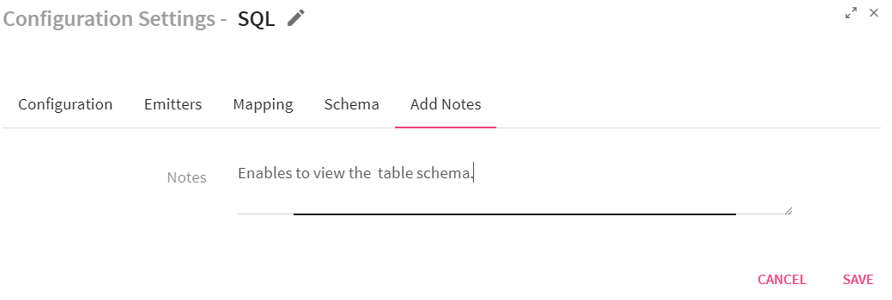
Click on the SAVE button after entering all the details.
Use Case: The SQL processor is used to run queries over streaming data and registered tables. You may use this processor for joining streaming and static data by performing join operation.
The Stream Correction processor adds the missing events in the incoming batch of events.
Example:
There is an employee data with fields: name, salary, age and grade
It is anticipated that following data will always be present in the incoming message.
• 5 messages with name Aaron
• 6 messages with name OJ
• 1 message with name Kate
The Stream Correction Processor adds the above number of messages for “name”, if not present in incoming stream.
You have following batches:
|
Input |
Salary |
Age |
Grade |
|
|---|---|---|---|---|
|
John |
10000 |
25 |
G6 |
(1 record of John) |
|
Aaron |
10000 |
25 |
G6 |
(5 records of Aaron) |
|
Aaron |
10000 |
25 |
G6 |
|
|
10000 |
10000 |
25 |
G6 |
|
|
10000 |
10000 |
25 |
G6 |
|
|
10000 |
10000 |
25 |
G6 |
|
|
10000 |
10000 |
25 |
G6 |
(3 records of OJ) |
|
10000 |
10000 |
25 |
G6 |
|
|
10000 |
10000 |
25 |
G6 |
|
The Stream Correction Processor expects 6 records of OJ (you have only 3 records in above batch), and 1 record of Kate (0 records in incoming batch); therefore, the output processor will add the missing events and no new records will be added for Aaron since incoming batch has 5 records as expected.
Hence the output looks like this : :
|
Name |
Salary |
Age |
Grade |
|
|---|---|---|---|---|
|
Aaron |
10000
|
25 |
G6 |
(1 record of JAaron) |
|
Aaron |
10000
|
25 |
G6 |
(5 records of Aaron) |
|
Aaron |
10000
|
25 |
G6 |
|
|
Aaron |
10000
|
25 |
G6 |
|
|
Aaron |
10000
|
25 |
G6 |
|
|
Aaron |
10000
|
25 |
G6 |
|
|
OJ |
10000
|
25 |
G6 |
(3 records of OJ) |
|
OJ |
10000
|
25 |
G6 |
|
|
OJ |
10000
|
25 |
G6 |
|
|
OJ |
null |
null |
null |
|
|
OJ |
null |
null |
null |
null |
|
OJ |
null |
null |
null |
null |
|
Kate |
null |
null |
null |
null |
OJ
You need to register a table with columns: frequency and the field name (whichever field is missing) for which you are expecting x number of records.
Considering the above example:
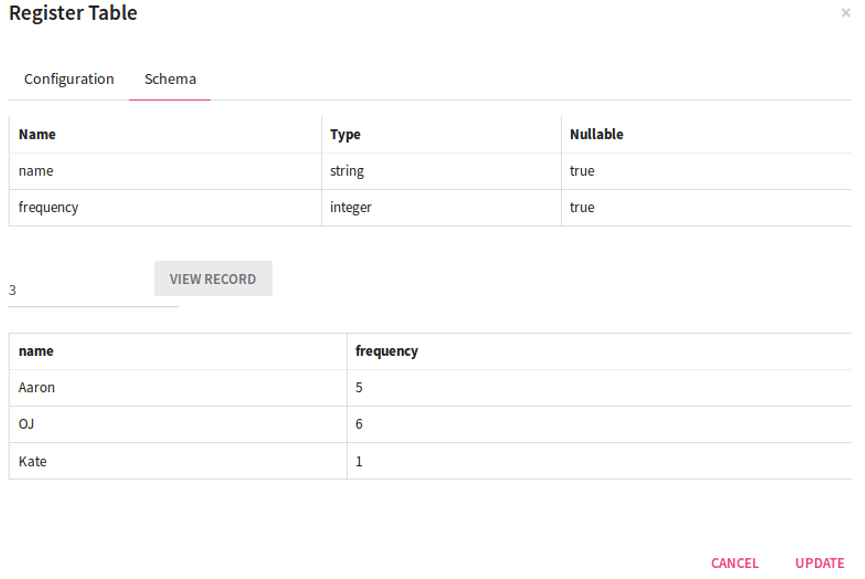
Register a table via Register Entities < Register Table with columns : Name and Frequency. Enter the following data in the table:
|
Name |
Frequency |
|---|---|
|
Aaron |
5 |
|
OJ |
6 |
|
Kate |
1 |
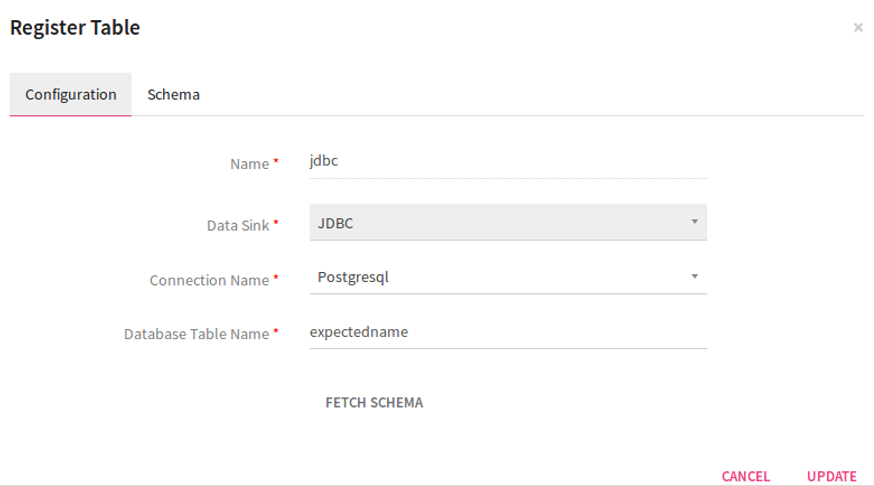
You have created a jdbc table and given a name to it. You can use this table in steamcorrection processor.
The registered table will be populated under Configuration < Event List.
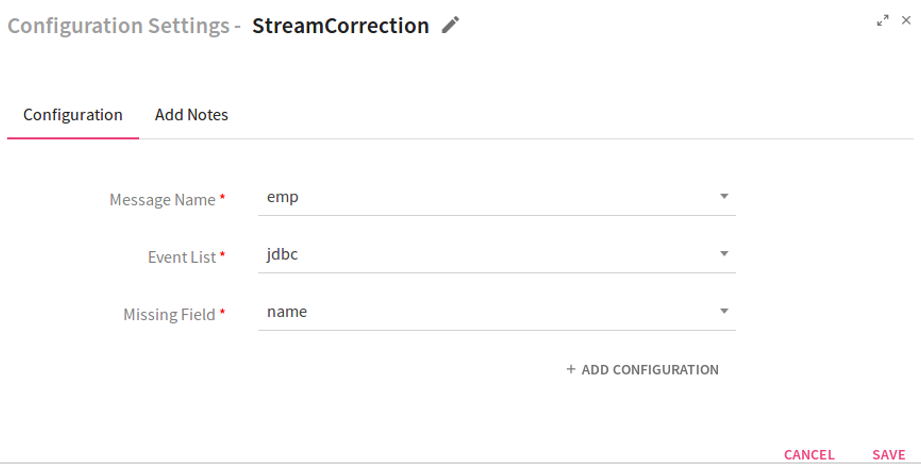
Configuring Stream Correction Processor
To add a Stream correction Processor into your pipeline, drag the processor to the canvas and right click on it to configure.
|
Field |
Description |
|---|---|
|
Message Name |
Select the message of the pipeline for which missing events are to be found. |
|
Event list |
Select the registered table which holds information of expected field value and its corresponding frequency. |
|
Missing Field |
Select the field for which events are expected. |
Click on the Add Notes tab. Enter the notes in the space provided.
Click on the SAVE button after entering all the details.
Use Case: This processor enables to add missing events in the incoming batches. For example, you are getting 100 records in every batch and you wish to compute average salary of these records. In some batches, records received are less than 100 and salary is unavailable for the missing records. By making use of this processor, you can add missing records for the given salary in the registered table.
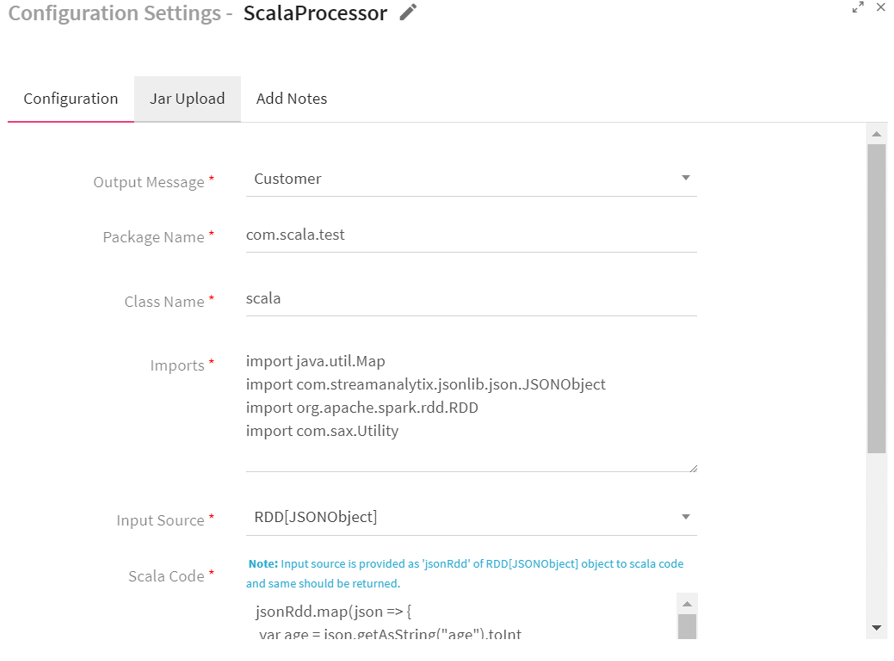
Configuring Scala Processor for Spark Pipelines
To add a Scala Processor into your pipeline, drag the processor on the canvas and right click on it to configure.
|
Field |
Description |
|---|---|
|
Output Message |
Message that holds Scala Processor output. |
|
Package Name |
Package for the Scala Implementation class. |
|
Class Name |
Class name for the Scala implementation. |
|
Imports |
Import statements for the Scala implementation. |
|
Input Source |
Input Source for the Scala Code: JSON Object: Input source JSONObject is provided as JSON to Scala code. Enables to perform operations over it.
RDD [JSON Object]: Input source RDD [JSONObject] is provided as JSONRDD to Scala code. Enables to use this input source to perform the transformation/action functions over RDD of JSONObject.
JavaDStream [JSONObject]: Input source JavaDStream [JSONObject] is provided as JSONStream to scala code. Enables to use this source to perform the transformation/action functions over JavaDStream of JSONObject.
JavaPairDStream [Object, JSONObject]: Input source JavaPairDStream [JSONObject] is provided as JSONStream to Scala code. Enables to use this input source to perform the transformation/action functions over JavaPairDStream of JSONObject.
RDD[(Object, JSONObject )]: Input source RDD [(Object, JSONObject)] is provided as JSONRDD to Scala code. Enables to use this input source to perform the transformation/action functions over RDD of JSONObject. |
|
Scala Code |
Scala code implementation to perform the operation on JSON RDD |
|
Add Current Timestamp |
If selected, adds current timestamp in the output message. |
Next, click on the Jar Upload tab. Jar file is generated when you build Scala code. You can upload the third party jars from here so that the API's can be utilized in Scala code by adding the import statement.
Click on the Add Notes tab. Enter the notes in the space provided.
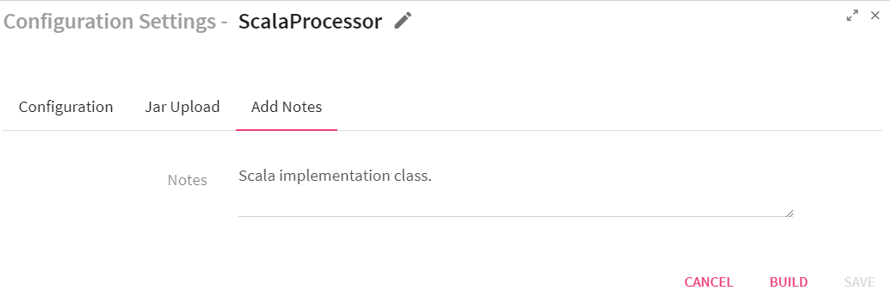
Click on the SAVE button after entering all the details.
Use Case: The Scala Processor is used for writing custom code in Scala language. This code can be used for processing the data coming within the pipeline.
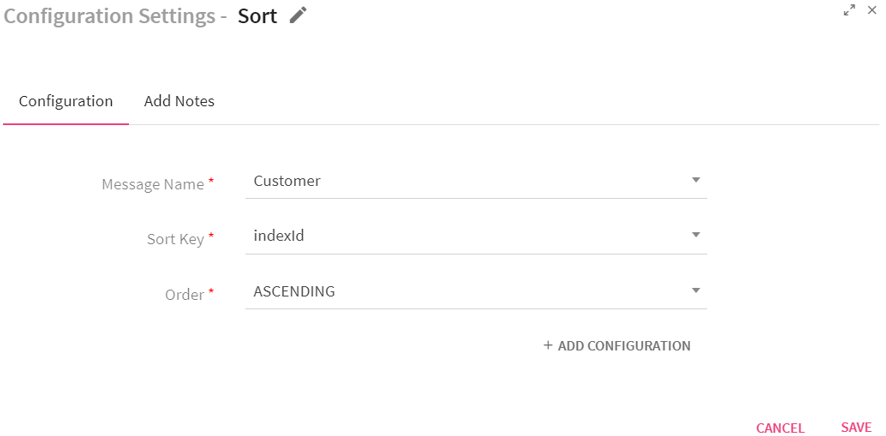
Configuring Sort Processor for Spark Pipelines
To add a Sort Processor into your pipeline, drag the processor to the canvas and right click on it to configure.
|
Field |
Description |
|---|---|
|
Message Name |
Select a message on which sorting has to be applied. |
|
Sort Key |
Select a field on which sorting is to be applied. |
|
Order |
Select order of sorting – ASCENDING or DESCENDING |
|
Add Configuration |
Enables to configure additional custom properties. |
Click on the Add Notes tab. Enter the notes in the space provided.
Click on the SAVE button after entering all the details.
Use Case: This processor is used when you want to sort batch data in increasing or decreasing order. For example, you can use this processor for sorting the height of students in ascending or descending order.
Configuring Take Processor for Spark Streaming pipelines
To add a Take Processor into your pipeline, drag the processor on the pipeline canvas and right click on it configure.
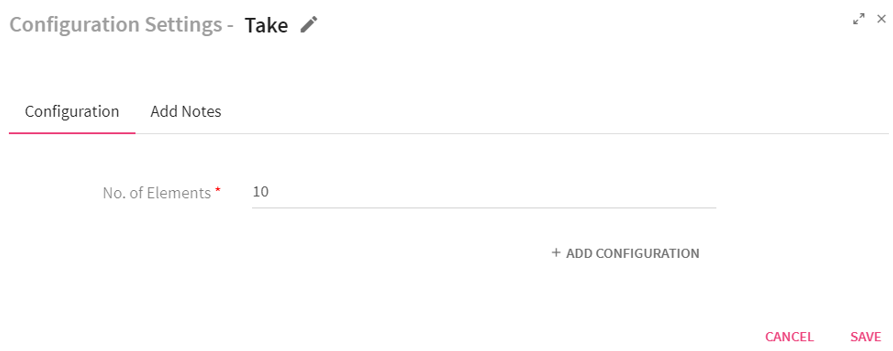
Enter the elements in the No of Elements field.
Click on the Add Notes tab.
Enter the notes in the space provided.
Click on the SAVE button after entering all the details.
Use Case: Take processor returns an array with the first n elements of the dataset. For example, if the number of elements entered are 10, the system will return first 10 elements of the dataset of each batch.
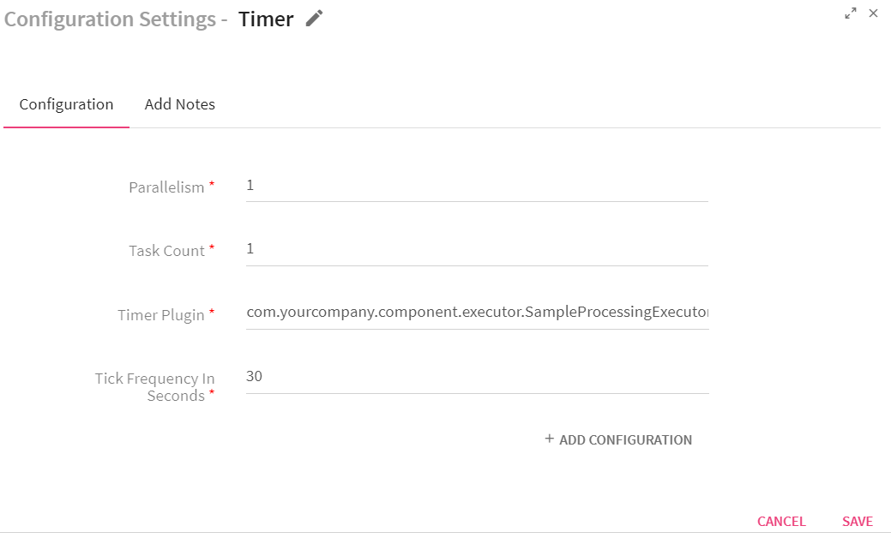
Configuring Timer Processor for Storm Streaming pipelines
To add a Timer Processor into your pipeline, drag the processor on the pipeline canvas and right click on it to configure.
|
Field |
Description |
|---|---|
|
Parallelism |
Number of executors (threads) of the processor. |
|
Task Count |
Number of instances of the processor. |
|
Timer Plugin |
Implements the ‘com.streamanalytix.framework.api.storm.processor.TimerProcessor’ interface and provides custom business logic in implemented methods. |
|
Tick Frequency in seconds |
Time window for which data will be held in memory in order to be operated as a group. |
|
ADD CONFIGURATION |
Enables to configure additional properties. |
Click on the Add Notes tab. Enter the notes in the space provided.
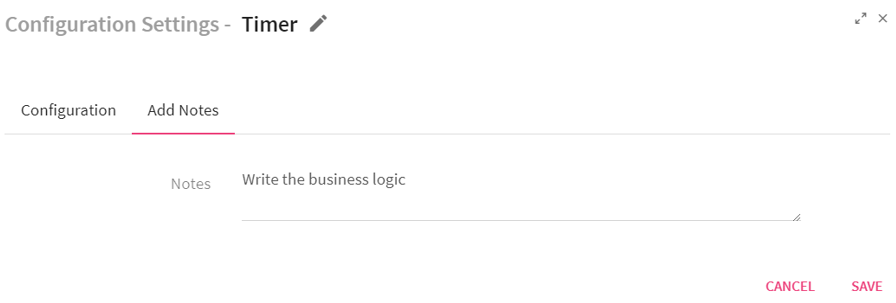
Click on the SAVE button after entering all the details.
Use Case: The Timer processor is used for writing customized business logic that will be executed in a fixed interval. For example, if you give timer of 5 seconds, this processor will hold the data for specified duration and then further process the data.
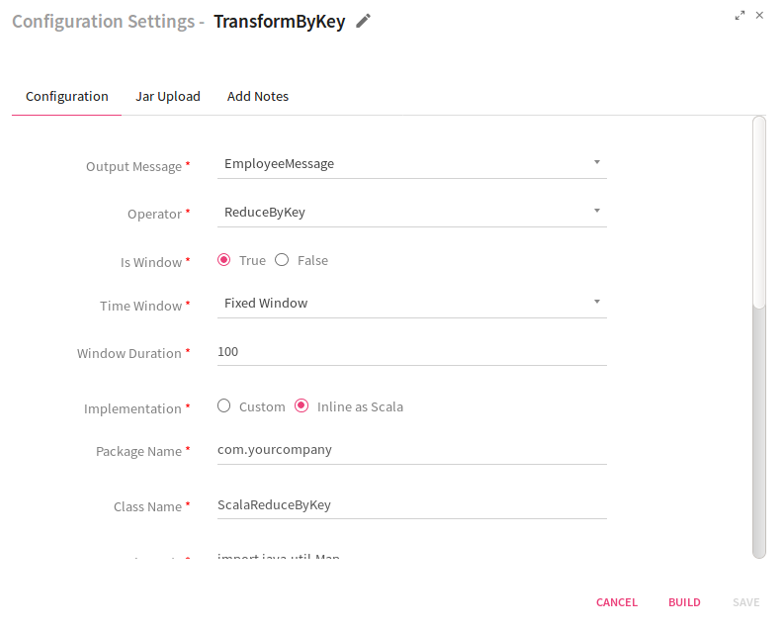
Configuring TransformByKey Processor for Spark Streaming pipelines
To add a TransformByKey Processor into your pipeline, drag the processor on the canvas and right click on it configure.
|
Field |
Description |
|---|---|
|
Output Message |
Contains all the output fields after applying transformation on input fields. |
|
Operator |
Operations that can be performed on incoming message fields:
ReduceByKey: Aggregates the incoming paired stream for each batch using the custom logic written for data reduction.
AggregateByKey: Aggregates the incoming paired stream for each batch using the custom logic written by for data aggregation.
SortByKey: Sorts the incoming paired stream for each batch.
UpdateStateByKey: Using UpdateStateByKey processor in pipeline you can return a new state where the state for each key is updated by applying the given function on the previous state of the key and the new values for the key. This can be used to maintain arbitrary state data for each key. For example, if the function performed is SUM and the previous batch SUM was 300 and the current batch SUM is 700 then the current state of the key would be 300+700=1000. |
|
Is Window |
To enable or disable time window configuration.
True: If selected True, enables Time Window and Window Duration fields.
False: If selected False, disables Time Window and Window Duration fields. |
|
Time Window |
Time window options:
Fixed Window: Window length and sliding interval remain same. The operation gets performed after the provided window interval. When selected, enables Window Duration field.
Sliding Window: In this type of window, you can configure the window length and sliding interval. When selected, enables Slide Duration field. |
|
Window Duration |
Duration in milliseconds for which incoming data would be collected. Data accumulated within that window duration will be passed further. Window Duration should be in multiples of batch duration that is provided at the time of saving or updating the pipeline. |
|
Slide Duration |
Enables to configure the window duration and sliding duration. For example, if the window duration is 60 seconds and slide duration is 10 seconds then, in every 10 seconds, the data collected in the previous 60 seconds will be sent ahead. The window duration and slide duration should be in multiples of batch duration. |
|
Implementation |
Type of implementation to be performed on the processor. Custom: When selected, Custom implementation is to be provided and system displays an additional field Reduce Logic Plugin.
Inline as Scala: When selected, specify the code in Scala language.
|
|
Reduce Logic Plugin |
Class to which the control will be passed in order to process incoming data. |
|
Package Name |
Package name for Scala code class. |
|
Class Name |
Scala implementation class name. |
|
Imports |
Import statements for the Scala implementation. |
|
Scala Code |
Code for performing the operations over jsonRdd object. |
|
Add Current Timestamp |
If selected, displays timestamp for the generated result. |
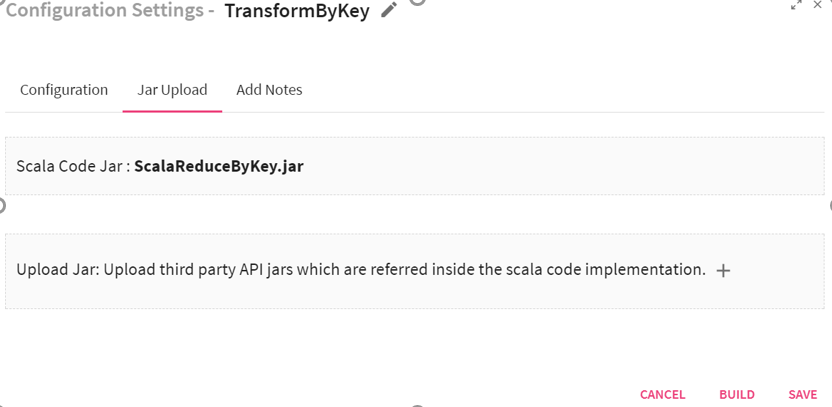
Next, click on the Jar Upload tab. Jar file is generated when you build Scala code by clicking on BUILD button. You can upload the third party jars from here so that the API's can be utilized in Scala code by adding the import statement.
Click on Add notes for adding notes.
Scenario II -Operator selected as Aggregate By Key.
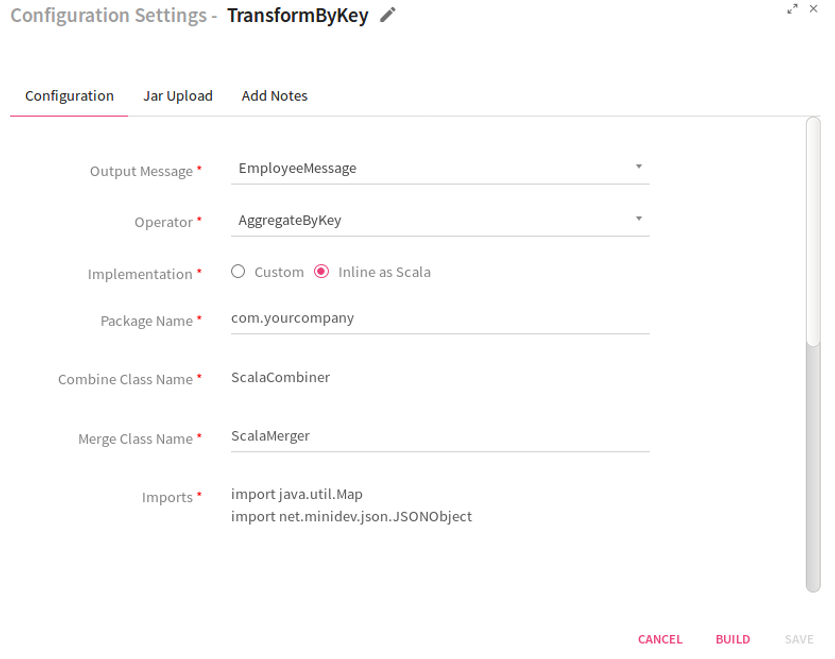
If you select the operator as Aggregate By Key, the system displays two additional fields: Combine Class Name and Merge Class Name. These are the classes to which the control will be passed in order to process the incoming data.
If option selected is Inline as Scala, provide the following information .
|
Field |
Description |
|---|---|
|
Package Name |
Package name of Scala code class. |
|
Combine Class Name |
Qualified name of the custom combiner class. |
|
Merge Class Name |
Qualified name of the custom merger class |
|
Imports |
Import statements for the Scala implementation. |
|
Merge Scala Code |
Specifies the Merge Scala Code. Input source is provided as arg0 and arg1 of JSONObject objects to Scala code and returns JSONObject |
|
Combine Scala code |
Specifies the Combine Scala Code. Input source is provided as arg0 and arg1 of JSONObject objects to Scala code and returns JSONObject. |
Scenario III- Operator selected as Sort By Key.
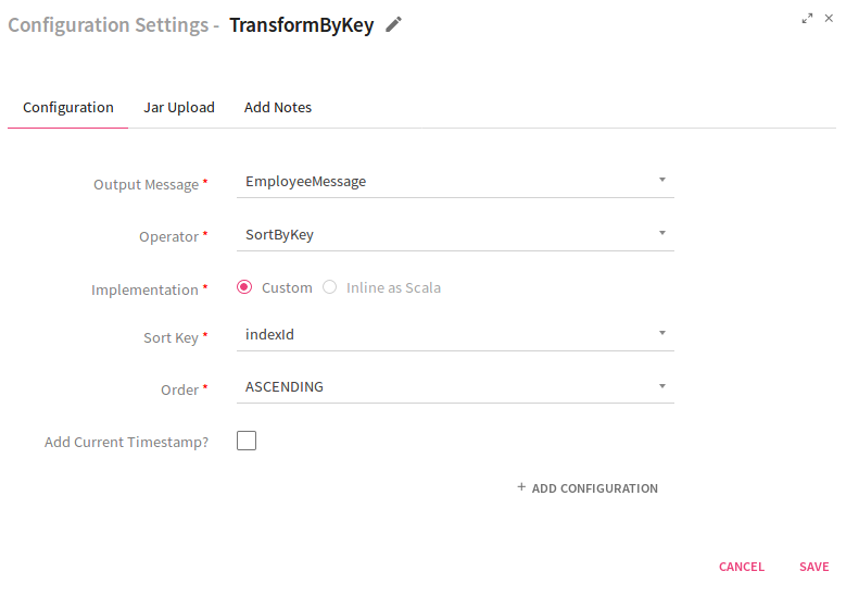
If you select the operator as Sort By Key, the system displays two fields: Sort Key and Order.
In the case of Sort Key, select the field which acts as a key in the incoming paired stream.
Sort By Key operator does not support the feature Inline as Scala.
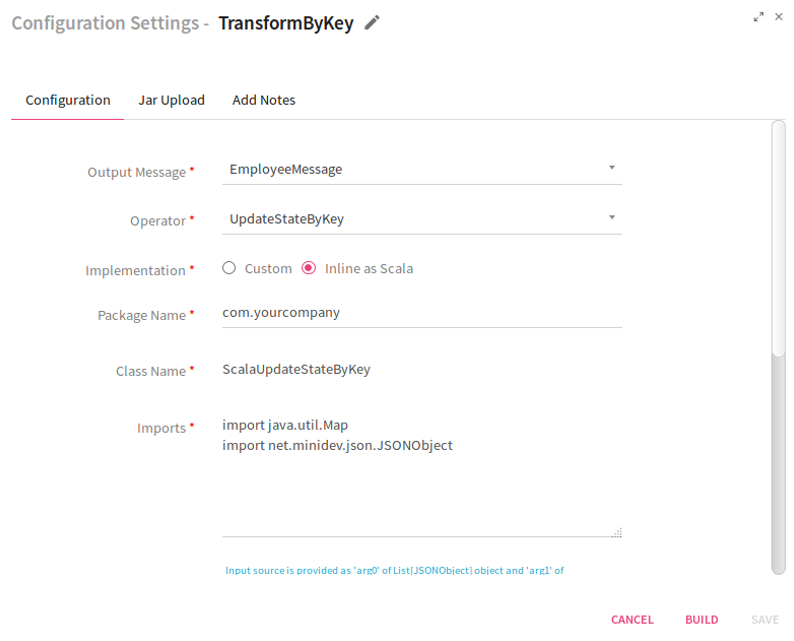
Scenario IV –Operator Selected as Update State By Key.
Select the operator UpdateStateByKey from the list. If you select the operation as Custom, provide the value for the Executor Plugin field. This is the class to which the control will be passed in order to process the incoming data.
If you select the option as Inline as Scala, enter the values for Package Name, Class Name, Imports and ScalaCode.
Click on the Add Notes tab. Enter the notes in the space provided.
Click on the SAVE button after entering all the details.
Use Case: TransformByKey processor allows you to perform operations on messages that are in the form of key value pair. For example, you can use this processor for calculating the maximum salary (value) of a specific grade(key) in an organization.
Union processor is not configurable.
Use Case:
The Union operation is used when you want to combine elements of two datasets.
Example to demonstrate how union works.
|
Input Set 1 {name:xyz,rating:7} {name:abc,rating:9} {name:klm,rating:5} |
Input Set 2 {name:xyz,rating:7} {name:abc,rating:9} {name:abc,rating:9} {name:klm,rating:6} |
|
Output Set after applying Union Operation {name:xyz,rating:7} {name:abc,rating:9} {name:klm,rating:5} {name:xyz,rating:7} {name:abc,rating:9} {name:abc,rating:9} {name:klm,rating:6} |
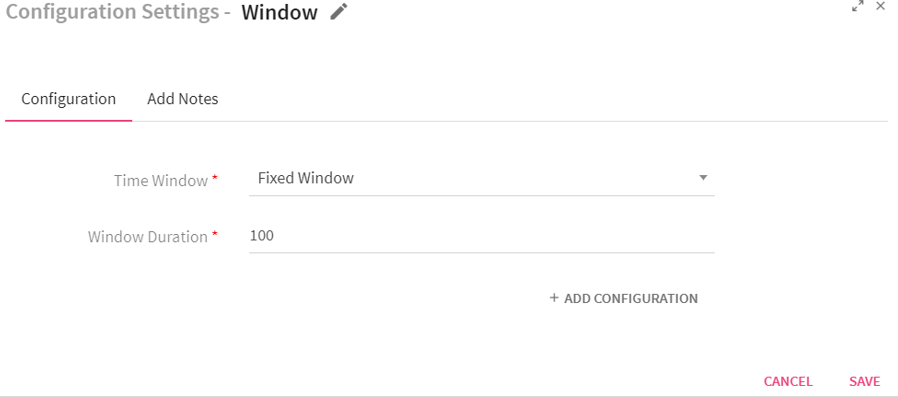
Configuring Window Processor for Spark Streaming pipelines
To add a Window Processor into your pipeline, drag the processor to the canvas and right click on it to configure.
|
Field |
Description |
|---|---|
|
Time Window |
Period of time to use for specified window type.
Fixed window: Specify a fixed window duration. For example, if the window duration is 60 seconds and batch duration is 10 seconds, data will be collected for 60 seconds. The next output gets generated again after 60 seconds window duration should be multiple of batch duration.
Sliding window: Specify the window duration and the sliding duration. For example, if the window duration is 60 seconds and slide duration is 10 seconds then, in every 10 seconds, the data collected in the previous 60 seconds will be sent ahead. The window duration and slide duration should be in multiple of the batch duration. |
|
Window Duration |
Duration in milliseconds for which incoming data would be collected. Data arrived within this window duration will be passed further. |
Click on the Add Notes tab.

Enter the notes in the space provided.
Click on the SAVE button after entering all the details.
Use Case: The Window processor is used in a pipeline for collecting the incoming data of a specific window duration.For example, you can use this processor for capturing the incoming data of pipeline for a specific duration like 10 seconds, 30 seconds.
For Spark Batch pipelines, you can use the following processors:
|
Processor |
Description |
|---|---|
|
Aggregates input stream values to perform min, max, count, sum, or avg operations. |
|
|
Generates alert based on specified rules. |
|
|
Performs aggregation function on the input RDD cumulatively. |
|
|
Removes duplicate value from an input RDD. |
|
|
Enriches or modifies an incoming message on the fly. |
|
|
Filters input RDD values based on specified rules. |
|
|
Produces multiple outputs for one input data. |
|
|
Groups input RDD by a key. |
|
|
Detects common and unique values from two or more input streams |
|
|
Joins two or more input RDD. |
|
|
Returns Paired RDD having dataset of (Key, Value) pairs. |
|
|
Stores the Spark RDD data into memory. |
|
|
Reshuffles the data in the RDD to balance the data across partitions. |
|
|
Implements your custom logic written in Scala in a pipeline. |
|
|
Sorts input RDD values in ascending or descending order. |
|
|
Run SQL queries on streaming data. |
|
|
Performs take (n) operation on the dataset. |
|
|
Performs TransformByKey operation on the dataset. |
|
|
Performs union of two or more input RDD |
Description
The following table lists the functions supported by Aggregation processor.
|
Average |
Average function calculates average of all the defined fields. |
|
Sum |
Sum function totals all the defined field values. |
|
Count |
Count function counts the number of fields. |
|
Minimum |
Minimum function displays the minimum value of the defined fields |
|
Maximum |
Maximum function displays the maximum value of the defined fields. |
Configuring Aggregation Processor for Spark Batch pipelines:
To add an Aggregation Processor into your pipeline, drag the processor to the canvas and right click on it to configure.
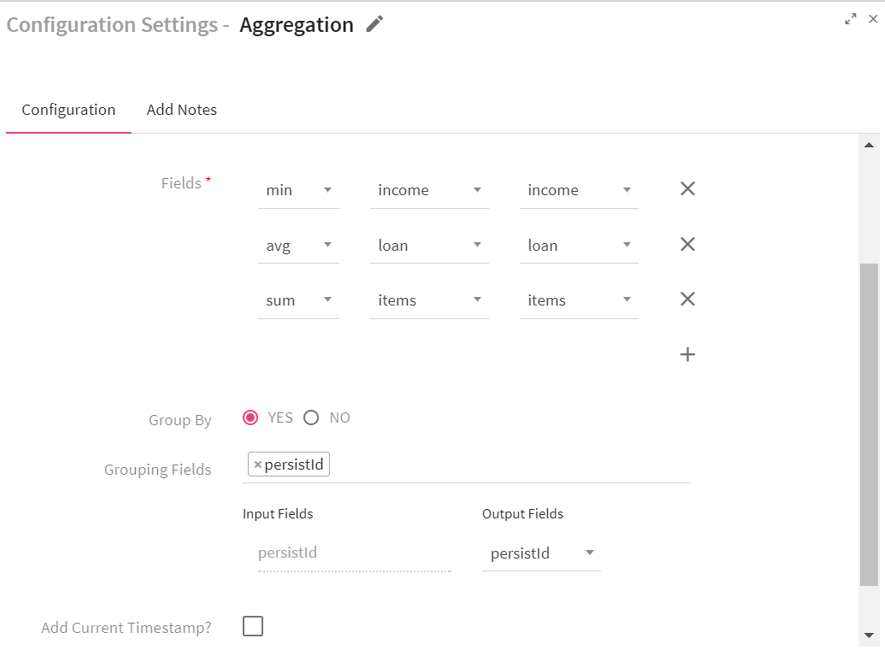
|
Field |
Description |
|---|---|
|
Message Name |
Select a message on which aggregation function is to be applied. |
|
Output Message |
Hold output fields after applying aggregation function. |
|
Fields |
Fields on the basis of which aggregation has to be applied. |
|
Group By |
Apply Group By or not Yes : Enables to select fields on which grouping has to be done. Default is No. |
|
Grouping Fields |
Selected message fields on which Group By is applied. |
|
Add Fields |
Additional Input fields can be added on which you wish to apply aggregation function. |
|
Add Current Timestamp |
If selected, displays timestamp for the generated result. |
|
ADD CONFIGURATION |
Additional properties can be added using ADD CONFIGURATION link. |
Click on the Add Notes tab. Enter the notes in the space provided.
Click on the SAVE button after entering all the details.
Use Case: The Aggregation processor is used when you want to perform Aggregation operations over the batch data.For example, you can use the Aggregation function max for computing the maximum salary of an employee in an organization.
The configuration is same for Spark Streaming and Batch.
The configuration is same for Spark Streaming and Batch.
The configuration is same for Spark Streaming and Batch.
The configuration is same for Spark Streaming and Batch.
The configuration is same for Spark Streaming and Batch.
TransformByKey processor allows you to perform operations on messages that are in the form of key value pair. For that, you need to initially process the stream through mapToPair processor to convert stream into a stream of key value pair.
Configuring TransformByKey Processor for Spark Batch pipelines
To add a TransformByKey Processor into your pipeline, drag the processor on the canvas and right click on it configure.
|
Field |
Description |
|---|---|
|
Output Message |
Contains all the output fields after applying transformation on input fields. |
|
Operator |
Operations that can be performed on incoming message fields. ReduceByKey: Aggregates the incoming paired RDD for incoming batch using the custom logic written by you for data reduction. AggregateByKey: Aggregates the incoming paired RDD for incoming batch using the custom logic written by you for data aggregation. SortByKey: Sorts the incoming RDD for incoming batch. |
|
Reduce Logic Plugin |
Class to which the control will be passed in order to process incoming data. |
|
Add Time Stamp |
If selected, displays timestamp for the generated result. |
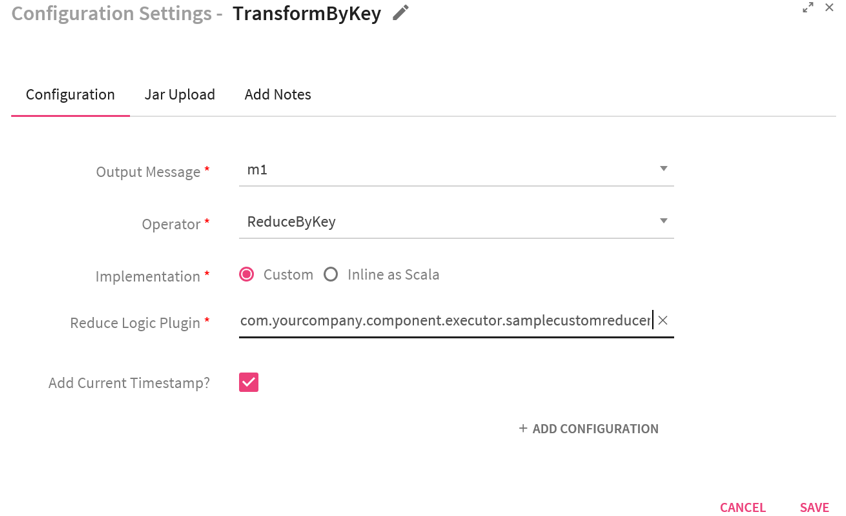
Scenario II -Operator selected as Aggregate By Key.
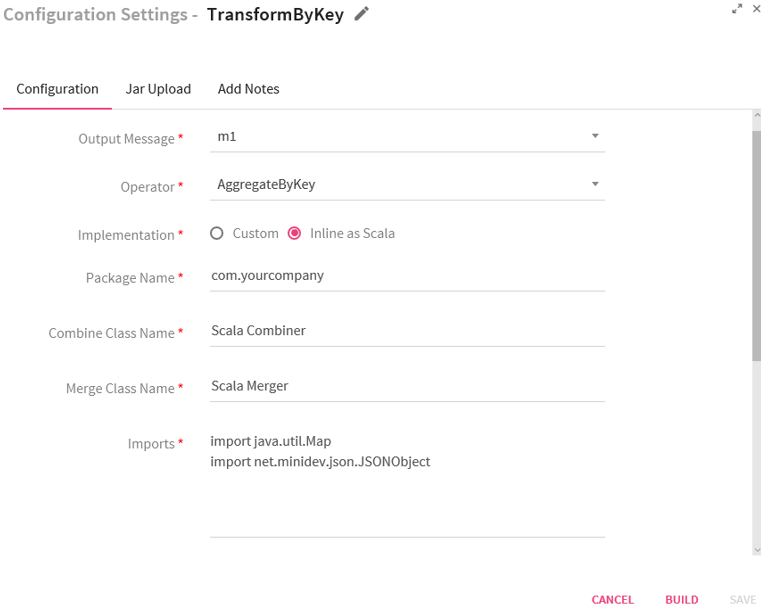 oo
oo
If you select the operator as Aggregate By Key, the system displays two additional fields : Combine Logic Plugin and Merge Logic Plugin. These are the classes to which the control will be passed in order to process the incoming data.
In Combine Logic Plugin, specify the qualified name of the custom combiner class in which you have written the code for combining data based on key.
In Merge logic Plugin, specify the qualified name of the custom merger class in which you have writtent the code for merging the output produced by combiners.
Scenario III- Operator selected as Sort By Key.
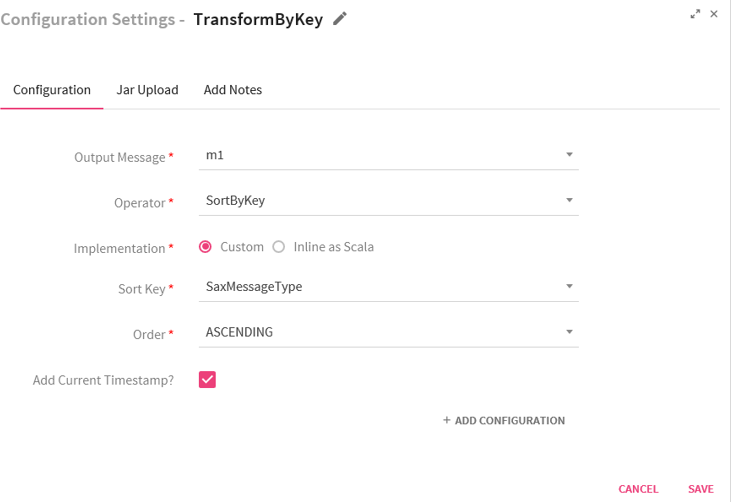
If you select the operator as Sort By Key, the system displays two fields Sort Key and Order.
In the case of Sort Key, you can select the field which acts as a key in the incoming paired stream.
Click on the Add Notes tab. Enter the notes in the space provided.
Click on the SAVE button after entering all the details.
Use Case: TransformByKey processor allows you to perform operations on messages that are in the form of key value pair.For example, you can use this processor for calculating the maximum salary (value) of a specific grade(key) in an organization.
Configuring Custom Processor for Spark Batch Pipelines
To add a Custom Processor into your Spark batch pipeline, drag the custom processor added in the pipeline or available as a registered component on the canvas, and right click on it to configure as explained below.
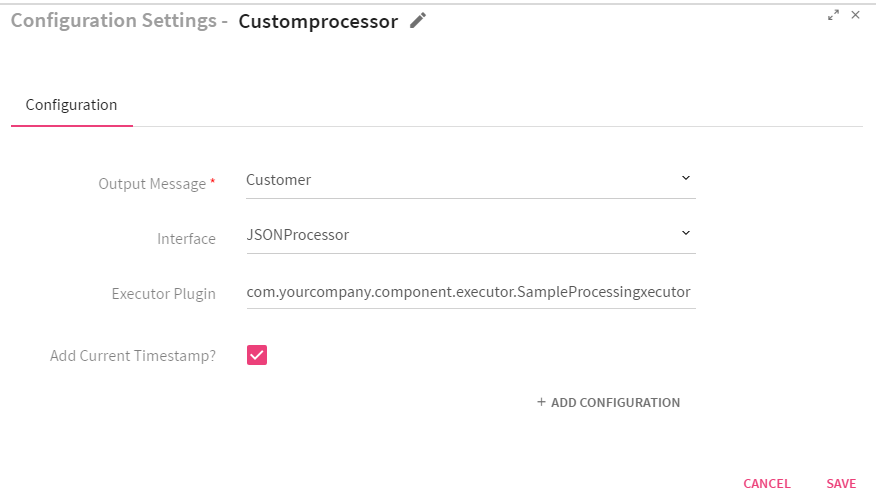
|
Field |
Description |
|---|---|
|
Output Message |
Message that holds the output fields after applying Join operation. |
|
Interface |
JSONProcessor: Interface which provides flexibility for implementing the business logic over the streaming JSON object. RDDProcessor: Interface which provides flexibility for implementing the business logic over the JSON RDD's. You can write transformation and action functions over it. |
|
Executor Plugin |
Class to which the control will be passed in order to process the incoming data. |
|
Add Current Timestamp |
If selected, displays timestamp for the generated result. |
|
ADD CONFIGURATION |
Enables to configure additional custom properties. |
Use Case: The custom processor is used for components which are not inbuilt within StreamAnalytix. You can write your own custom code and implement your logic in a pipeline . For example, StreamAnalytix does not provide support for reading data from DynamoDB database. If you wish to read data from DynamoDB, you can write your own custom logic and use it in a pipeline for reading the data.
The configuration is same for Spark Streaming and Batch.
The configuration is same for Spark Streamingand Batch.
The configuration is same for Spark Streaming and Batch.
The configuration is same for Spark Streaming and Batch.
The configuration is same for Spark Streaming and Batch.
The configuration is same for Spark Streaming and Batch.
The configuration is same for Spark Streaming and Batch.
The configuration is same for Spark Streaming and Batch.
The configuration is same for Spark Streamingand Batch.
The configuration is same for Spark Streaming and Batch.
With the only difference, when you create a batch pipeline, following input sources are available:
|
Input Source |
JSON Object: Input source JSONObject is provided as JSON to Scala code. You can perform operations over it.
RDD [JSON Object]: Input source RDD [JSONObject] is provided as JSONRDD to Scala code. You can use this input source to perform the transformation/action functions over RDD of JSONObject.
RDD[(Object, JSONObject )]: Input source RDD [(Object, JSONObject)] is provided as JSONRDD to Scala code. You can use this input source to perform the transformation/action functions over RDD of JSONObject. |
The configuration is same for Spark Streaming and Batch.
The configuration is same for Spark Streaming and Batch.
The configuration is same for Spark Streaming and Batch.