NVIDIA Triton Processor
Triton Inference Server is NVIDIA’s open-source platform for deploying and managing AI models at scale. It supports popular frameworks like TensorFlow, PyTorch, ONNX etc. offering flexibility in model integration. With support for both CPU and GPU, Triton ensures optimized, high-performance inference. Ideal for production workloads, it enables efficient, low-latency AI serving across diverse environments.
Configure the processor parameters as explained below.
Model Selection
Provide the details of the model to be used.
Connection
Select the NVIDIA Triton Connection that you created in Gathr.
Model
Select the model version to be used in the processor.
Configuration Tab
Provide the below details in the Configuration tab.
Inference Request
Select the option to prepare the Triton Inference request. The available options are JSON and Advanced.
JSON as Inference Request
Enter JSON object in the text area. The JSON should include all necessary fields, such as model’s name, input data, and any additional parameters required by the Triton Inference Server. Ensure the input data matches the expected shape, datatype, and other parameters defined by the model hosted on the Triton Inference Server.
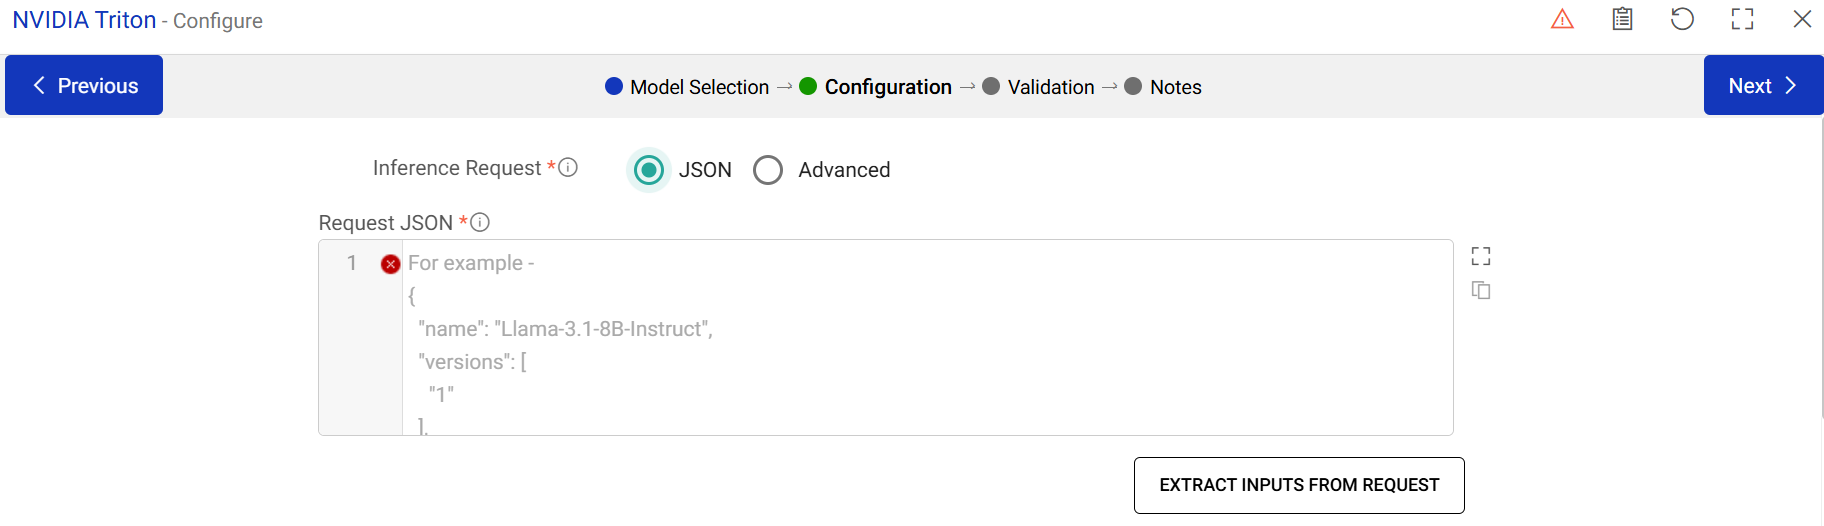
Request JSON
Enter the inference request JSON. Use <GathrColumn>variable_name</GathrColumn> in your request to define variables that will be replaced with input dataset column values.
Input
The placeholders <GathrColumn>variable_name</GathrColumn> provided in the prompt can be mapped to columns to replace its value with the placeholder keys.
Input from Request JSON
Placeholders <GathrColumn>___</GathrColumn> provided in the Request JSON will be extracted here. Map them with the input dataset columns.
Input column
Select the column to replace the placeholder variable.
Automap
Automap placeholders provided in Request JSON with input dataset columns. The placeholders variable name should be same as input dataset columns for automapping.
Output
The output can be configured to emit data received from input.
Output Column
Specify the column where the entire response will be stored.
Advanced Inference Request
The Advanced option can be used to prepare the Triton Inference request without the need to provide an entire JSON. Here, the model config file is used to pre-populate model config parameters.
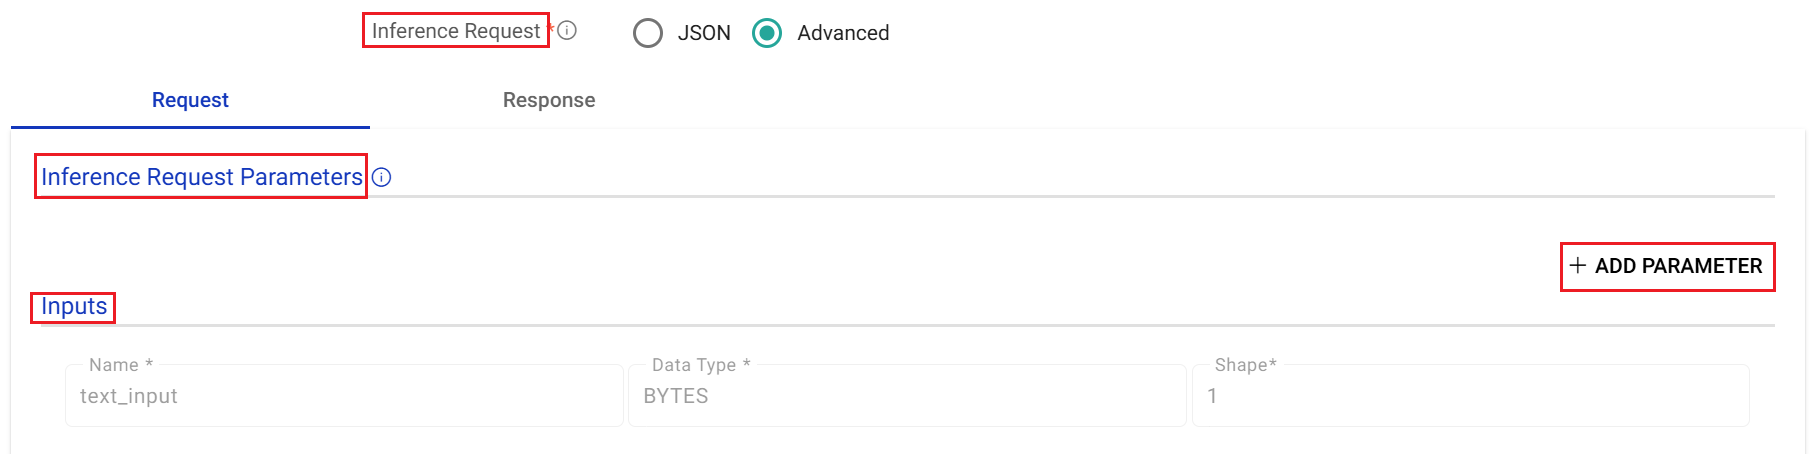
Inference Request Parameters
Add key-value parameters based on the selected model to help generate the inference request.
Inputs
The input parameters (non-editable) are auto-populated from the model config file available on the Triton server.
Data
Provide the actual contents of the input tensor. It must match the specified shape and datatype of the tensor.
Example: What is the capital of

If the column “Employee_Country” is changed in the prompt, ensure that the column mapping is correct by clicking on Export Inputs From JSON.
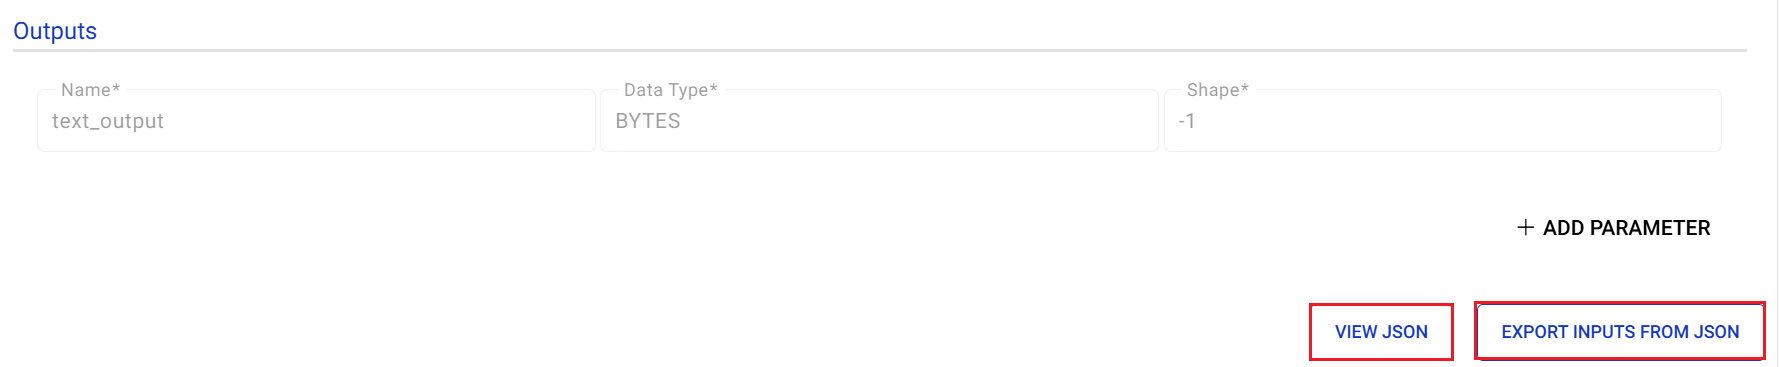
Outputs
The output parameters (non-editable) are auto-populated from the model config file available on the Triton server.
Map the Input from prompt and Input column fields by clicking at the Export Input from JSON.
View JSON
Click View JSON button to review the Request JSON.
Export Inputs From JSON
The placeholder
Response
The response received from the input.
Input from prompt
The plceholders provided in the Data field in the previous tab are extracted here to map them with the input column.
Input column
Select the input dataset column name to replace its value with the placeholder key.
Output Column
Specify the column where the entire response will be stored.
Validation
Next step is to provide the below details under the Validation tab.
Validate Output Using
Validate the output according to your needs. Choose the rows you want to validate.
Top 3 Rows: Quickly validate the first three rows of the output. This is good for a rapid overview.
Custom Rows: For more precise validation, you can manually select specific rows to validate. Simply click on the rows you want to include.
Random Rows: Comprehensively validate random rows in the output.
Once you’ve made your selection, click the Validate button to initiate the validation process. The processor will perform the validation according to your chosen rows.
Review and Confirm
Thoroughly review the validation results to confirm if they align with the desired outcome. Adjust and Revalidate (if Necessary).
If you identify any errors or inconsistencies, you can go back to the Nvidia processor’s configuration section and make adjustment as needed.
Once you’re satisfied with the validation results, you can proceed to the next step and save the configurations.
If you have any feedback on Gathr documentation, please email us!