Workday Connection
See the Connector Marketplace topic. Please request your administrator to start a trial or subscribe to the Premium Workday connector.
Workday is a financial management, human capital management and student information system software vendor.
This topic describes how to authenticate to Workday and configure any necessary connection properties in the Workday connection connector.
Connection Configuration
Each connection property available in the Workday connector is explained below.
Connection Name
The name of the connection to be created should be provided. This is the name that will display on the list of available connections.
Scope
Define the connection scope to customize their accessibility.
Organization: Accessible to organization users across all Gathr projects for usage in applications.
Project: Accessible to organization users limited to projects that are specified by the connection owner for usage in applications.
Private: Accessible only to the connection owner for usage in applications.
Connection Type
Choose one of the following methods to connect to Workday.
WQL: Use the Workday Query Language (WQL) service to expose Workday data sources as read-only views.
Reports: Use Reports as a Service (RaaS) to expose Workday reports as views.
To use RaaS, you must create a custom report to use this feature. An additional configuration field is available to set the custom report URL. For more information, see Custom Report URL.
REST: Use the REST API to expose Workday data as tables and views.
SOAP: Use the SOAP API to expose Workday data as views.
Auth Scheme
The type of authentication to use when connecting to Workday.
Possible Values
Basic: Authenticate using the User and Password for a normal user or integration system users (ISUs).
Normal users log into Workday interactively with a web browser, while the connector authenticates ISUs automatically.
OAuth: Set to this to perform the OAuth 2.0 authentication.
Basic
If Basic is selected, additional configuration parameter will get listed.
User
The Workday user account used to authenticate.
Password
The Workday user password used to authenticate.
Tenant
The tenant for the account.
OAuth
If OAuth is selected, additional configuration parameters will get listed.
Client ID
The client Id assigned when you register your application with an OAuth authorization server.
Client Secret
The client secret assigned when you register your application with an OAuth authorization server.
Refresh Token
The OAuth refresh token for the corresponding OAuth access token.
Tenant
The tenant for the account.
Host
The host for the API URL.
Custom Report URL
Provide the URL of the report that shows all RaaS reports.
To create a custom report follow these steps:
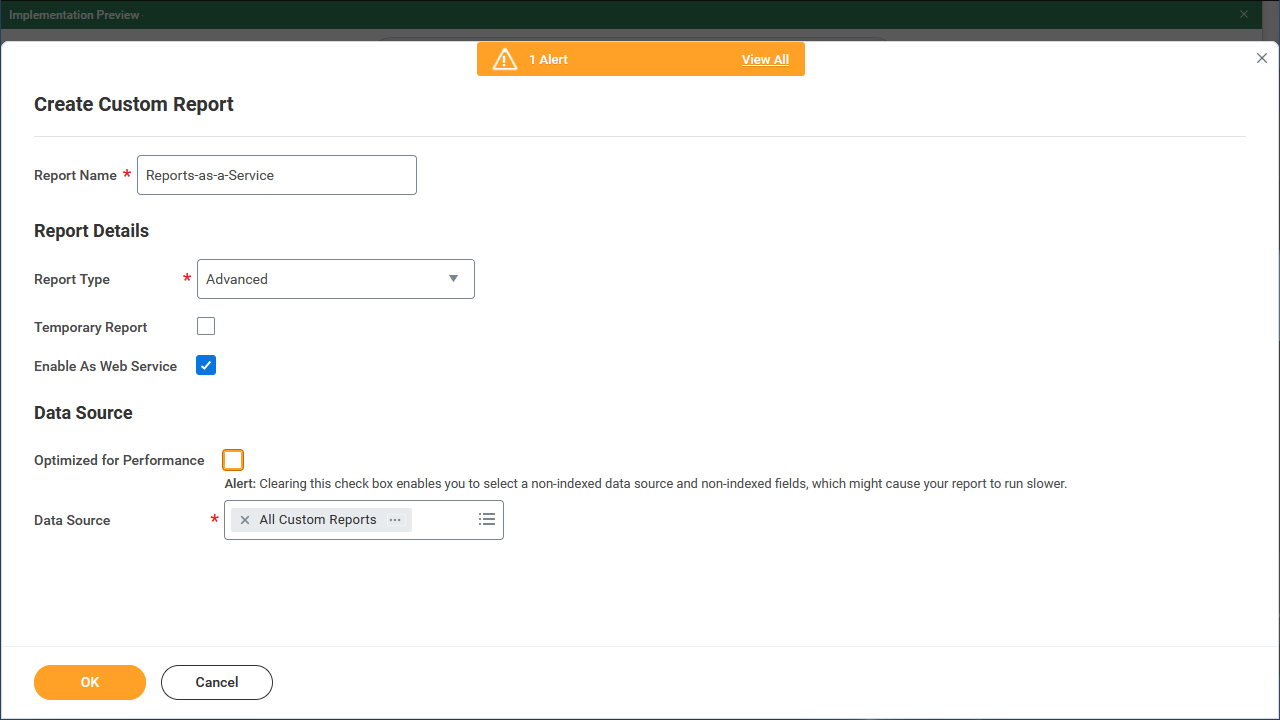
Open the Create Custom Report form.
Name the report Reports as a Service.
Enter Advanced for the report type.
Select Enable As Web Service.
Clear Optimized for Performance.
Enter All Custom Reports for the Data Source.
After the report is created, add the following columns and filters:
- In Fields
For the first column, enter Report Name.
Add a second column and enter Web Service Namespace.
Add a third column and enter Report Owner.
Add a fourth column and enter Brief Description.
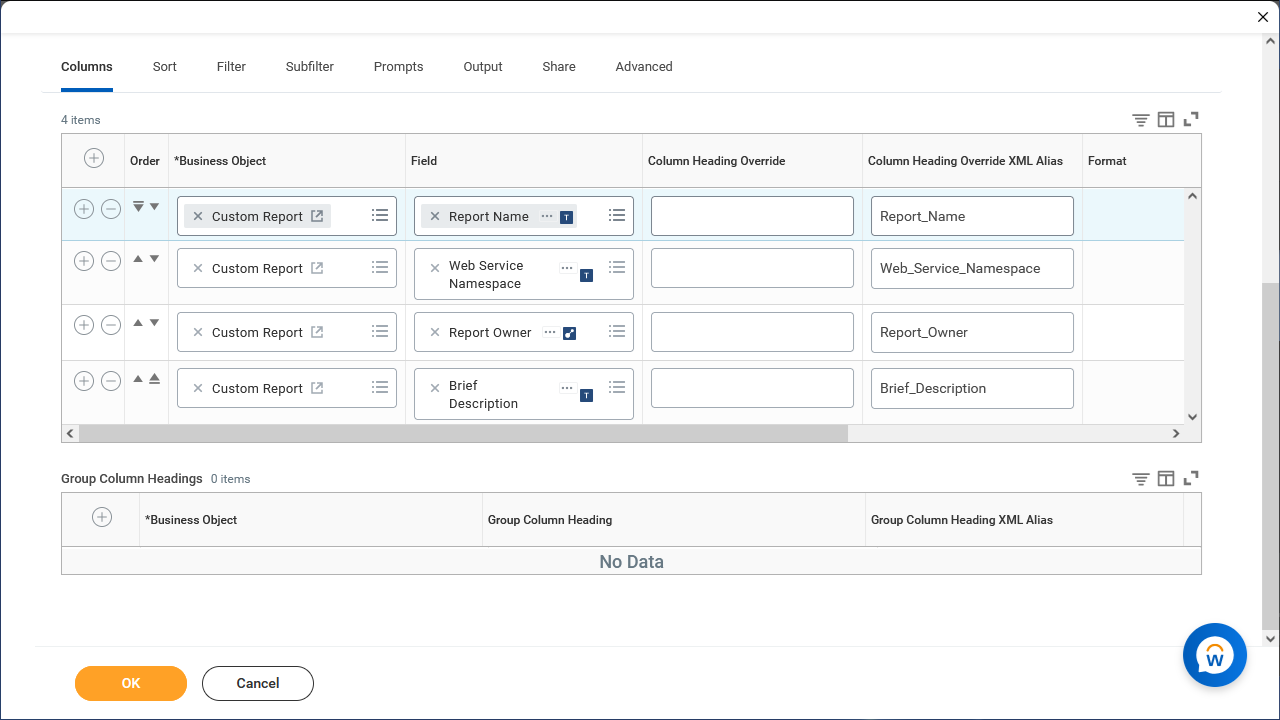
Make sure all columns have the primary business object as their Business Object. The primary business object has the name Custom Report and should have a box-and-arrow icon beside it. If the icon is an ellipsis (…) instead, then click menu , select Primary Business Object and then Custom Field.
Open the Filter tab and create a new filter. Enter Web Service Namespace as the field and is not blank as the Operator.
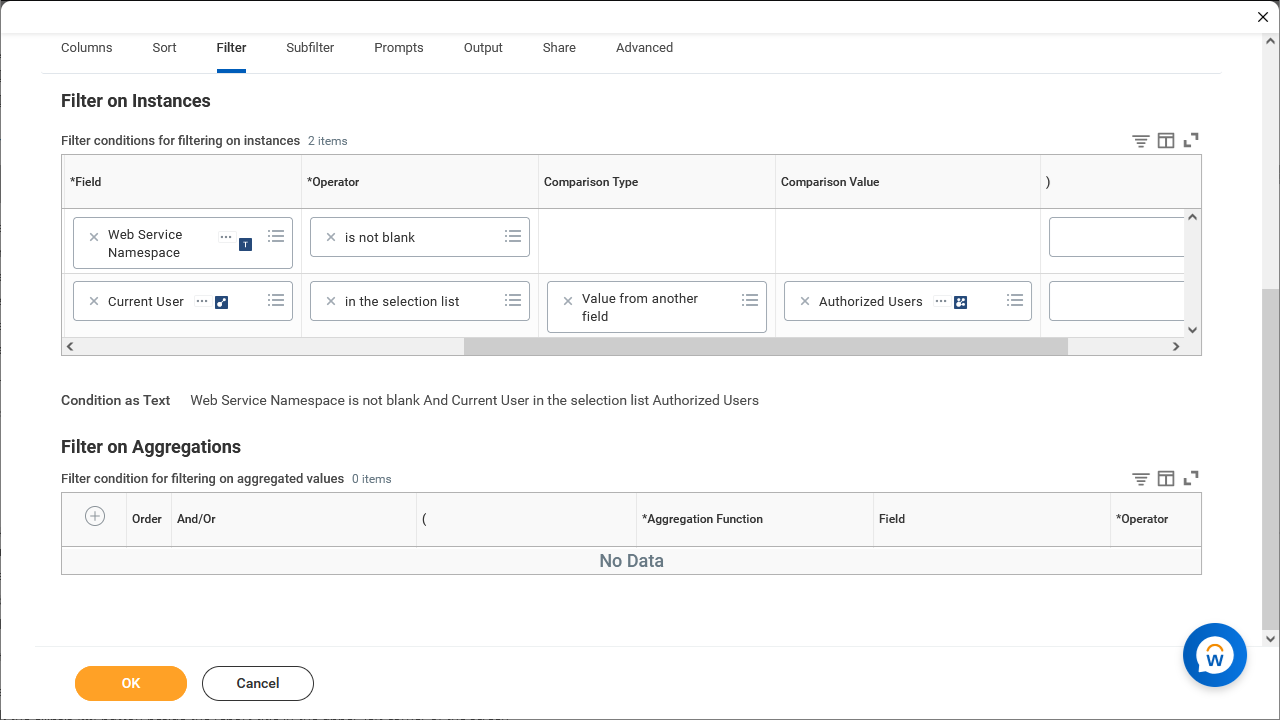
Add a second filter. Enter Current User as the field, in the selection list as the Operator, Value from Another Field as the comparison type, and Authorized Users as the comparison value.
Click OK to save the report. If Workday displays any warnings then click OK again to dismiss them.
Note that the Current User filter is optional but recommended. It is there to ensure that the connector does not surface reports that your account does not have permissions to view. However, if the report has performance issues then the filter can be removed.
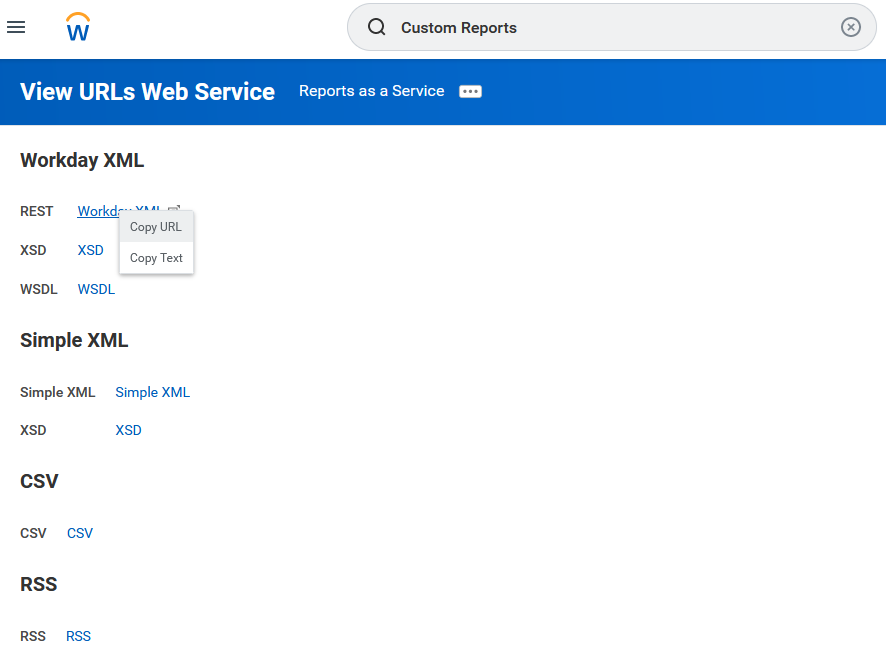
The final step is to find the URL associated with the report. This URL is used to set the Custom Report URL connection property.
Steps to find the Custom Report URL:
Open the newly created report.
Click the ellipsis (…) button beside the report title in the upper-left corner of the screen.
Find the Web Services tab within the pop-up. You may have to scroll down inside the pop-up to see it.
Hover over it and select View URLs.
Right-click and copy the Workday XML URL.
Service
The specific SOAP service or services to retrieve data from.
Enter as a comma seperated list.
Note that services come from the following:
https://community.workday.com/sites/default/files/file-hosting/productionapi/index.html
After entering all the details, click on the TEST button.
If the connection service identification and authentication details are provided correctly, a success message stating “connection available” is generated.
Click on the CREATE button to save the changes.
If the details are incorrect or the server is down, you will get a message “Connection unavailable”.
If you have any feedback on Gathr documentation, please email us!